
Converting from automatic to manual offers a more engaging driving experience, enhanced control, and potentially improved fuel efficiency. Many enthusiasts seek this transformation for a purist feel.
Why Choose Manual?
The allure of a manual transmission lies in its direct connection between driver and machine, fostering a more immersive and rewarding experience. Many drivers prefer the precise control over gear selection, enabling spirited driving and a heightened sense of engagement. Beyond the driving feel, a manual swap can sometimes unlock performance potential, though this varies. Furthermore, enthusiasts often cite a desire to escape the perceived detachment of automatic systems, embracing a more traditional and involved driving style. The cost savings, while not always substantial, can also be a factor.
Is a Conversion Right for You?
Consider your driving habits and mechanical aptitude honestly. A manual conversion is a significant undertaking, demanding time, skill, and financial investment. Daily commuting in heavy traffic might diminish the enjoyment. If you lack experience with automotive repairs, professional installation is crucial, adding to the cost. Evaluate if the benefits – enhanced control and driving pleasure – outweigh the complexities and potential challenges. It’s not simply a bolt-on process; it requires dedication and a willingness to learn.
Assessing Your Vehicle & Compatibility
Thoroughly research your specific vehicle model; compatibility varies greatly. Utilizing resources like RealOEM is vital for identifying necessary parts and potential fitment issues.
Vehicle Specific Considerations
Each vehicle presents unique challenges during a manual conversion. For example, Jetta VR6 models require ECU recoding via VAG-COM or OBD11, a crucial step often overlooked. Consider the availability of donor vehicle parts, as sourcing can significantly impact cost and timeline. Some vehicles, like the E30, benefit from complete swap packages found on platforms like Facebook Marketplace, potentially saving time and money. However, even with a package, components like the clutch may need upgrading to handle increased power, as seen with turbo M20 builds. Always verify compatibility before purchasing any parts.
Donor Vehicle Sourcing
Locating a suitable donor vehicle is paramount for a cost-effective manual conversion. Classifieds are excellent resources, offering both complete cars and individual parts. Prioritize low-mileage donors to minimize wear and tear on components. A complete donor provides a comprehensive parts list, simplifying the process. Alternatively, sourcing individual parts demands meticulous research using resources like RealOEM to ensure compatibility. Be prepared for potential shipping costs and delays when acquiring parts from distant locations, impacting the overall project budget and timeline.
Parts List Compilation (Using Resources like RealOEM)
Creating a detailed parts list is crucial, and RealOEM.com is an invaluable tool. Input your vehicle’s VIN to ensure accurate component identification. Beyond the core transmission, clutch, and flywheel, account for smaller items – shifter linkages, pedal assemblies, and wiring harness modifications. Don’t overlook ECU compatibility; coding may require specific sensors. Thoroughly cross-reference parts numbers to avoid ordering incorrect or incompatible components, saving time and preventing costly returns during the conversion process.
Essential Parts for the Swap
A successful conversion demands a transmission, clutch kit, flywheel, shifter mechanism, and linkages. Sourcing these components is vital for a smooth and reliable manual swap.
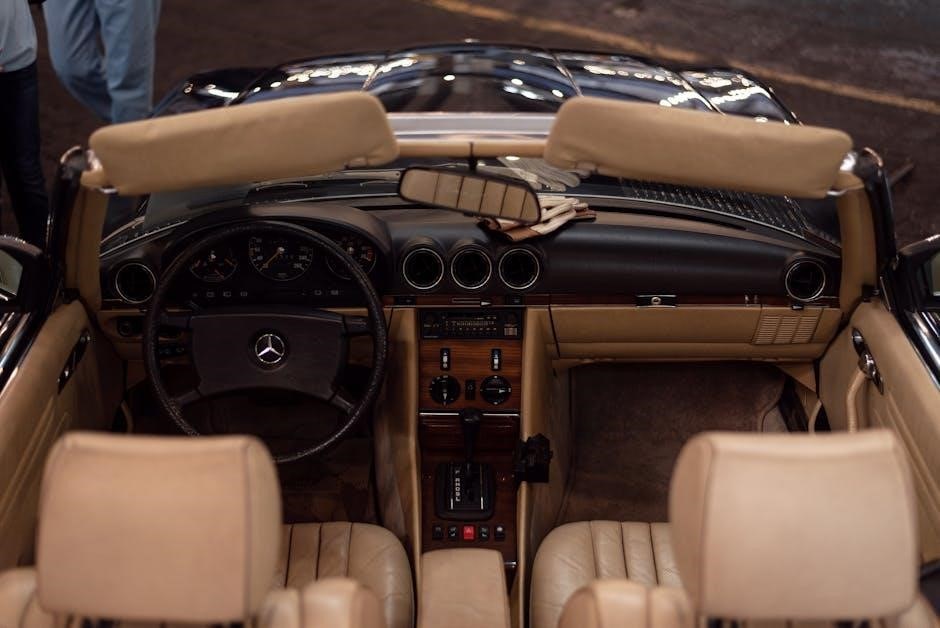
Transmission
Selecting the correct manual transmission is paramount; consider gear ratios for your vehicle and driving style. A used transmission from a donor car or a rebuilt unit are common options. Inspect for wear, ensuring smooth operation before purchase. The Getrag 285 is often favored for VR6 swaps, but compatibility varies. Budget accordingly, as transmission costs can range significantly, impacting the overall project expense. Remember to verify the transmission’s condition and history to avoid future issues, potentially saving on costly repairs down the line.
Clutch Kit
Choosing the right clutch kit is crucial for handling the engine’s power. Consider your modifications – a stock engine needs a standard kit, while boosted engines require upgraded components. Options include organic, ceramic, or hybrid clutches, each offering different levels of grip and driveability. Ensure the kit includes a pressure plate, disc, throw-out bearing, and pilot bearing. Budget between $200-$800 depending on quality and performance needs, prioritizing reliability and longevity for a smooth driving experience.
Flywheel
A manual transmission requires a flywheel designed for clutch operation, unlike the flexplate used with automatics. Options range from stock replacements to lightweight aluminum flywheels, impacting engine responsiveness. Lightweight flywheels reduce rotational mass, improving acceleration but potentially increasing NVH (noise, vibration, and harshness). Expect to spend $150-$600, factoring in resurfacing or purchasing a new flywheel. Ensure compatibility with your chosen clutch kit for optimal performance and a smooth engagement, avoiding premature wear.
Shifter Mechanism & Linkages
The shifter assembly, including the stick, cables or linkages, and associated hardware, is crucial for manual operation. Sourcing a complete shifter setup from a donor vehicle is common. Inspect bushings and wear points for replacement, ensuring precise gear selection. Short-throw shifters are available for a sportier feel, costing $100-$400 extra. Proper adjustment is vital to prevent binding or imprecise shifts, impacting the driving experience significantly. Compatibility with the transmission is paramount.

Electrical System Modifications
ECU recoding via VAG-COM or OBD11 is essential to recognize the manual transmission, alongside wiring harness integration and sensor compatibility checks.
ECU Recoding (VAG-COM/OBD11)
Post-swap, the vehicle’s Engine Control Unit (ECU) must be recoded to acknowledge the manual transmission. This process, typically done with VAG-COM or OBD11, removes automatic transmission-related codes and enables proper functionality. Failure to do so will result in error messages and potentially impaired performance. Recoding also adjusts parameters for the manual setup, ensuring correct operation of systems like the speedometer and ABS. It’s a critical step, often requiring specialized knowledge or a professional tuner to execute correctly, avoiding further complications;
Wiring Harness Integration
Integrating the manual transmission’s wiring harness requires careful attention to detail. The automatic transmission’s wiring will need to be either removed or repurposed, as several connections are no longer needed. New wiring may be required for the clutch switch, reverse light switch, and potentially the speedometer signal. Ensuring correct pin assignments and secure connections is vital to avoid electrical issues. Thoroughly review wiring diagrams and double-check all connections before powering up the vehicle to prevent damage.
Pedal Position Sensor Compatibility
Confirming compatibility of the pedal position sensor is crucial during the conversion. Manual transmission vehicles often utilize a different sensor or require ECU adjustments to interpret signals correctly. The automatic transmission’s throttle-by-wire system may need recalibration or replacement. VAG-COM or OBD11 coding is frequently necessary to ensure the ECU accurately reads the manual transmission’s pedal input, preventing erratic shifting or performance issues. Incorrect sensor readings can lead to driveability problems.

Mechanical Installation Process
The core of the swap involves removing the automatic transmission, installing the clutch and flywheel, then carefully positioning the manual transmission into place.
Transmission Removal
Begin by disconnecting the driveshaft and axles, ensuring adequate support to prevent damage. Next, detach all wiring and cooling lines connected to the automatic transmission. Support the engine from above, then remove the bolts securing the transmission to the engine block. Carefully lower the automatic transmission, utilizing a transmission jack for controlled descent. Be mindful of weight and potential obstructions during removal, and thoroughly inspect the flexplate for any issues before proceeding with the manual swap process.
Clutch & Flywheel Installation
With the automatic transmission removed, thoroughly clean the engine block’s mating surface. Install the new flywheel, ensuring proper alignment and torque specifications are followed precisely. Mount the clutch disc and pressure plate assembly, again adhering to the manufacturer’s torque sequence. Verify the pilot bearing is correctly seated within the crankshaft. Double-check all fasteners for tightness, as improper installation can lead to premature clutch failure and a frustrating driving experience.
Transmission Installation
Carefully align the manual transmission with the engine, utilizing a transmission jack for support and precise positioning. Gently guide the input shaft into the clutch disc, ensuring smooth engagement. Secure the transmission to the engine block, tightening the mounting bolts to the specified torque. Connect the driveshaft and axles, verifying proper alignment and functionality. Double-check all connections before proceeding, preventing potential damage during initial operation.
Driveshaft & Axle Considerations
Upon swapping to a manual transmission, assess driveshaft compatibility; lengths may differ requiring shortening or replacement. Axle shafts might also need upgrading, especially with increased power, as some manual swaps reveal weak gears. Billet axles offer enhanced durability. Inspect CV joints for wear and tear, replacing them if necessary. Proper driveshaft balancing is crucial to avoid vibrations, ensuring a smooth and reliable driving experience.
Pedal Assembly & Hydraulic System
Installing a manual pedal assembly and hydraulic clutch system is vital. This includes a master cylinder, slave cylinder, and brake line modifications for proper operation.
Manual Pedal Installation
The installation of the manual brake and clutch pedal assembly requires careful attention to detail. Removing the existing automatic pedal box is the first step, ensuring all wiring and linkages are disconnected. The manual pedal assembly then needs to be securely mounted, often requiring bracket modifications or a complete replacement of the pedal box. Proper alignment is crucial for smooth operation and comfortable driving. Verify that the clutch pedal travel is within the specified range, and that there are no obstructions hindering its movement. Secure all bolts to the manufacturer’s torque specifications to prevent loosening during use.
Master & Slave Cylinder Installation
Following pedal installation, mount the clutch master cylinder, ensuring proper hose routing to avoid kinks or interference. Securely attach the slave cylinder to the transmission, aligning it precisely with the clutch fork. Bleeding the hydraulic system is vital to remove air bubbles, guaranteeing firm clutch engagement. Use appropriate brake fluid and follow the bleeding procedure diligently. Inspect all connections for leaks after bleeding, and re-tighten if necessary. A properly bled system is essential for a smooth and reliable manual transmission operation.
Brake Line Modifications
Often, the existing brake lines won’t directly integrate with the new manual pedal assembly’s hydraulic system. Custom brake lines may be required, fabricated to the correct length and with the appropriate fittings. Careful routing is crucial to prevent interference with other components. Ensure all connections are secure and properly torqued to avoid leaks. Bleeding the entire brake system after modifications is essential for optimal braking performance and safety, verifying a firm pedal feel.

Cooling System Adjustments
Manual transmissions often require dedicated cooler lines, potentially necessitating modifications to the existing radiator setup for proper temperature regulation and longevity.
Transmission Cooler Lines
When transitioning from an automatic to a manual transmission, the existing transmission cooler lines are no longer needed for their original purpose. However, simply disconnecting them isn’t sufficient; proper capping or removal is crucial to prevent fluid leaks. Some enthusiasts repurpose these lines for auxiliary oil coolers, while others opt for complete removal and secure capping of the ports on the radiator. Ensure any caps used are compatible with transmission fluid to avoid corrosion or degradation. Thorough inspection for leaks post-modification is essential for a reliable conversion.
Radiator Compatibility
Generally, the radiator itself remains compatible during an automatic-to-manual swap, as cooling requirements don’t drastically change. However, if the automatic transmission utilized a dedicated transmission cooler integrated within the radiator, this section becomes redundant with the manual setup. Ensure any unused ports are properly sealed to prevent leaks. Inspect the radiator for any damage during the process, and consider flushing the system to remove any residual automatic transmission fluid contamination for optimal cooling performance.
Post-Installation Checks & Adjustments
After the swap, meticulously adjust the clutch, shifter, and verify all fluid levels. Thoroughly bleed the hydraulic system to ensure proper clutch engagement and smooth operation.
Clutch Adjustment
Proper clutch adjustment is critical for smooth shifting and preventing premature wear. Begin by ensuring the clutch pedal has adequate free play before engaging the release mechanism. Adjust the clutch cable, or hydraulic system, to achieve this optimal engagement point – typically around mid-travel;
Incorrect adjustment can lead to slipping, difficulty selecting gears, or constant dragging. Test drive the vehicle and listen for any unusual noises. Fine-tune the adjustment until smooth, consistent engagement is achieved across all gears, ensuring a comfortable and reliable driving experience.
Shifter Adjustment
Precise shifter adjustment is vital for accurate gear selection and a satisfying driving experience. Begin by verifying all linkage connections are secure and properly lubricated. Adjust the shift cables or linkages to ensure each gear is easily and positively engaged, without excessive force or looseness.
Pay close attention to the neutral position, ensuring it’s centered and easily accessible. Test drive and refine the adjustments until smooth, precise shifts are achieved, eliminating any vagueness or binding. A well-adjusted shifter enhances control and driving enjoyment.
Fluid Levels & Bleeding
Following the manual transmission swap, meticulously check and top off all fluid levels – transmission, engine oil (often reduced due to cooler line removal), and brake fluid. Critically, bleed the hydraulic clutch system thoroughly to eliminate air bubbles, ensuring a firm pedal feel and proper clutch engagement.
Repeatedly pump the clutch pedal and bleed the lines until clear fluid emerges. Confirm no leaks exist in the system before a test drive, safeguarding against clutch slippage or failure.
Potential Costs Breakdown (Based on Current Data ⎻ 02/26/2026)
Swap costs vary widely, ranging from $850 for a lucky package deal to over $2500, plus $1500-$6000 for professional labor, impacting resale value.
Parts Costs (Range: $850 ‒ $2500+)
The financial aspect of sourcing components can fluctuate dramatically. A complete, pre-assembled swap package, as found on platforms like Facebook Marketplace, might cost around $850, representing a fortunate scenario. However, procuring individual parts—transmission, clutch kit, flywheel, shifter mechanism—typically falls within the $1200 to $2500+ range.
Don’t forget the potential need for a billet driveshaft or upgraded gears, adding to the expense. Selling the original automatic transmission can offset costs by $400-$700, effectively lowering the overall parts investment.
Labor Costs (Range: $1500 ‒ $6000+)
Professional installation significantly impacts the total cost. Dealerships, like Mitsubishi, may charge upwards of $6,000 USD, offering the benefit of warranties on parts and labor. Independent mechanics generally fall between $1500 and $2500, but prices vary based on location and shop rates.
Complexities like ECU recoding and wiring harness integration contribute to labor hours. Performing the swap yourself drastically reduces this cost, but requires substantial mechanical expertise.
Resale Value Impact
A manual conversion’s effect on resale value is nuanced. While some buyers actively seek manual transmissions, appreciating the enhanced driving experience, others prefer automatics. A well-documented, professionally executed swap may attract enthusiasts willing to pay a premium.
However, modifications can deter mainstream buyers, potentially lowering the vehicle’s overall appeal. Thorough record-keeping and utilizing quality parts are crucial to maximizing any potential resale benefit.
Common Challenges & Troubleshooting
Weak transmission gears, particularly third, and ECU compatibility issues are frequent hurdles. Finding complete swap packages can also prove difficult and time-consuming.
Gear Teeth Issues (Weak Gears)
A recurring problem reported within the conversion community centers around the durability of the transmission gears themselves. Specifically, the third gear is frequently cited as a weak point, prone to stripping or “popping teeth” under increased power or spirited driving. Some owners have experienced failures on their fourth or fifth replacement transmission, highlighting a persistent design limitation.
While upgrading to stronger aftermarket shafts is possible, the core gearset remains vulnerable. This necessitates careful consideration of power levels and driving style to mitigate potential failures, adding an unexpected cost and inconvenience to the swap.
ECU Compatibility Problems
Successfully completing the manual swap requires significant Electronic Control Unit (ECU) recalibration, often utilizing VAG-COM or OBD11 software. The ECU needs to be reprogrammed to recognize and properly manage the manual transmission, disabling automatic transmission-related functions and enabling appropriate sensor inputs. Incorrect coding can lead to various issues, including warning lights, limp mode, or improper operation of other vehicle systems.
This process demands technical expertise, and improper adjustments can be costly to rectify, potentially requiring professional tuning services.
Finding Complete Swap Packages
Locating a pre-assembled swap package can significantly streamline the conversion process, reducing sourcing time and potential compatibility issues. Online marketplaces like Facebook Marketplace and dedicated forums often feature complete kits including the transmission, shifter mechanism, clutch, flywheel, and sometimes even ECU coding services. These packages represent a convenient, albeit potentially pricier, option.
However, carefully verify the package’s contents and condition before purchasing, ensuring all necessary components are included for a seamless installation.
Legal & Insurance Implications
Modifications like manual swaps may require reporting to local authorities and could impact insurance coverage; always verify regulations and inform your provider.
Modification Reporting
Depending on your location, a manual transmission swap might necessitate notifying your local Department of Motor Vehicles (DMV) or equivalent agency. Regulations vary significantly; some jurisdictions require inspection and documentation of substantial vehicle alterations. Failing to report could lead to issues during vehicle inspections or registration renewals. It’s crucial to research your state or province’s specific laws regarding modifications. Documentation, such as receipts for parts and proof of professional installation (if applicable), can be beneficial. Always prioritize compliance to avoid legal complications and ensure a smooth vehicle ownership experience.
Insurance Coverage
Informing your insurance provider about the manual transmission swap is paramount. Modifications can impact your premium and coverage. Some insurers may view the change as increasing risk, potentially leading to higher rates or even policy cancellation if unreported. Be upfront and provide detailed information about the conversion. Obtain written confirmation from your insurer acknowledging the modification and its effect on your policy. Failure to disclose could jeopardize claims in the event of an accident, leaving you financially vulnerable.
Resources & Communities
Online forums and Facebook groups dedicated to your vehicle model are invaluable for swap advice, parts sourcing, and troubleshooting assistance from experienced enthusiasts.
Online Forums & Groups
Dedicated online communities are crucial for a successful manual conversion. Forums specific to your vehicle (like VWVortex for Jettas) offer detailed guides, troubleshooting threads, and access to members who’ve completed similar swaps. Facebook groups provide a more immediate platform for questions and parts sourcing, often with local connections.
These platforms allow you to learn from others’ mistakes, find rare parts, and gain confidence throughout the process. Searching past posts can answer many questions before you even ask, saving valuable time and effort. Don’t hesitate to actively participate and share your progress!
Parts Suppliers
Sourcing parts requires a multi-faceted approach. RealOEM.com is invaluable for creating a comprehensive parts list, identifying OEM numbers, and checking compatibility. Classifieds (Facebook Marketplace, Craigslist) can yield affordable donor car components or individual parts. Specialized VW parts suppliers, like ECS Tuning or FCP Euro, offer new and used options.
Consider local transmission shops; they may have rebuildable units or access to hard-to-find items. Be cautious when buying used; inspect thoroughly or purchase from reputable sellers with return policies.
Ultimately, a manual conversion is a significant undertaking. The benefits – a more connected driving experience and potential for increased vehicle value – must be balanced against the considerable cost (ranging from $1200 to $6000+) and complexity. Thorough research, meticulous planning, and realistic self-assessment of your mechanical skills are crucial.
If the appeal of a manual outweighs the challenges, the reward can be a truly personalized and enjoyable vehicle.