Husqvarna Viking Emerald 116 Manual: A Comprehensive Guide
This guide details accessing the Husqvarna Viking Emerald 116 manual, offering digital downloads, printable versions, and even service information for repairs and maintenance.
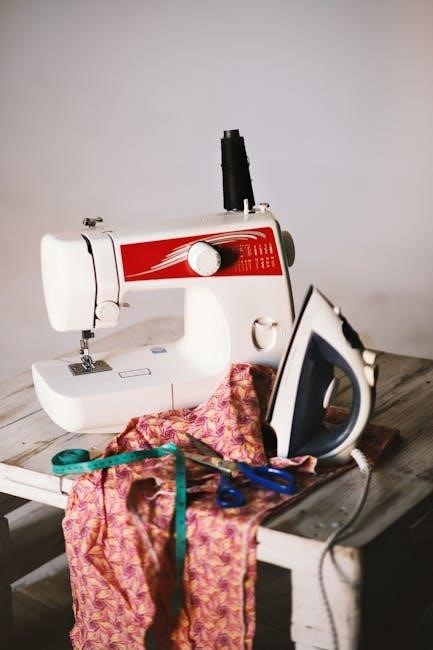
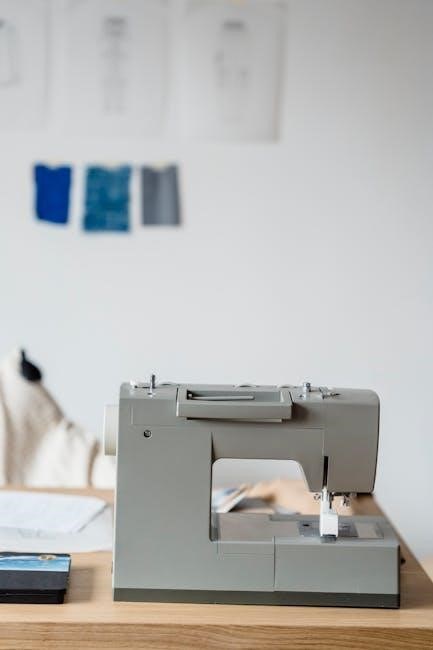
The Husqvarna Viking Emerald 116 is a popular sewing machine known for its reliability and user-friendly design. Released as part of the Emerald series (including models 118, 122, 183, and 203), it caters to both beginners and experienced sewists.
Understanding its features and operation relies heavily on a comprehensive manual. These manuals, available in digital and printable formats, cover everything from basic setup to advanced techniques; Finding the correct manual – whether an original, a reproduction, or a downloadable PDF – is crucial for maximizing the machine’s potential.
The Emerald 116 boasts a range of stitches and capabilities, making it versatile for various sewing projects. Accessing detailed instructions ensures smooth operation and successful outcomes.
Understanding the Manual’s Importance
The Husqvarna Viking Emerald 116 manual is absolutely essential for optimal machine performance and longevity. It provides detailed guidance on setup, threading, stitch selection, and troubleshooting – preventing potential damage and ensuring consistent results.
Without the manual, users may struggle with basic operations or inadvertently misuse features, leading to frustration and costly repairs. A clear understanding of the machine’s components, as outlined in the manual, empowers users to perform routine maintenance like cleaning and lubrication effectively.
Furthermore, the manual unlocks the full potential of the Emerald 116, enabling users to confidently tackle diverse sewing projects and explore advanced techniques.

Manual Availability and Formats
Husqvarna Viking Emerald 116 manuals are available as digital downloads, printable PDFs, and potentially original or reproduction copies via online marketplaces.
Digital Download Options
Several online resources offer digital versions of the Husqvarna Viking Emerald 116 manual for immediate access. Chatswood Sewing Centre provides a downloadable PDF instruction book for $39.00, offering a convenient way to view the manual on various devices.
Sewconsult.com also offers a 48-page PDF download of the instruction and user manual for the Emerald 116, 118, and 122 models. Pocono Sew & Vac lists free digital manuals for the Emerald 116, alongside parts and accessories.
These digital options eliminate shipping costs and provide instant access to troubleshooting guides, sewing techniques, and machine information, making them ideal for quick reference and on-the-go assistance.
Printable Manuals
For those preferring a physical copy without the cost of an original, printable manuals are readily available. eBay currently lists a digital, printable color copy of the original Viking Users Guide for the Emerald 116, spanning 48 pages. This option allows users to print only the sections they need, conserving paper and resources.
Alongside the main user guide, a 52-page addition containing helpful sewing hints is also offered on eBay. This combination provides a comprehensive resource for both machine operation and sewing expertise.
Printing a digital manual offers the convenience of a hard copy for use at the sewing machine, free from the distractions of a computer screen.
Original vs. Reproduction Manuals
When seeking a Husqvarna Viking Emerald 116 manual, understanding the difference between original and reproduction copies is crucial. Original manuals, while offering historical authenticity, can be difficult to find and often come with a higher price tag due to their rarity.
Reproduction manuals, like the digital copies available on eBay, provide a cost-effective alternative. These are typically high-quality scans or recreations of the original, offering all the essential information without the expense of a vintage document.
Digital printable copies balance accessibility and affordability, allowing users immediate access to the manual’s content. Consider your needs and budget when choosing between an original or a reproduction.
Key Features Covered in the Manual
The manual comprehensively covers machine parts, setup procedures, and fundamental sewing techniques for the Husqvarna Viking Emerald 116, aiding users effectively.
Machine Overview and Parts Identification
The Husqvarna Viking Emerald 116 manual provides a detailed overview of the sewing machine, beginning with a comprehensive parts identification section. Users can expect clear diagrams illustrating each component, from the power switch and handwheel to the presser foot and bobbin winder.
This section is crucial for understanding the machine’s functionality and for performing basic maintenance. The manual meticulously labels all key parts, enabling users to confidently identify components during setup, troubleshooting, or when ordering replacement parts. Furthermore, it often includes explanations of each part’s purpose and how it contributes to the overall sewing process. Understanding these elements is foundational for successful operation and longevity of the Emerald 116.
Setting Up the Machine
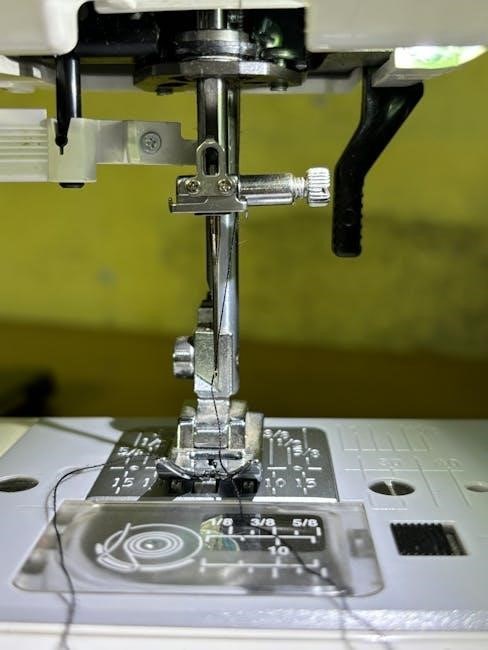
The Husqvarna Viking Emerald 116 manual guides users through the initial setup process with clear, step-by-step instructions; This includes properly threading the machine, both the upper and lower threads, ensuring correct bobbin winding, and installing the needle correctly.
The manual details how to attach the presser foot and adjust presser foot pressure for different fabric types. It also explains how to select the appropriate stitch settings and test the machine before beginning a project. Proper setup is vital for achieving optimal sewing results and preventing potential issues. Following these instructions carefully ensures the Emerald 116 operates smoothly and efficiently from the very first stitch.
Basic Sewing Techniques
The Husqvarna Viking Emerald 116 manual provides comprehensive instruction on fundamental sewing techniques. It covers straight stitching, zigzag stitching, and understanding stitch length and width adjustments. Users will learn how to backstitch for secure seams and how to pivot the fabric for accurate corners.
The manual also details techniques for sewing different fabric types, offering guidance on needle selection and thread tension. It includes clear diagrams illustrating proper fabric handling and seam allowances. Mastering these basic techniques is crucial for successful sewing projects. The Emerald 116 manual empowers beginners and experienced sewers alike to confidently tackle a wide range of sewing tasks.

Advanced Features & Techniques
The manual details decorative stitching, buttonhole sewing, and zipper insertion on the Husqvarna Viking Emerald 116, expanding sewing capabilities.
Decorative Stitching
The Husqvarna Viking Emerald 116 manual provides detailed instructions for utilizing the machine’s decorative stitching capabilities. Users can explore a variety of stitch patterns to personalize sewing projects, adding unique embellishments to garments and home décor.
The manual illustrates how to select different decorative stitches, adjust stitch width and length for desired effects, and practice on scrap fabric before applying them to final projects. It also covers techniques for combining decorative stitches with other sewing methods, such as appliqué and embroidery.
Understanding stitch density and proper thread selection are crucial for achieving optimal results, and the manual offers guidance on these aspects. Furthermore, it may include sample projects showcasing the creative potential of the Emerald 116’s decorative stitches.
Buttonhole Sewing
The Husqvarna Viking Emerald 116 manual dedicates a section to mastering buttonhole creation. It details the process of setting up the machine for accurate and consistent buttonholes, crucial for garment construction and repair. The manual likely explains how to select the appropriate buttonhole foot and adjust settings based on button size.
Step-by-step illustrations guide users through each stage, from initial setup to finishing the buttonhole. It emphasizes the importance of test buttonholes on scrap fabric to ensure proper sizing and stitch quality. The manual may also cover techniques for different buttonhole styles, such as keyhole or round-end buttonholes.
Troubleshooting tips address common issues like uneven stitching or incorrect buttonhole length, ensuring professional-looking results.
Zipper Insertion
The Husqvarna Viking Emerald 116 manual provides detailed instructions for various zipper insertion techniques. It likely covers standard zipper application, centered zippers, and potentially invisible zipper insertion, catering to diverse sewing projects. The manual emphasizes selecting the correct zipper foot for optimal results and stitch placement.
Illustrated guides demonstrate how to accurately position the zipper tape, maintain consistent seam allowances, and secure the zipper ends. It likely includes advice on preventing puckering and ensuring a smooth zipper operation. The manual may also detail techniques for inserting zippers into different fabric types, like delicate or heavy materials.
Troubleshooting sections address common issues like skipped stitches or uneven zipper teeth, helping users achieve professional finishes.
Troubleshooting Common Issues
The manual assists in resolving frequent problems like thread breakage, needle malfunctions, and tension imbalances, ensuring smooth operation of your Emerald 116.
Thread Breakage Problems
Frequent thread breakage with the Husqvarna Viking Emerald 116 can stem from several easily addressable causes. The manual emphasizes checking the threading path meticulously, ensuring the thread isn’t snagged or incorrectly seated in any tension discs or guides.
Incorrect needle selection is another common culprit; the manual details appropriate needle types and sizes for various fabrics. Using a dull or damaged needle significantly increases the risk of breakage. Furthermore, improper tension settings can strain the thread, leading to snapping.
The Emerald 116 manual advises verifying the thread quality – cheap or old thread is prone to breaking. Finally, ensure the bobbin is wound evenly and correctly inserted, as an improperly wound bobbin can cause tension issues and thread breakage during sewing.
Needle Issues
The Husqvarna Viking Emerald 116 manual dedicates significant attention to needle-related problems. A bent or damaged needle is a primary concern, potentially causing skipped stitches, fabric puckering, or even needle breakage. Always replace a visibly damaged needle immediately.
Incorrect needle size for the fabric weight is another frequent issue. The manual provides a comprehensive chart detailing appropriate needle sizes for different materials. Using too small a needle can strain the fabric and thread, while a too-large needle can create unsightly holes.
Ensure the needle is correctly inserted – fully pushed up into the needle clamp. The manual illustrates the proper insertion technique. Finally, the type of needle (universal, ballpoint, etc.) must match the fabric being sewn for optimal performance and to prevent damage.
Tension Adjustment
The Husqvarna Viking Emerald 116 manual emphasizes the importance of proper thread tension for achieving quality stitches. Incorrect tension leads to looping, puckering, or weak seams. The manual guides users through identifying tension problems – whether the top or bottom thread is too tight or loose.
It details how to adjust the tension dial, explaining that small adjustments are key. The manual recommends testing tension on a scrap fabric sample, using the same fabric and thread as the project. A balanced tension creates even stitches with the knot residing within the fabric layers.
Different fabrics and thread types require varying tension settings. The manual provides baseline recommendations, but encourages experimentation to find the optimal setting for each combination.
Maintenance and Care
The manual details routine cleaning, lubrication procedures, and even belt replacement for the Husqvarna Viking Emerald 116, ensuring longevity and optimal performance.
Cleaning the Machine
Regular cleaning is crucial for maintaining the Husqvarna Viking Emerald 116’s performance. The manual emphasizes removing lint and dust from the bobbin area and feed dogs after each use. A small brush, often included with the machine, is ideal for this task.
For more thorough cleaning, the manual likely recommends disconnecting the power and using a lint brush or vacuum cleaner attachment to remove debris from internal components. Avoid using liquids directly on the machine; instead, dampen a cloth with a mild cleaning solution and wipe surfaces carefully. Pay attention to the needle plate and surrounding areas, as thread and fabric fibers tend to accumulate there. Proper cleaning prevents jams and ensures smooth operation, extending the machine’s lifespan.
Lubrication Guide
The Husqvarna Viking Emerald 116 manual provides specific guidance on lubrication, a vital aspect of machine maintenance. Generally, these machines require minimal oiling, and over-lubrication can attract dust and cause problems. The manual likely details specific oiling points, such as the bobbin race and hook assembly.
Use only sewing machine oil recommended by Husqvarna Viking; other oils can damage internal components. Apply oil sparingly, using an oiler or a very small brush. Avoid getting oil on belts or other rubber parts. Regular, careful lubrication ensures smooth operation and prevents wear and tear, contributing to the longevity of your Emerald 116. Consult the manual for the recommended lubrication schedule.
Belt Replacement
The Husqvarna Viking Emerald 116 manual details the process of belt replacement, a task that may become necessary over time with regular use. A broken or worn belt will prevent the machine from operating correctly, impacting stitch formation and power transfer. The manual will illustrate the belt’s path and how to access it for removal and installation.
Ensure the machine is unplugged before attempting any repairs. Carefully note the belt’s routing before removing the old one – a diagram or photograph can be helpful. Use a replacement belt specifically designed for the Emerald 116 model. Proper tensioning is crucial; the manual will likely specify the correct tension. Incorrect tension can lead to slippage or premature wear.
Accessing Service Manuals
Service manuals for the Husqvarna Viking Emerald 116 are available online via the Internet Archive and other resources, aiding in complex repairs.
Husqvarna Viking Service Manuals Online
Locating comprehensive service manuals for the Husqvarna Viking Emerald 116 often begins with exploring online repositories. The Internet Archive, for example, hosts digitized versions of older manuals, potentially including those for this model.
These online resources can be invaluable for users attempting more in-depth repairs than covered in the standard user manual. While availability varies, diligent searching can uncover schematics, detailed parts breakdowns, and troubleshooting guides specifically tailored to the Emerald 116.
Remember to verify the manual’s applicability to your specific machine variant, as slight differences can exist between models. Additionally, exploring sewing machine forums and online communities can often lead to shared links and user-contributed resources.
Internet Archive Resources
The Internet Archive presents a valuable, though sometimes unpredictable, source for Husqvarna Viking Emerald 116 documentation. As of recent data (04/06/2026), the archive contains Husqvarna Viking Service Manuals, dated back to 2020-05-14.
Navigating the archive requires patience and specific search terms. Try variations like “Husqvarna Viking Emerald 116 service manual” or “Viking Emerald 116 repair guide”.
The quality and completeness of archived materials can differ significantly. Some documents may be scans of original manuals, while others might be user-submitted copies. Always assess the document’s clarity and accuracy before relying on its information for repairs or maintenance. It’s a treasure trove, but requires careful exploration.
Finding Specific Repair Information
Locating precise repair details for your Husqvarna Viking Emerald 116 often requires a focused approach. Beyond general service manuals, pinpointing solutions to specific issues can be challenging. The Internet Archive and online retailers like eBay offer potential resources, including service manuals and supplemental guides.
When searching, be as detailed as possible. Instead of “Emerald 116 repair,” try “Emerald 116 needle breakage” or “Emerald 116 tension problems”.
Remember that older machines may have limited online support. Consulting sewing machine forums and communities can connect you with experienced users who may have encountered and solved similar problems.

Parts and Accessories Information
Finding replacement parts and compatible accessories for the Husqvarna Viking Emerald 116 is crucial; parts diagrams aid in accurate identification and ordering.
Locating Replacement Parts
Securing replacement parts for your Husqvarna Viking Emerald 116 sewing machine requires a strategic approach. Several online retailers specialize in vintage sewing machine components, offering a wide selection of parts specifically for this model. Websites like Pocono Sew-Vac and potentially eBay (as indicated by listings for service and instruction manuals) are excellent starting points for your search.
When ordering, having the precise part number is invaluable. Parts diagrams, often found within the service manual or available from online resources, are essential for accurate identification. These diagrams visually represent the machine’s internal structure, allowing you to pinpoint the exact component you need. Be prepared to provide the machine’s serial number when ordering, as this can help ensure compatibility. Don’t hesitate to contact specialized sewing machine repair shops for assistance if you encounter difficulties.
Compatible Accessories
Expanding the functionality of your Husqvarna Viking Emerald 116 is easily achieved with compatible accessories. While specific accessory lists aren’t explicitly detailed in the provided snippets, understanding general sewing machine accessories is key. These typically include a variety of presser feet – zigzag, buttonhole, and blind hem feet – to tackle diverse projects.
Additional useful accessories encompass bobbins (ensure you use the correct type for the Emerald 116), needles in various sizes and types (universal, ballpoint, etc.), and potentially specialized feet for quilting or embroidery. Exploring online marketplaces like eBay, alongside sewing supply retailers, can reveal original or compatible accessories. Always verify compatibility before purchasing, referencing the instruction manual or consulting with a sewing machine expert to ensure optimal performance and avoid damage to your machine.
Understanding Parts Diagrams
Accessing and interpreting parts diagrams is crucial when repairing or maintaining your Husqvarna Viking Emerald 116. While the provided text doesn’t directly link to diagrams, service manuals (available online via the Internet Archive and potentially through eBay sellers) often contain detailed exploded views of the machine’s internal components.
These diagrams illustrate how parts fit together, aiding in reassembly after cleaning or repair. Each part is typically labeled with a reference number, corresponding to a parts list. When ordering replacement parts, referencing these numbers ensures you receive the correct component. Familiarizing yourself with these diagrams, alongside the machine’s manual, empowers you to confidently undertake basic repairs and maintenance, extending the lifespan of your sewing machine.