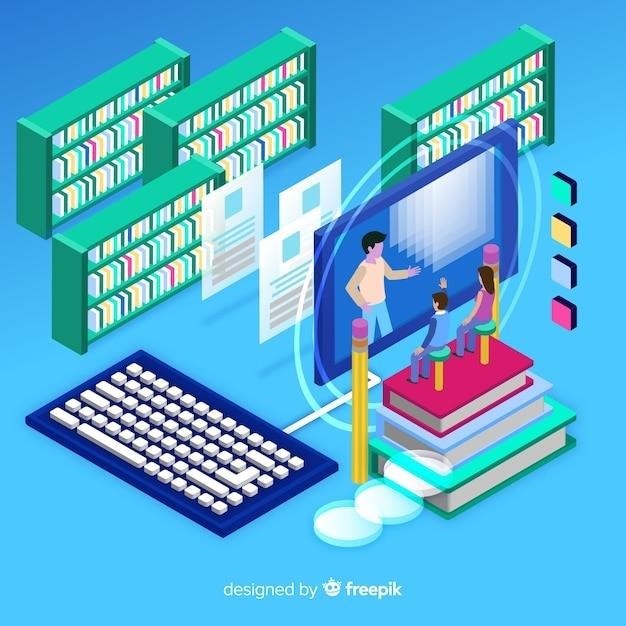
2014 chevrolet cruze owners manual

The 2014 Chevrolet Cruze Owners Manual is a comprehensive guide that provides detailed information on all aspects of your vehicle. From basic operation and maintenance to advanced troubleshooting and technical specifications‚ this manual is an essential resource for every Cruze owner. It includes step-by-step instructions‚ illustrations‚ diagrams‚ and helpful tips to ensure a safe and enjoyable driving experience. Download your free copy today and keep it handy for all your Cruze needs.

Introduction

Welcome to the world of the 2014 Chevrolet Cruze‚ a compact sedan designed to meet the needs of modern drivers. This comprehensive owner’s manual serves as your guide to understanding and operating all the features and functionalities of your vehicle. From the moment you step behind the wheel‚ you’ll discover a blend of comfort‚ technology‚ and performance that makes every journey enjoyable.

This manual is meticulously organized to provide you with clear and concise information‚ ensuring a seamless learning experience. It covers everything from basic operation and maintenance to advanced features and safety systems. We encourage you to familiarize yourself with the contents of this manual‚ as it contains vital information that will help you maximize your driving experience and ensure the safety of yourself and your passengers.

Throughout this manual‚ you’ll find detailed descriptions‚ illustrations‚ and diagrams that make complex concepts easy to understand. We’ve included helpful tips and troubleshooting guides to assist you in maintaining your Cruze and resolving any issues that may arise. Remember‚ this manual is your companion on the road‚ providing you with the knowledge and resources you need to enjoy your Chevrolet Cruze to the fullest.

Vehicle Overview

The 2014 Chevrolet Cruze is a stylish and efficient compact sedan that offers a compelling combination of features‚ performance‚ and value. Designed to meet the demands of modern driving‚ the Cruze boasts a sleek exterior‚ a comfortable and well-appointed interior‚ and a range of advanced technologies. Whether you’re commuting to work‚ running errands‚ or embarking on a road trip‚ the Cruze delivers a smooth and enjoyable ride.

Under the hood‚ the 2014 Cruze offers a choice of powerful and fuel-efficient engines‚ including a 1.8-liter four-cylinder engine or a turbocharged 1.4-liter four-cylinder engine. The Cruze’s handling is responsive and precise‚ thanks to its well-tuned suspension and responsive steering. The available six-speed manual transmission provides a sporty driving experience‚ while the six-speed automatic transmission delivers smooth and effortless shifts.

Inside the cabin‚ the 2014 Cruze offers a comfortable and spacious environment for passengers. The front seats are supportive and well-padded‚ while the rear seats provide ample legroom and headroom for adults. The interior is equipped with a variety of features‚ including a user-friendly infotainment system‚ Bluetooth connectivity‚ and a range of safety features.

Safety Features

The 2014 Chevrolet Cruze is equipped with a comprehensive suite of safety features designed to protect you and your passengers in the event of an accident. These features include⁚

  • Anti-lock Braking System (ABS)⁚ ABS helps prevent the wheels from locking up during emergency braking‚ allowing you to maintain steering control.
  • Electronic Stability Control (ESC)⁚ ESC helps maintain control of the vehicle during slippery conditions‚ such as snow or ice‚ by applying brakes to individual wheels and reducing engine power.
  • Traction Control⁚ Traction control helps prevent wheelspin when accelerating‚ especially on slippery surfaces.
  • Airbags⁚ The Cruze is equipped with multiple airbags‚ including front‚ side‚ and curtain airbags‚ to help protect occupants in the event of a collision.
  • Tire Pressure Monitoring System (TPMS)⁚ TPMS alerts you if any of your tires are underinflated‚ which can affect vehicle handling and fuel efficiency.
  • Rearview Camera⁚ A rearview camera helps improve visibility when backing up‚ making it easier to avoid obstacles.
  • Daytime Running Lamps (DRL)⁚ DRLs help make your vehicle more visible to other drivers during the day‚ reducing the risk of accidents.

These safety features work together to provide a high level of protection for you and your passengers. However‚ it is important to remember that no safety feature can replace responsible driving practices.

Driving and Operation

The 2014 Chevrolet Cruze offers a comfortable and efficient driving experience‚ thanks to its responsive handling‚ well-tuned suspension‚ and fuel-efficient powertrain options. Here’s a glimpse into the driving and operational aspects of the Cruze⁚

  • Engine and Transmission⁚ The Cruze is available with a 1.8L four-cylinder engine or a 1.4L turbocharged four-cylinder engine. Both engines offer ample power for daily driving‚ while the turbocharged option provides a bit more pep for passing and merging. Transmission options include a six-speed manual or a six-speed automatic.
  • Steering and Handling⁚ The Cruze’s steering is precise and responsive‚ making it easy to maneuver in tight spaces. The suspension provides a comfortable ride without sacrificing handling‚ making it enjoyable to drive on both city streets and highways.
  • Fuel Economy⁚ The Cruze is known for its impressive fuel economy‚ especially with the 1.4L turbocharged engine and the manual transmission. The EPA estimates that the Cruze Eco can achieve up to 28 mpg city and 42 mpg highway.
  • Infotainment System⁚ The Cruze features a user-friendly infotainment system with a touchscreen display‚ Bluetooth connectivity‚ and an optional navigation system. This system allows you to stay connected and entertained on the road.
  • Visibility and Ergonomics⁚ The Cruze offers good visibility from the driver’s seat‚ making it easy to see your surroundings. The driver’s seat is comfortable and adjustable‚ allowing you to find the perfect driving position.

The 2014 Chevrolet Cruze provides a well-rounded driving experience that combines comfort‚ efficiency‚ and a touch of sportiness. Make sure to consult your owner’s manual for specific details about your vehicle’s features and operating instructions.

Maintenance and Servicing

Regular maintenance is crucial for ensuring your 2014 Chevrolet Cruze runs smoothly and reliably for years to come. The owner’s manual outlines a comprehensive maintenance schedule‚ including recommended service intervals and procedures. Here’s a breakdown of key maintenance tasks⁚

  • Oil Changes⁚ Regular oil changes are essential for lubricating engine parts and preventing wear and tear. The recommended oil change interval for the Cruze is typically every 5‚000 to 7‚500 miles‚ depending on your driving conditions.
  • Tire Rotation and Pressure⁚ Maintaining proper tire pressure and rotating your tires regularly helps ensure even wear and optimal handling. Check your tire pressure at least once a month and rotate your tires every 5‚000 to 7‚500 miles.
  • Fluid Levels⁚ Checking and topping off fluid levels‚ such as coolant‚ brake fluid‚ and power steering fluid‚ is crucial for maintaining proper vehicle operation.
  • Air Filter Replacement⁚ A clean air filter ensures optimal engine performance and fuel efficiency. Replace your air filter every 12‚000 to 15‚000 miles or as needed.
  • Brake Pads and Rotors⁚ Inspecting brake pads and rotors for wear is crucial for maintaining safe braking. Replace them as needed‚ typically every 25‚000 to 30‚000 miles.
  • Spark Plugs⁚ Spark plugs play a vital role in engine ignition. Replace them every 30‚000 to 100‚000 miles‚ depending on the type of spark plugs.
  • Scheduled Services⁚ Your owner’s manual outlines a comprehensive schedule of recommended services‚ including inspections‚ tune-ups‚ and other maintenance tasks.

Following the recommended maintenance schedule and addressing any issues promptly can help extend the life of your Cruze and keep it performing at its best. Remember‚ regular maintenance is an investment in your vehicle’s longevity and your safety.

Troubleshooting and Repairs

While the 2014 Chevrolet Cruze is a reliable vehicle‚ issues can arise over time. The owner’s manual provides valuable guidance on troubleshooting common problems and performing basic repairs. Here’s a glimpse into the troubleshooting and repair information you’ll find⁚

  • Diagnostic Trouble Codes (DTCs)⁚ Your Cruze’s onboard diagnostics system can detect and store fault codes related to various components. The manual explains how to access and interpret these codes‚ providing insights into potential issues.
  • Engine Problems⁚ From rough idling to misfires‚ the manual covers troubleshooting steps for common engine problems‚ including checking fuel lines‚ spark plugs‚ and ignition systems.
  • Transmission Issues⁚ If you experience shifting problems or unusual noises‚ the manual offers guidance on checking transmission fluid levels‚ inspecting for leaks‚ and identifying potential causes.
  • Electrical System Faults⁚ The manual provides information on diagnosing issues with electrical components‚ such as headlights‚ taillights‚ and power windows.
  • Braking System Problems⁚ Troubleshooting steps for braking issues‚ including brake pedal feel‚ noise‚ and warning lights‚ are outlined in the manual.
  • Body and Interior Issues⁚ The manual covers common issues with body panels‚ interior components‚ and accessories‚ offering guidance on identifying and addressing these problems.

Remember‚ while the owner’s manual provides helpful information‚ it’s always best to consult a qualified mechanic for complex repairs. By understanding basic troubleshooting steps and seeking professional assistance when needed‚ you can keep your Cruze running smoothly and safely for years to come.

Technical Specifications

The 2014 Chevrolet Cruze Owners Manual includes a detailed section dedicated to technical specifications‚ providing essential information about your vehicle’s design‚ performance‚ and capabilities. Here’s a glimpse into the technical specifications you’ll find⁚

  • Engine Options⁚ The 2014 Cruze offered a choice of gasoline engines‚ including a 1.8L four-cylinder and a 1.4L turbocharged four-cylinder. The manual details their horsepower‚ torque‚ fuel consumption‚ and other performance characteristics.
  • Transmission Options⁚ The 2014 Cruze was available with a choice of manual and automatic transmissions. The owner’s manual provides details on the gear ratios‚ shift patterns‚ and other technical aspects of these transmissions.
  • Dimensions and Weight⁚ The manual lists key dimensions‚ such as length‚ width‚ height‚ wheelbase‚ and curb weight. This information is useful for understanding the vehicle’s size‚ maneuverability‚ and cargo capacity.
  • Suspension and Steering⁚ The manual provides details about the suspension system components‚ including the type of struts‚ springs‚ and shock absorbers used. It also outlines the steering system’s design and specifications.
  • Braking System⁚ The manual details the braking system‚ including information on the disc and drum brake sizes‚ anti-lock braking system (ABS)‚ and electronic stability control (ESC).
  • Fuel System⁚ The owner’s manual provides information about the fuel tank capacity‚ fuel type‚ and fuel economy ratings for different engine and transmission combinations.
  • Electrical System⁚ The technical specifications section includes details about the battery voltage‚ alternator output‚ and fuse box layout.

By understanding these technical specifications‚ you’ll gain a deeper understanding of your Cruze’s capabilities and how it operates. The owner’s manual serves as a valuable reference for owners who want to explore the technical aspects of their vehicles.

Warranty and Support

The 2014 Chevrolet Cruze Owners Manual includes a dedicated section on warranty and support‚ providing crucial information about the coverage and assistance available to you as a vehicle owner. This section outlines the various warranties that come with your Cruze‚ detailing the terms‚ conditions‚ and limitations of each.

  • New Vehicle Limited Warranty⁚ This warranty covers defects in materials and workmanship for a specific period. The manual details the duration of the warranty‚ the components covered‚ and any exclusions or limitations.
  • Powertrain Limited Warranty⁚ This warranty specifically covers the engine‚ transmission‚ and drivetrain components for an extended period. The manual outlines the duration of the powertrain warranty‚ its coverage‚ and any exceptions.
  • Rust-Through Corrosion Warranty⁚ This warranty protects against rust perforation for a certain period. The manual details the duration of the rust-through warranty and the components covered.
  • Emissions Warranty⁚ This warranty covers components related to the vehicle’s emissions system. The manual outlines the duration of the emissions warranty and the components covered.
  • Customer Assistance⁚ The warranty and support section often includes information about Chevrolet’s customer assistance programs. This may include details on roadside assistance‚ towing services‚ and other support options available to you.

By carefully reviewing the warranty and support section in your 2014 Chevrolet Cruze Owners Manual‚ you can familiarize yourself with the coverage and assistance available to you. This information is crucial for understanding your rights and responsibilities as a vehicle owner and for ensuring you receive the necessary support when required.

Additional Resources

Beyond the comprehensive information within the 2014 Chevrolet Cruze Owners Manual‚ Chevrolet offers a wealth of additional resources to enhance your ownership experience. These resources provide access to essential information‚ helpful tools‚ and support services that go beyond the scope of the printed manual.

  • myChevrolet App⁚ This mobile app connects you to your vehicle‚ providing access to various features and services. You can use the myChevrolet app to remotely start your engine‚ check your fuel level‚ locate your vehicle‚ and receive maintenance alerts.
  • OnStar⁚ Chevrolet’s OnStar system provides a range of safety‚ security‚ and convenience features. The manual details the capabilities of OnStar‚ including emergency services‚ stolen vehicle assistance‚ and remote diagnostics.
  • Chevrolet Website⁚ The official Chevrolet website offers a vast library of resources‚ including owner manuals‚ service information‚ recalls‚ and FAQs. You can access these resources online or through the myChevrolet app.
  • Chevrolet Dealerships⁚ Your local Chevrolet dealership is a valuable resource for all things Cruze. They can provide service‚ repairs‚ parts‚ and expert advice.
  • Owner Forums⁚ Online forums dedicated to Chevrolet Cruze owners offer a platform to connect with other owners‚ share experiences‚ and seek advice on a wide range of topics;

By utilizing these additional resources‚ you can stay informed about your 2014 Chevrolet Cruze and access valuable support whenever needed. Remember‚ Chevrolet is committed to providing a comprehensive ownership experience‚ and these resources are designed to enhance your journey with your Cruze.

burton snowboard boots size guide

Burton Snowboard Boot Size Guide

Finding the perfect fit for your Burton snowboard boots is crucial for comfort, performance, and a great day on the slopes. This guide will walk you through Burton’s sizing philosophy, how to use their size charts, and tips for choosing the right size.

Understanding Burton Snowboard Boot Sizing

Burton snowboard boots are designed to provide a snug and comfortable fit, allowing for optimal control and responsiveness on the slopes. However, finding the right size can be a bit tricky, as it differs from traditional street shoe sizing. Burton’s sizing philosophy emphasizes the importance of a precise fit, ensuring both comfort and performance. Unlike some other brands, Burton boots tend to fit true to size, straight out of the box, eliminating the need for sizing up or down. This means that your usual street shoe size is a good starting point for finding your Burton boot size.

While Burton boots generally fit true to size, it’s always a good idea to consult their official size charts and consider the specific boot model you’re interested in. Each model may have slightly different sizing variations; Remember, a good fit is essential for a positive snowboarding experience. It’s crucial to find boots that are snug but not overly tight, allowing for comfortable flexing and movement.

Burton’s Sizing Philosophy

Burton’s sizing philosophy revolves around providing a precise and comfortable fit that enhances performance and enjoyment on the slopes. Unlike some other brands that might encourage sizing up or down, Burton believes in true-to-size fitting, meaning your street shoe size is a reliable starting point for finding your Burton boot size. This consistent sizing approach allows for a more predictable and comfortable experience, ensuring that your boots fit snugly and securely without feeling too tight or loose;

Burton understands that foot shapes and sizes can vary, so they offer a wide range of models and sizes to cater to diverse needs. Their sizing charts are designed to be comprehensive and user-friendly, providing detailed information on men’s, women’s, and children’s boot sizes. Additionally, Burton encourages customers to consult with their experienced staff at local snowboard shops for personalized fitting recommendations. This approach emphasizes the importance of finding a boot that not only fits well but also complements your individual riding style and preferences.

The Importance of Proper Fit

A proper fit in your snowboard boots is paramount for both comfort and performance. It’s not just about feeling good; it’s about achieving optimal control and responsiveness on the slopes. When your boots fit snugly but not too tightly, your feet stay warm and comfortable, even during long days of riding. Additionally, a well-fitting boot allows for precise control over your board, enabling you to execute turns smoothly and confidently.

Conversely, ill-fitting boots can lead to a variety of problems. Boots that are too loose can cause slippage and discomfort, hindering your ability to control your board. On the other hand, boots that are too tight can restrict blood circulation, leading to numbness, pain, and even blisters. Moreover, an improper fit can negatively impact your performance, making it difficult to execute advanced maneuvers and enjoy the full potential of your snowboarding experience. Therefore, it’s essential to prioritize finding the right size and fit for your Burton snowboard boots to ensure a comfortable and enjoyable riding experience.

Using Burton’s Size Charts

Burton provides comprehensive size charts for their snowboard boots, making it easier to find the right fit. These charts offer a starting point by correlating your street shoe size with the corresponding Burton boot size. However, it’s crucial to remember that these charts are just a guide; individual foot shapes and preferences can vary, so it’s always best to try on boots before making a purchase.

Burton’s size charts typically include information for men, women, and kids, along with different boot models. You can find these charts on the Burton website or at authorized retailers. To use the charts effectively, simply locate your street shoe size in the corresponding column and then match it to the equivalent Burton boot size. For example, if you wear a size 10 in street shoes, you would likely need a size 10 in Burton boots.

However, keep in mind that Burton boots may fit slightly differently than other brands, so it’s always advisable to try on different sizes and models to find the most comfortable and supportive fit for your feet.

Men’s Burton Snowboard Boot Size Chart

Burton’s men’s snowboard boot size chart provides a comprehensive guide for finding the perfect fit. It offers a clear correlation between street shoe sizes and Burton boot sizes, making the process straightforward. The chart typically includes various sizes, ranging from small to extra-large, and may also incorporate specific models or styles for added clarity.

To use the chart, simply locate your street shoe size in the corresponding column and match it to the equivalent Burton boot size. For instance, if you wear a size 10 in street shoes, you’d likely need a size 10 in Burton boots. However, it’s important to note that foot shapes can vary, so trying on boots before purchasing is always recommended.

The men’s Burton snowboard boot size chart is a valuable tool for finding the right fit, but it’s crucial to remember that individual preferences and foot shapes can influence the optimal size. It’s always best to err on the side of caution and try on different sizes and models to find the most comfortable and supportive fit.

Women’s Burton Snowboard Boot Size Chart

Burton’s women’s snowboard boot size chart is specifically designed to accommodate the unique needs of female snowboarders. It reflects the varying foot shapes and sizes common among women, offering a tailored approach to finding the perfect fit. The chart typically includes a range of sizes, encompassing both smaller and larger sizes to suit a diverse group of riders.

The chart effectively translates street shoe sizes into their corresponding Burton boot sizes. This helps women easily determine their likely boot size by simply matching their street shoe size to the chart’s equivalent. For example, if a woman wears a size 7 in street shoes, she would likely need a size 7 in Burton boots. However, individual foot shapes can play a role, so trying on boots before purchasing is always advisable.

Burton’s women’s snowboard boot size chart serves as a valuable guide for finding the right fit; However, it’s important to remember that personal preferences and foot shapes can influence the optimal size. It’s always best to try on different sizes and models to find the most comfortable and supportive fit;

Kids’ Burton Snowboard Boot Size Chart

Burton’s kids’ snowboard boot size chart caters to the specific needs of young riders, ensuring a comfortable and secure fit as they learn to navigate the slopes. The chart offers a range of sizes, accommodating the growth spurts and varying foot sizes that are common in childhood. It’s a valuable tool for parents and guardians looking to equip their children with the right footwear for snowboarding adventures.

The chart is typically presented in a user-friendly format, often displaying both US shoe sizes and Mondopoint sizes. Mondopoint is a measurement of the foot’s length in centimeters and is widely used in the snowboarding industry. This dual-size system allows for greater precision when determining the ideal boot fit for a child. The chart is designed to ensure that kids’ boots are not too big or too small, providing optimal comfort and control on the slopes.

Burton’s kids’ snowboard boot size chart is a reliable resource for finding the right fit for young riders. However, it’s essential to note that foot growth can be rapid, so it’s advisable to check the fit regularly and consider a larger size if needed. Ultimately, the most important factor is ensuring a comfortable and secure fit that allows for safe and enjoyable snowboarding experiences.

Step On Binding Compatibility

Burton’s Step On bindings are a revolutionary innovation in snowboarding, offering a seamless and effortless entry and exit system. This system requires specific compatibility between boots and bindings, ensuring a secure and reliable connection for riders. The Step On system is designed to work exclusively with Burton’s Step On boots, offering a unique and streamlined experience.

The Step On system utilizes a built-in mechanism in both the boot and binding, creating a secure and instant connection with a simple step-in motion. This eliminates the need for traditional buckles and straps, simplifying the process of getting in and out of bindings. The system is designed to be user-friendly, especially for beginners and riders who value convenience.

While the Step On system offers a convenient and efficient method of binding engagement, it’s crucial to note that it is not compatible with traditional snowboard bindings. Riders who choose Step On bindings must also use compatible Step On boots. Burton provides detailed size charts and compatibility guidelines to ensure a perfect match between boots and bindings, guaranteeing a safe and enjoyable snowboarding experience with the Step On system.

Mondopoint Sizing

Mondopoint sizing, often referred to as “Mondo,” is a standardized system used in the footwear industry, particularly in snowboarding and skiing, to measure the length of a foot in centimeters. It provides a more precise measurement than traditional shoe sizes, which can vary across brands and styles. This system offers a consistent and accurate way to determine the correct boot size, ensuring a comfortable and secure fit.

To determine your Mondopoint size, you’ll need to measure your foot length from the tip of your longest toe to the back of your heel. A ruler or measuring tape is essential for this process. Burton provides Mondopoint sizing charts that correlate your foot length with the corresponding boot size. This allows you to find the perfect fit, ensuring adequate room for your toes while maintaining a snug and supportive fit for optimal performance and comfort.

Understanding Mondopoint sizing is essential for finding the perfect Burton snowboard boot size. It provides a more accurate and precise measurement than traditional shoe sizes, allowing you to select the ideal boot for your individual foot shape and size. By referencing Burton’s Mondopoint size charts, you can make informed decisions and ensure a comfortable and secure fit for your snowboarding adventures.

Finding Your Perfect Fit

Finding the perfect fit for your Burton snowboard boots is crucial for a comfortable and enjoyable snowboarding experience. Your boots should feel snug but not overly tight, allowing for a comfortable range of motion while providing ample support and stability on the slopes. A well-fitting boot ensures optimal performance, reduces the risk of blisters and discomfort, and enhances your overall enjoyment of the sport.

When trying on boots, be sure to wear the socks you plan to wear on the mountain. This will ensure an accurate representation of how the boots will feel during your snowboarding sessions. Walk around the shop in the boots, bend your knees, and flex your ankles to test the fit and feel. If you feel any pressure points or discomfort, try on a different size or style.

Remember, snowboard boots are designed to be a bit snugger than your typical street shoes. The liner of the boot will mold to your foot over time, providing a more personalized and comfortable fit. If you’re unsure about the fit, consult with a knowledgeable salesperson at a reputable snowboard shop. They can help you determine the perfect size and style for your needs.

Tips for Choosing the Right Size

Choosing the right size Burton snowboard boots is essential for a comfortable and enjoyable snowboarding experience. Here are some tips to help you find the perfect fit⁚

  • Consider your foot shape⁚ Do you have narrow, medium, or wide feet? Burton offers various width options to cater to different foot shapes. If you have wide feet, you might want to consider a boot designed for wider feet or a size up.
  • Think about your riding style⁚ If you’re an aggressive rider who likes to push the limits, you might prefer a snugger fit for greater control and responsiveness. If you’re a beginner or prefer a more relaxed riding style, a slightly looser fit might be more comfortable.
  • Allow for break-in time⁚ Snowboard boots are designed to break in over time. The liner will mold to your foot, providing a more customized and comfortable fit. Expect some initial stiffness and adjust your expectations accordingly.
  • Try on both boots⁚ Always try on both boots and walk around the shop to ensure they feel comfortable and secure. Look for any pressure points or areas of discomfort.
  • Don’t be afraid to try different sizes⁚ If you’re between sizes, it’s always a good idea to try both. You might find that a half-size up or down feels more comfortable.

Remember, your comfort is key. If you’re unsure about the fit, seek advice from a knowledgeable salesperson at a reputable snowboard shop.

Burton’s Official Sizing Guide

Burton provides comprehensive size charts for their snowboard boots to help you find the perfect fit. These charts are available on their website and in-store. They typically include the following information⁚

  • Men’s, Women’s, and Kids’ Sizes⁚ Separate size charts are available for each gender and age group, ensuring accurate sizing for every rider.
  • US, Euro, and Mondopoint Sizes⁚ Burton’s size charts list the corresponding US, Euro, and Mondopoint (cm) sizes for easy conversion and comparison.
  • Step On Binding Compatibility⁚ For riders using Burton’s Step On bindings, the size charts also include compatibility information to ensure proper binding-to-boot fit.
  • Binding Size Recommendations⁚ Burton’s size charts often provide recommended binding sizes based on boot size. This helps ensure a secure and comfortable fit for both boots and bindings.

By utilizing Burton’s official size guide, you can confidently choose the right size for your snowboarding boots, allowing you to focus on enjoying the slopes with comfort and performance.

Additional Resources

Beyond Burton’s official size guide, there are a wealth of resources available to help you find the perfect fit for your snowboard boots. Here are some suggestions⁚

  • Local Snowboard Shops⁚ Experienced boot fitters at your local snowboard shop can provide personalized advice and help you find the right size and style based on your individual needs. They can also measure your feet using a Mondopoint system, which provides a more accurate measurement than traditional shoe sizing.
  • Online Forums and Reviews⁚ Community forums and online reviews from other snowboarders can offer insights into specific boot models, fit, and sizing. Read through reviews and discussions to see what other riders have experienced with different Burton boot models and sizes.
  • Snowboarding Websites and Blogs⁚ Many websites and blogs dedicated to snowboarding provide articles and guides on snowboard boot sizing and fit. They often feature detailed explanations of different sizing systems, fit tips, and recommendations for specific boot models.
  • Burton Customer Service⁚ Don’t hesitate to contact Burton’s customer service department for any questions or assistance with sizing. They can provide valuable guidance and help you navigate the size charts and find the right fit for your needs.

By utilizing these additional resources, you can gather comprehensive information and ensure you make an informed decision when choosing your Burton snowboard boots.

ten day smoothie cleanse pdf

Ten Day Smoothie Cleanse⁚ A Comprehensive Guide

Embark on a transformative journey with our comprehensive guide to a ten-day smoothie cleanse. Discover the benefits‚ prepare for your cleanse‚ and explore a sample plan designed to nourish your body and invigorate your well-being. We’ll delve into essential smoothie ingredients‚ offer tips for success‚ address potential side effects‚ guide you through the post-cleanse transition‚ and conclude with a comprehensive understanding of this powerful cleanse.

Introduction

In today’s fast-paced world‚ where convenience often trumps nutrition‚ a ten-day smoothie cleanse offers a refreshing approach to revitalizing your health and well-being. This comprehensive guide delves into the intricacies of this transformative experience‚ providing you with the knowledge and tools to embark on a successful journey. A smoothie cleanse‚ as the name suggests‚ involves consuming a series of nutrient-rich smoothies throughout the day‚ replacing traditional meals with a blend of fruits‚ vegetables‚ and other healthy ingredients. This practice allows your body to detoxify‚ reset‚ and experience a renewed sense of energy and vitality. Prepare to embark on a ten-day adventure that will leave you feeling lighter‚ brighter‚ and more connected to your body’s innate wisdom.

Benefits of a Smoothie Cleanse

A ten-day smoothie cleanse offers a multitude of benefits that extend beyond mere weight loss. By consuming a concentrated dose of fruits‚ vegetables‚ and other nutrient-rich ingredients‚ you provide your body with a potent boost of vitamins‚ minerals‚ and antioxidants. This can lead to improved digestion‚ enhanced energy levels‚ and a clearer complexion. The cleansing process itself allows your digestive system to rest and repair‚ reducing the burden on your body and promoting optimal gut health. Moreover‚ a smoothie cleanse can help to reduce inflammation‚ support detoxification‚ and promote a sense of overall well-being. While individual results may vary‚ the potential benefits of a ten-day smoothie cleanse are undeniable‚ offering a path to a healthier‚ more vibrant you.

Preparing for Your Cleanse

Before embarking on a ten-day smoothie cleanse‚ it’s essential to adequately prepare your body and mind. Start by gradually reducing your intake of processed foods‚ refined sugars‚ and unhealthy fats in the days leading up to the cleanse. This transition will help your body adjust to a more nutrient-dense diet. It’s also crucial to ensure you have access to the necessary ingredients for your smoothies. Stock up on fresh fruits‚ vegetables‚ and other healthy additions. Consider preparing some ingredients in advance‚ such as chopping vegetables or freezing fruit‚ to streamline your smoothie-making process. Lastly‚ inform your doctor or healthcare provider about your intention to undertake a cleanse‚ especially if you have any underlying health conditions or are taking medications. With a little preparation‚ you can set yourself up for success on your ten-day smoothie journey.

Sample Ten-Day Smoothie Cleanse Plan

This sample plan offers a starting point for your ten-day smoothie cleanse. Feel free to adjust it based on your preferences and dietary needs. Remember to listen to your body and make modifications as necessary.

Day 1-3⁚ Focus on hydrating smoothies with plenty of fruits and vegetables. Consider incorporating leafy greens‚ berries‚ bananas‚ and citrus fruits. Include sources of healthy fats like avocado or chia seeds.

Day 4-7⁚ Introduce more protein-rich ingredients like nut butters‚ seeds‚ and protein powder. Experiment with different flavor combinations‚ such as green smoothies with spinach‚ cucumber‚ and mango‚ or berry smoothies with blueberries‚ raspberries‚ and almond milk.

Day 8-10⁚ Continue enjoying a variety of smoothies while gradually incorporating more solid foods. This could include steamed vegetables‚ soups‚ or salads. Listen to your body and gradually transition back to your regular diet.

Day 1-3

The initial three days of your cleanse are crucial for setting the tone and preparing your body for the transition. This phase focuses on hydration and a gentle introduction to a nutrient-rich‚ smoothie-based diet.

Start your day with a refreshing smoothie packed with leafy greens like spinach or kale. Include hydrating fruits like cucumber‚ berries‚ and citrus fruits for a burst of vitamins and antioxidants; Add a touch of healthy fats from avocado or chia seeds to enhance satiety and provide essential nutrients.

Throughout the day‚ continue to enjoy smoothies with a focus on fruits and vegetables. Aim for a variety of colors and textures to ensure a balanced intake of nutrients. Remember to stay hydrated by drinking plenty of water alongside your smoothies.

Day 4-7

As you progress into days 4-7‚ your body will have adapted to the cleanse‚ and you can begin to introduce more variety and complexity into your smoothies. These days are all about maximizing nutrient absorption and supporting your body’s natural detoxification processes.

Embrace a wider range of fruits and vegetables‚ including those that offer digestive support‚ such as ginger‚ turmeric‚ and leafy greens. Experiment with different flavor combinations to keep your cleanse interesting and enjoyable.

Continue to hydrate adequately‚ and consider incorporating herbal teas‚ such as ginger tea or peppermint tea‚ to aid digestion and promote a sense of well-being. Listen to your body and make adjustments to your smoothies as needed‚ ensuring you are getting the nutrients and hydration you require.

Day 8-10

As you approach the final days of your ten-day smoothie cleanse‚ you’ll likely experience a surge of energy and clarity. Your body has now fully adapted to the cleanse‚ and you’re reaping the rewards of nutrient-rich smoothies. These days are about celebrating your commitment and transitioning back to solid foods.

You can gradually reintroduce whole foods into your diet‚ starting with light and easily digestible options like cooked vegetables‚ soups‚ and salads. Listen to your body and pay attention to how your digestive system reacts to these foods. Continue to prioritize fruits and vegetables in your diet‚ while slowly incorporating other food groups back into your routine.

Remember‚ the goal is to transition gently and gradually‚ allowing your body to adjust without feeling overwhelmed. Celebrate your accomplishment and embrace the newfound energy and vitality you’ve gained through this transformative cleanse.

Essential Smoothie Ingredients

The beauty of a smoothie cleanse lies in its versatility and the abundance of nutrient-rich ingredients that can be incorporated into your daily blends. From vibrant fruits and vegetables to healthy fats and proteins‚ there’s a world of flavor and nourishment waiting to be explored.

To ensure your smoothies are packed with essential vitamins‚ minerals‚ and antioxidants‚ consider including a variety of ingredients from each category. Experiment with different combinations to discover your favorite flavors and textures. Remember‚ your taste buds are your guide‚ and you can personalize your smoothie recipes to suit your preferences.

The key is to prioritize whole‚ unprocessed ingredients and focus on creating smoothies that are both delicious and nourishing. With a little creativity‚ you can craft a symphony of flavors that will not only satisfy your cravings but also support your health and well-being.

Fruits

Fruits are the stars of a smoothie cleanse‚ adding sweetness‚ vibrant colors‚ and a wealth of vitamins‚ minerals‚ and antioxidants. Choose a variety of fruits to ensure you’re getting a diverse range of nutrients. Berries are excellent choices‚ packed with antioxidants and fiber. Bananas add creaminess and potassium‚ while mangoes deliver a tropical twist and a boost of vitamin C.

Don’t be afraid to experiment with different fruits throughout your cleanse. Try adding a handful of grapes for a burst of sweetness‚ or include some pineapple for a tangy and refreshing flavor. Apples and pears provide a satisfying crunch‚ while melons offer hydration and a refreshing coolness. The possibilities are endless‚ and the key is to find the fruits that you enjoy the most.

As you explore the world of fruits‚ remember that the more colorful your smoothie‚ the more diverse the nutrients you’re consuming. So‚ embrace the vibrant hues of nature and let your creativity flow. Your taste buds and your body will thank you.

Vegetables

While fruits bring sweetness and vibrant colors to your smoothies‚ vegetables add a grounding element‚ providing essential nutrients and fiber to keep you feeling full and satisfied. Leafy greens like spinach‚ kale‚ and romaine lettuce are powerhouses of vitamins‚ minerals‚ and antioxidants. These greens are packed with chlorophyll‚ which can help detoxify your body.

Don’t shy away from adding other vegetables to your smoothies. Cucumbers add a refreshing coolness and are rich in electrolytes‚ while carrots provide a sweet‚ earthy flavor and a boost of vitamin A. Bell peppers‚ both red and green‚ offer a vibrant crunch and a good source of vitamin C. Celery adds a crispness and is known for its digestive benefits.

Remember‚ vegetables are essential for a well-rounded smoothie cleanse. Their abundance of vitamins‚ minerals‚ and fiber will nourish your body‚ support your digestion‚ and help you feel energized throughout your cleanse. Experiment with different vegetables and find the ones that you enjoy the most. You’ll be surprised at the variety of flavors and textures you can create.

Healthy Fats and Proteins

While fruits and vegetables provide essential vitamins and minerals‚ incorporating healthy fats and proteins into your smoothies ensures sustained energy levels‚ supports satiety‚ and enhances overall nutritional value. Avocados‚ with their creamy texture and rich source of healthy monounsaturated fats‚ add a delightful richness to smoothies. They also provide fiber‚ potassium‚ and vitamin C‚ promoting heart health and aiding in digestion.

Nut butters‚ such as almond butter‚ peanut butter‚ or cashew butter‚ contribute a dose of protein‚ healthy fats‚ and essential vitamins and minerals. These creamy additions also add a satisfying texture and depth of flavor to your smoothies. Chia seeds‚ packed with fiber‚ omega-3 fatty acids‚ and protein‚ provide a subtle texture and a boost of nutrients. Their gel-like properties contribute to a satisfying feeling of fullness.

For an extra protein boost‚ consider adding protein powder derived from plant-based sources like pea protein‚ brown rice protein‚ or hemp protein. These powders provide a convenient way to increase protein intake and support muscle maintenance‚ especially during a cleanse when calorie intake may be reduced. Remember to choose protein powders that are minimally processed and free of added sugars or artificial ingredients.

Tips for Success

Embarking on a ten-day smoothie cleanse requires mindful preparation and a commitment to consistent practices. Here are some valuable tips to ensure a successful and fulfilling experience⁚

Listen to Your Body⁚ Pay close attention to your body’s signals throughout the cleanse. If you experience any discomfort or unusual symptoms‚ adjust your smoothie recipes or consider consulting a healthcare professional.

Stay Hydrated⁚ Water is essential for optimal digestion‚ nutrient absorption‚ and overall well-being. Drink plenty of water throughout the day‚ especially during a cleanse.

Plan Ahead⁚ Prepare your smoothies in advance to avoid rushing or skipping meals. Having a well-stocked refrigerator and pantry with fresh fruits‚ vegetables‚ and essential ingredients will make the process smoother.

Mindful Eating⁚ Engage in mindful eating practices‚ savoring each sip of your smoothies and paying attention to your body’s fullness cues.

Rest and Relaxation⁚ Prioritize rest and relaxation during your cleanse. Adequate sleep‚ stress management techniques‚ and gentle exercise can support your body’s natural detoxification processes.

Potential Side Effects and Precautions

While a ten-day smoothie cleanse can offer numerous benefits‚ it’s essential to be aware of potential side effects and take necessary precautions. Here’s a guide to help you navigate this aspect of the cleanse⁚

Digestive Changes⁚ Some individuals may experience digestive discomfort‚ such as bloating‚ gas‚ or diarrhea‚ during the initial days of the cleanse. This is often due to the shift in dietary habits.

Nutrient Deficiencies⁚ A smoothie cleanse‚ while providing essential nutrients‚ may not meet all your daily requirements. It’s crucial to ensure you’re consuming a balanced range of fruits‚ vegetables‚ and healthy fats to avoid deficiencies.

Low Energy Levels⁚ You might experience a temporary decrease in energy levels during the cleanse‚ particularly if you’re accustomed to a higher-calorie diet.

Headaches⁚ Some individuals may experience headaches‚ potentially related to changes in blood sugar levels or dehydration. Stay hydrated and consider incorporating electrolyte-rich drinks.

Consult Your Healthcare Provider⁚ If you have any underlying health conditions‚ allergies‚ or are taking medications‚ consult your healthcare provider before starting a smoothie cleanse.

Post-Cleanse Transition

After completing your ten-day smoothie cleanse‚ a smooth transition back to your regular diet is crucial to maintain the benefits and avoid any negative side effects. Follow these guidelines for a successful post-cleanse period⁚

Gradual Reintroduction⁚ Avoid jumping back into your previous eating habits immediately. Start by incorporating small portions of whole‚ unprocessed foods‚ such as cooked vegetables‚ lean protein‚ and whole grains.

Listen to Your Body⁚ Pay attention to how your body responds to each new food. If you experience any digestive discomfort‚ slow down the reintroduction process and choose lighter‚ easier-to-digest foods.

Hydration is Key⁚ Continue to drink plenty of water throughout the transition phase. Water helps flush out toxins and supports proper digestion.

Mindful Eating⁚ Practice mindful eating during this time‚ paying attention to your hunger cues and fullness signals. This will help you establish a healthier relationship with food.

Regular Exercise⁚ Maintain a regular exercise routine to support your body’s natural detoxification process and boost your energy levels.

Maintain a Balanced Diet⁚ After the cleanse‚ focus on consuming a balanced diet rich in fruits‚ vegetables‚ whole grains‚ and lean protein. Minimize processed foods‚ sugary drinks‚ and unhealthy fats.

A ten-day smoothie cleanse can be a powerful way to reset your body‚ nourish your system‚ and experience a renewed sense of vitality. By following a carefully designed plan‚ incorporating essential ingredients‚ and prioritizing mindful preparation‚ you can unlock the transformative benefits of this cleanse. Remember‚ consistency is key‚ and incorporating the principles of healthy eating and lifestyle choices beyond the cleanse will help you maintain the positive outcomes.

While a smoothie cleanse can be a valuable tool for short-term detoxification and weight management‚ it’s important to consult with your healthcare provider before embarking on any cleanse‚ especially if you have underlying health conditions. A healthy lifestyle that includes a balanced diet‚ regular exercise‚ and stress management is essential for long-term well-being.

Embrace the journey of self-care and empowerment through a ten-day smoothie cleanse. May this comprehensive guide serve as your trusted companion on this transformative path toward a healthier and happier you.

densurefit instructions

Follow our step-by-step guide to create a secure soft reline with DenSureFit for the best denture fit and comfort․ Learn proper techniques for a strong hold without adhesive․

HOW TO APPLY DenSureFit to the UPPER Denture․ This is the official DenSureFit instructional video․ www․densurefit․com/shop

DenSureFit instructions⁚ upper denture step-by-step instructional video for your dentist-grade soft silicone denture reline kit․

How to apply DenSureFit dentist-grade soft silicone reline material to your upper or lower dentures․ Upper Reline Instructions, Lower Reline Instructions

Aug 27, 2018 ;․․ HOW TO APPLY DenSureFit to the UPPER Denture․ This is the official DenSureFit instructional video․ www․densurefit․com/shop․ Watch DenSureFit instructional videos for step-by-step guides on applying, adjusting, and maintaining your denture soft liner․ In this guide, you will find step-by-step instructions on how to properly apply your DenSureFit liner, ensuring an optimal fit for both upper and lower dentures ․․․

Before using DenSureFit on your lower denture, always reline your upper FIRST and then your lower․ Do NOT reline them both at the same time․

FAQ⁚ Will I still need to use denture adhesive? How soon can I use DenSureFit after new tooth extractions? Can I use it on my lower denture?

DenSureFit can provide a snug and comfortable cushion that will reduce the denture adhesive necessary to securely hold a floating denture․

How to apply DenSureFit dentist-grade soft silicone reline material to your upper or lower dentures․ Upper Reline Instructions, Lower Reline Instructions․ May 21, 2024 ౼ How to apply DenSureFit dentist-grade soft silicone reline material to your upper or lower dentures․ Overcoming Denture Challenges Fixodent․ Fixodent 1․8M views ; How You SHOULD Be Brushing Your Teeth ౼ Step 3 of My Complete Mouth Care System․ Find the OFFICIAL DenSureFit HOW TO APPLY DenSureFit instructional videos for UPPER amp; LOWER here!

Sep 22, 2020 ․․․ HOW TO USE DENSUREFIT! densurefit․ 127K views 4 years ago ․․․more․ Heather B․ Denture DiVa․ 13․6K․ Subscribe․

Step 1⁚ Clean, Rinse, and Dry Your Denture․ If you dont clean and dry your denture thoroughly before application, DenSureFit will not stick!

Find the OFFICIAL DenSureFit HOW TO APPLY DenSureFit instructional videos for UPPER amp; LOWER here! Play all Shuffle

Please review all instructions carefully before attempting your reline․ The contents of the kit are intended for one denture plate․

Oct 8, 2018 ․․․ DenSureFit Lowers Lining/ Instructional ․ 104K views 6 years ago ․․․more․ Kyle Bergmann․ 3․4K․ Subscribe․

Watch DenSureFit instructional videos for step-by-step guides on applying, adjusting, and maintaining your denture soft liner․

Enjoy the videos and music you love, upload original content, and share it all with friends, family, and the world on YouTube․ Want the 411 on how to properly snug up your dentures after a dentists soft re-line? You came to the right place!! Find the OFFICIAL DenSureFit HOW TO APPLY DenSureFit instructional videos for UPPER amp; LOWER here! Play all Shuffle

Key Principles of DenSureFit

DenSureFit is a revolutionary denture reline solution that utilizes a soft silicone material to create a custom fit for your dentures․ It eliminates the need for daily adhesives and provides long-lasting comfort․ The key principles behind DenSureFit’s effectiveness are⁚

  • Soft Silicone Technology⁚ DenSureFit employs a soft, flexible silicone material that conforms to the contours of your gums, creating a secure and comfortable seal․ This eliminates the discomfort and irritation often associated with traditional denture adhesives․
  • Suction-Based Fit⁚ The soft silicone liner creates a gentle suction that keeps your dentures firmly in place․ This eliminates the need for adhesives and allows for a more natural feel․
  • Long-Lasting Comfort⁚ DenSureFit is designed to provide a comfortable and secure fit for up to three months․ This eliminates the need for frequent adjustments and allows you to enjoy your dentures without worry․
  • Easy Application⁚ DenSureFit is designed for easy home application․ With clear and concise instructions, you can reline your dentures in the comfort of your own home, saving time and money․
  • Temporary Solution⁚ While DenSureFit provides a comfortable and secure fit, it is not a permanent solution․ It is intended as a temporary solution until you can consult with your dentist for a professional reline․

DenSureFit allows you to reclaim confidence and enjoy the comfort of a snugly fitting denture․ Its innovative technology provides a comfortable, secure, and long-lasting solution for denture users․

DenSureFit Kit Contents & Supplies Needed

The DenSureFit kit contains everything you need to create a comfortable and secure reline for your dentures․ Here’s what you’ll find in the kit⁚

  • DenSureFit Soft Silicone Reline Material⁚ This is the key ingredient for creating a custom fit for your dentures․ It comes in a convenient, easy-to-use package․
  • Measuring Spoon⁚ This ensures you use the correct amount of DenSureFit material for your denture․ Accurate measurement is essential for a successful application․
  • Instructions⁚ Detailed and comprehensive instructions guide you through the process of applying DenSureFit to your dentures․

In addition to the kit contents, you’ll need a few basic supplies for a successful application⁚

  • Clean, Dry Denture⁚ Ensure your dentures are thoroughly cleaned and dried before applying DenSureFit․ This ensures the reline material adheres properly․
  • Warm Water⁚ Warm water is needed to activate the DenSureFit material․ It allows the material to soften and become moldable․
  • Paper Towels⁚ Paper towels are useful for cleaning up any excess DenSureFit material and ensuring a clean working surface․
  • A Mirror⁚ A mirror is helpful for visualizing the application process and ensuring even distribution of the reline material․

With these supplies, you’ll be ready to comfortably and confidently apply DenSureFit for a secure and comfortable denture fit․

Anatomy of Your Dentures

Understanding the anatomy of your dentures is crucial for successful DenSureFit application․ Dentures are made up of a base plate and artificial teeth․ The base plate is the foundation of the denture, covering the gum tissue and supporting the artificial teeth․ It’s made of acrylic resin, a strong and durable material․ The artificial teeth are crafted from porcelain or acrylic, resembling natural teeth in shape and color․

The base plate of your denture is designed to fit snugly against your gums․ However, over time, the gums can shrink, causing the denture to become loose․ This is where DenSureFit comes in․ It acts as a soft reline, creating a custom fit that compensates for any changes in your gum tissue․

While the base plate is smooth and flat, the artificial teeth are designed to resemble natural teeth․ They have different shapes and sizes, depending on their position in your mouth․ The arrangement of the teeth ensures proper chewing function and a natural appearance․

By understanding the anatomy of your dentures, you can better understand how DenSureFit works and how to properly apply it to achieve a secure and comfortable fit․

Step-by-Step Instructions for Applying DenSureFit

Applying DenSureFit is a straightforward process, but it requires meticulous attention to detail for optimal results․ Here’s a step-by-step guide to help you achieve a secure and comfortable fit for your dentures⁚

  1. Clean, Rinse, and Dry Your Denture⁚ Before applying DenSureFit, it’s essential to thoroughly clean and dry your denture․ Any residue or moisture can interfere with the adhesion of the material․
  2. Prepare the DenSureFit Material⁚ Open the DenSureFit package and carefully remove the material․ Depending on the type of DenSureFit you’re using, the material may need to be softened or activated before application․ Follow the instructions provided by the manufacturer․
  3. Apply the DenSureFit Material⁚ Apply the DenSureFit material to the denture base plate, ensuring an even layer․ Pay particular attention to areas where the denture is loose or has gaps․ Spread the material evenly, avoiding any lumps or bumps․
  4. Position Your Denture⁚ Gently place your denture in your mouth, ensuring it’s properly positioned․ You may need to adjust it slightly to ensure a comfortable fit․
  5. Bite Down and Hold⁚ Bite down gently and hold your dentures in place for the time recommended by the manufacturer․ This allows the DenSureFit material to set and solidify․
  6. Trim Excess Material⁚ Once the DenSureFit has set, remove your denture and trim any excess material with a sharp knife or scissors․ Ensure a smooth and even surface for a comfortable fit․
  7. Rinse and Wear⁚ Rinse your dentures with water to remove any loose particles and you’re ready to wear them․ It’s recommended to wear your dentures for a few hours before making any adjustments․

Remember, DenSureFit is designed to provide a temporary reline, and it’s crucial to consult your dentist for regular check-ups and professional relines․

Upper Denture Instructions

Applying DenSureFit to your upper denture requires a slightly different approach compared to the lower denture․ Here’s a step-by-step guide to ensure a secure and comfortable fit⁚

  1. Prepare the DenSureFit Material⁚ Before applying DenSureFit, ensure the material is properly softened or activated as per the manufacturer’s instructions․ This ensures a smooth and consistent application․
  2. Apply to the Denture Base⁚ Carefully apply a thin, even layer of DenSureFit material to the base of your upper denture․ Pay close attention to areas where the denture is loose or has gaps, ensuring a complete coverage․
  3. Position and Bite Down⁚ Gently place the denture in your mouth, ensuring it’s properly positioned․ Bite down gently and hold for the recommended time, allowing the DenSureFit material to set and solidify․
  4. Trim Excess Material⁚ Remove the denture and carefully trim any excess DenSureFit material with a sharp knife or scissors․ Ensure a smooth and even surface for a comfortable fit․
  5. Rinse and Wear⁚ Rinse your denture with water to remove any loose particles․ Wear your dentures for a few hours to allow the DenSureFit material to fully set․

Remember, it’s crucial to follow the manufacturer’s instructions carefully for optimal results․ If you experience any discomfort or difficulty, consult your dentist for guidance․

Lower Denture Instructions

Relining your lower denture with DenSureFit requires a slightly different approach than the upper denture․ Here’s a detailed guide to ensure a secure and comfortable fit⁚

  1. Prepare DenSureFit⁚ Before starting, ensure you’ve properly softened or activated the DenSureFit material according to the manufacturer’s instructions․ This will ensure a smooth and consistent application․
  2. Apply to Denture Base⁚ Apply a thin, even layer of DenSureFit material to the base of your lower denture․ Pay special attention to areas where the denture is loose or has gaps, ensuring complete coverage․
  3. Positioning and Bite⁚ Gently place the denture in your mouth, ensuring it’s correctly positioned․ Bite down gently and hold for the recommended time, allowing the DenSureFit material to set and solidify․
  4. Trim Excess Material⁚ Remove the denture and carefully trim any excess DenSureFit material with a sharp knife or scissors․ Ensure a smooth and even surface for a comfortable fit․
  5. Rinse and Wear⁚ Rinse your denture with water to remove any loose particles․ Wear your dentures for a few hours to allow the DenSureFit material to fully set․

Always refer to the manufacturer’s instructions for specific details and guidance․ If you experience any discomfort or difficulty during the process, consult your dentist for assistance․

Tips for a Successful Application

Applying DenSureFit for the first time can seem daunting, but with a few helpful tips, you can achieve a comfortable and secure fit․ Here are some pointers to ensure a successful application⁚

  • Cleanliness is Key⁚ Before you begin, meticulously clean your dentures with a denture cleaning solution․ This removes any plaque, food debris, or adhesive residue that can interfere with the bonding process․ Ensure your dentures are dry before proceeding․
  • Follow the Instructions⁚ Pay close attention to the manufacturer’s instructions for softening or activating the DenSureFit material․ This ensures the material is properly prepared for application and a smooth, even coating․
  • Thin Layer is Best⁚ Apply a thin, even layer of DenSureFit to the denture base․ Avoid over-applying, as it can lead to discomfort and difficulty in removing the denture․
  • Proper Positioning⁚ When placing the denture back in your mouth, ensure it’s correctly positioned․ This is crucial for a secure fit and even pressure distribution․
  • Gentle Bite⁚ Bite down gently and hold for the recommended time, allowing the DenSureFit material to set and solidify․ Avoid excessive pressure that can distort the material․
  • Trim Carefully⁚ After the material sets, trim any excess DenSureFit with a sharp knife or scissors․ Ensure a smooth surface for comfortable wear․

With a little patience and attention to detail, you can achieve a snug and comfortable fit with DenSureFit․

Troubleshooting Common Issues

While DenSureFit is generally easy to use, you might encounter some common issues during application or wear․ Here are some troubleshooting tips⁚

  • Denture Not Sticking⁚ If the DenSureFit material doesn’t adhere to your denture, ensure your denture is thoroughly cleaned and dry before application․ If the material is old or has been exposed to extreme temperatures, it may have lost its adhesive properties․ Consider replacing the material․
  • Uneven Application⁚ If the reline is uneven, it can lead to discomfort and denture instability․ Carefully apply a thin, even layer of DenSureFit material to the denture base․ Use a tool like a spatula to help distribute the material evenly․
  • Denture Feels Too Tight⁚ If the reline is too thick or if the denture feels too tight, you can carefully trim the excess material with a sharp knife or scissors․ Ensure a smooth surface for comfortable wear․
  • Denture Feels Loose⁚ If the reline is too thin or if the denture feels loose, you may need to reapply DenSureFit․ Ensure the denture is clean and dry before applying a fresh layer of material․
  • Material Not Setting Properly⁚ If the DenSureFit material doesn’t set properly, it may be due to improper mixing or insufficient time allowed for setting․ Refer to the manufacturer’s instructions for specific setting times and conditions․

If you continue to experience issues, consult the DenSureFit website or contact their customer support for further assistance․

holy night music sheet pdf

O Holy Night Sheet Music PDF

Finding the sheet music for “O Holy Night” is easy! You can access a variety of arrangements‚ including those for SATB chorus‚ piano‚ and guitar‚ through various online resources. Websites like Michael Kravchuk’s offer free lead sheets in multiple keys‚ while Anchorage Concert Chorus provides scores for SATB chorus with orchestral or piano accompaniment. For a wider selection and community engagement‚ explore the vast library of sheet music on sites like Musescore‚ where you can download and print free sheet music for various instruments. Furthermore‚ you can download sheet music for specific arrangements‚ like Gateway Worship’s version of “O Holy Night‚” from platforms like PraiseCharts. Whether you’re a seasoned musician or a beginner‚ finding the perfect sheet music for “O Holy Night” is just a click away.

Overview

“O Holy Night” is a beloved Christmas carol that has captured hearts worldwide with its powerful lyrics and soaring melody. This timeless classic is frequently performed during the holiday season‚ adding a touch of reverence and beauty to celebrations. For those seeking to perform or simply appreciate the musical score‚ finding the sheet music is a vital step. “O Holy Night” sheet music PDFs are readily available online‚ offering a variety of arrangements to suit different musical preferences and skill levels. These PDFs provide a convenient and accessible way to learn and perform the carol‚ whether for individual practice‚ choral singing‚ or orchestral arrangements. The availability of “O Holy Night” sheet music PDFs ensures that this cherished Christmas tradition can continue to be enjoyed by musicians and music lovers alike.

History and Origin

“O Holy Night‚” originally titled “Minuit‚ chrétiens” (Midnight‚ Christians)‚ has a rich history dating back to the mid-19th century. The lyrics were penned by Placide Cappeau‚ a French poet and playwright‚ in 1847. He aimed to capture the awe and wonder of the Nativity story‚ emphasizing the profound impact of Christ’s birth on humanity. The music was composed by Adolphe Adam‚ a renowned French composer known for his operas and ballets. Adam’s score beautifully complements Cappeau’s words‚ creating a harmonious and emotionally resonant piece. The carol’s popularity grew quickly in France‚ and it eventually crossed borders‚ reaching the United States in the mid-1850s. The English translation‚ by John Sullivan Dwight‚ a prominent American Unitarian minister and music critic‚ further contributed to its enduring appeal. “O Holy Night” has since become a staple of Christmas celebrations worldwide‚ its timeless message of hope and peace resonating across cultures and generations.

Lyrics and Text

The lyrics of “O Holy Night” are a poignant reflection on the birth of Jesus Christ‚ expressing awe‚ wonder‚ and profound gratitude for his arrival. The English translation‚ crafted by John Sullivan Dwight‚ beautifully captures the essence of the original French text. The opening lines‚ “O Holy Night‚ the stars are brightly shining‚” evoke the celestial beauty of the night of Christ’s birth‚ while the following verses delve deeper into themes of redemption and peace. The lyrics highlight the transformative power of Jesus’ sacrifice‚ bringing hope and joy to a world in need. Phrases like “a thrill of hope‚ the weary world rejoices‚” and “the weary world rejoices‚” resonate deeply‚ reminding us of the profound impact of Christ’s birth on humanity. The lyrics also emphasize the universal message of love and peace‚ culminating in the powerful declaration‚ “Truly He taught us to love one another.” This message of unity and compassion remains relevant and inspiring‚ making “O Holy Night” a timeless carol cherished by people of all faiths and backgrounds.

Musical Arrangement

The musical arrangement of “O Holy Night” is characterized by its dramatic and expressive nature‚ effectively conveying the profound emotions embedded within the lyrics. The melody‚ composed by Adolphe Adam‚ is known for its soaring highs and heart-wrenching lows‚ creating a captivating emotional journey for the listener. The piece typically begins with a slow and stately tempo‚ building tension and anticipation before reaching a powerful climax. The use of dynamic contrasts‚ with moments of hushed reverence transitioning to bursts of triumphant energy‚ further enhances the emotional impact. The harmonic structure is rich and complex‚ employing a variety of key changes and modulations to create a sense of depth and grandeur. The use of lush orchestral accompaniment‚ particularly in the more elaborate arrangements‚ adds a layer of richness and grandeur‚ further emphasizing the sacred nature of the piece. Overall‚ the musical arrangement of “O Holy Night” is a testament to the power of music to evoke profound emotions and connect us to the spiritual essence of the Christmas story.

Popular Versions and Arrangements

Over the years‚ “O Holy Night” has been interpreted and arranged by countless artists and musicians‚ resulting in a diverse range of popular versions. The song’s timeless appeal and emotional depth have resonated with performers across genres‚ from classical vocalists and choirs to pop stars and contemporary Christian artists. Some notable interpretations include Andrea Bocelli’s operatic rendition‚ which showcases the song’s dramatic potential‚ and Celine Dion’s soaring vocal performance‚ highlighting its emotional power. Instrumental versions‚ such as those by renowned pianists like Lang Lang‚ offer a different perspective‚ focusing on the melodic beauty and harmonic richness of the composition. “O Holy Night” has also been adapted for various musical settings‚ from orchestral arrangements to contemporary jazz interpretations‚ demonstrating its versatility and enduring popularity. These diverse interpretations showcase the song’s enduring appeal and its ability to transcend musical boundaries‚ making it a beloved Christmas classic that continues to captivate audiences worldwide.

Free Sheet Music Resources

The internet has become a treasure trove for musicians seeking free sheet music‚ and “O Holy Night” is no exception. Numerous websites offer free downloads of various arrangements for piano‚ guitar‚ vocals‚ and even orchestral instruments. For instance‚ Michael Kravchuk’s website provides free lead sheets in popular keys like Bb Major‚ A Major‚ and C Major‚ making it a great resource for soloists. Anchorage Concert Chorus offers free lead sheets for SATB chorus with piano or orchestral accompaniment‚ ideal for choral ensembles. Websites like Musescore‚ a popular open-source music notation software‚ boast a vast library of free sheet music for various instruments‚ including “O Holy Night.” These platforms allow users to download‚ print‚ and share sheet music‚ fostering a collaborative community of musicians. Additionally‚ websites dedicated to specific genres‚ such as PraiseCharts for Christian music‚ offer free downloads of “O Holy Night” arrangements for specific artists and albums. By leveraging these online resources‚ musicians can easily access free sheet music for “O Holy Night” and explore various arrangements to suit their individual needs and preferences.

Software for Creating and Editing Sheet Music

If you’re looking to create or edit sheet music for “O Holy Night‚” there are various software options available‚ ranging from free open-source programs to paid professional tools. MuseScore‚ a popular open-source option‚ offers a comprehensive suite of features for creating and editing sheet music‚ including support for various instruments‚ notation styles‚ and audio playback. It’s a user-friendly platform with a large online community‚ making it ideal for both beginners and experienced users. Other free options include Noteflight‚ which focuses on online collaboration and sharing‚ and LilyPond‚ a powerful and flexible tool for creating high-quality sheet music using a text-based markup language. For professional-level capabilities‚ consider paid software like Sibelius‚ Finale‚ or Dorico‚ which offer advanced features like orchestral scoring‚ complex notation‚ and extensive customization options. These programs are widely used by composers‚ arrangers‚ and publishers‚ providing the tools to create professional-quality sheet music. Whether you’re creating a new arrangement for “O Holy Night” or simply making edits to an existing score‚ these software options provide the necessary tools to bring your musical ideas to life.

Performance Tips and Techniques

Performing “O Holy Night” effectively requires attention to both technical and expressive elements. Vocalists should focus on breath control‚ particularly during the soaring high notes‚ and strive for clarity and resonance in their delivery. For instrumentalists‚ precise articulation and dynamics are crucial to conveying the piece’s emotional depth. Consider using a legato style for the melodic phrases‚ emphasizing the smooth flow of the music. When performing the piece‚ be mindful of the text’s meaning and strive to communicate the heartfelt sentiment of the lyrics. The powerful imagery of “O Holy Night” can be enhanced through thoughtful phrasing and dynamic contrasts. Practice articulating the words clearly and expressively‚ allowing the emotions to shine through in your performance. Remember to connect with the audience and share the beauty of this timeless Christmas carol. Whether you’re singing or playing‚ focus on delivering a performance that is both technically sound and emotionally resonant‚ capturing the essence of “O Holy Night” and its enduring appeal.

Uses and Applications

“O Holy Night” sheet music finds its place in a wide array of musical contexts‚ spanning from intimate gatherings to grand performances. Churches and choirs frequently incorporate it into their Christmas services‚ adding a poignant and inspiring element to the holiday season. The song’s popularity extends beyond religious settings‚ with its inclusion in various musical programs‚ including concerts‚ recitals‚ and even theatrical productions. Its dramatic nature makes it a perfect choice for soloists seeking to showcase their vocal prowess‚ while its adaptable arrangements cater to instrumentalists of all levels. The sheet music serves as a valuable resource for music educators‚ allowing them to introduce students to this classic carol and its rich musical heritage. Beyond traditional performances‚ “O Holy Night” finds its way into contemporary adaptations‚ including orchestral arrangements‚ jazz interpretations‚ and even instrumental covers. This versatility showcases the enduring appeal of this timeless Christmas classic‚ ensuring its continued presence in musical landscapes across generations.

Cultural Significance

“O Holy Night” transcends its musical form to become a deeply ingrained cultural touchstone‚ particularly during the Christmas season. Its powerful lyrics‚ evoking themes of peace‚ joy‚ and redemption‚ resonate with listeners across diverse backgrounds and beliefs. The song’s popularity has cemented its place as a beloved Christmas tradition‚ frequently appearing in holiday movies‚ television specials‚ and even commercial jingles. Its inclusion in countless carols and Christmas music compilations further reinforces its cultural significance‚ making it a recognizable and cherished part of the holiday experience. The sheet music‚ in its various arrangements‚ serves as a tangible representation of this cultural phenomenon‚ allowing individuals and communities to participate in the tradition of singing “O Holy Night” and sharing its message of hope and wonder. Its enduring presence in contemporary culture‚ from traditional performances to modern adaptations‚ testifies to its profound impact on shaping the cultural landscape of Christmas celebrations.

The enduring popularity of “O Holy Night” is reflected in the abundance of sheet music resources available online. Whether you seek a traditional SATB arrangement‚ a solo piano version‚ or a contemporary adaptation‚ finding the perfect sheet music for this cherished carol is a straightforward endeavor. From free lead sheets to professionally published scores‚ the digital landscape offers a wealth of options for musicians of all levels. The accessibility of sheet music allows individuals and communities to engage with this timeless melody‚ perpetuating its cultural significance and ensuring that its powerful message of hope and joy continues to resonate across generations. The readily available sheet music for “O Holy Night” serves as a testament to its enduring appeal‚ making it a cornerstone of Christmas music and a beloved tradition that continues to inspire and uplift listeners worldwide.

french a2 level books pdf

French A2 Level Books⁚ A Comprehensive Guide

This comprehensive guide delves into the world of French A2 level textbooks, providing insights into the A2 level, its benefits, essential skills, and a selection of recommended textbooks in PDF format. We’ll also explore valuable online resources for your A2 French learning journey.

Introduction

Embarking on a language learning adventure, especially with a language as rich and beautiful as French, can be both exciting and daunting. The French A2 level, as defined by the Common European Framework of Reference for Languages (CEFR), marks a significant milestone in your language journey. It signifies a level of proficiency where you can comprehend basic French, engage in simple conversations, and understand everyday situations. While online resources and language learning apps offer valuable support, a well-structured textbook can be your invaluable companion, providing a comprehensive framework for your learning;

This guide aims to be your ultimate resource in navigating the world of French A2 level textbooks, particularly those available in PDF format. We’ll explore the benefits of studying French at the A2 level, highlight essential skills you’ll develop, and offer a curated list of highly recommended textbooks that can empower you to achieve your language goals. Whether you’re a complete beginner or seeking to solidify your existing foundation, this guide will provide you with the tools and knowledge to confidently embrace the world of French language learning.

Understanding the A2 Level

The A2 level in the Common European Framework of Reference for Languages (CEFR) represents a significant step in your French language learning journey; It falls under the “Basic User” category, indicating that you’re moving beyond the very basics and starting to grasp the fundamentals of the language. At this level, you’ll be able to understand and use common everyday expressions and phrases, communicate basic needs and wants, and even participate in simple conversations about familiar topics.

Think of it as being able to navigate basic interactions in French-speaking environments, like ordering food at a restaurant, asking for directions, or engaging in casual conversations about your hobbies. You’ll be able to understand simple written texts, such as short articles or emails, and even start to grasp the intricacies of French grammar, including basic verb conjugations and sentence structure. This level lays the foundation for further language development, enabling you to progress towards higher levels of fluency and comprehension.

Benefits of Studying French at the A2 Level

Embarking on your French learning journey at the A2 level offers a plethora of benefits, opening doors to a world of cultural immersion, personal growth, and enhanced communication skills. As you progress through the A2 level, you’ll gain a solid foundation in French, enabling you to navigate everyday situations with confidence. The ability to communicate basic needs and engage in simple conversations will empower you to interact with native speakers, enhancing your cultural understanding and broadening your horizons.

Moreover, mastering the A2 level unlocks a treasure trove of French literature and media, making it possible to enjoy authentic French films, music, and books. This exposure to French culture will deepen your appreciation for its nuances and foster a deeper understanding of the language. Furthermore, studying French at the A2 level can be a rewarding experience, fostering a sense of accomplishment and boosting your self-esteem. It provides a sense of achievement as you witness your language skills grow and your ability to communicate in French expand.

Essential Skills for A2 French

Attaining proficiency in French at the A2 level necessitates the development of a solid foundation in essential language skills. Mastering these skills will empower you to communicate effectively in everyday situations, navigate basic conversations, and comprehend simple texts. One crucial skill is the ability to understand and respond to basic questions, such as “How are you?” or “What is your name?” You’ll also need to be able to introduce yourself and others, describe your daily routine, and express simple preferences. This involves expanding your vocabulary to include common greetings, daily activities, and basic descriptive words.

Furthermore, you’ll need to develop a grasp of fundamental grammar concepts. This includes understanding basic verb conjugations in the present tense, as well as the use of articles, prepositions, and pronouns. Additionally, you’ll need to enhance your listening comprehension skills. This involves being able to understand simple announcements, spoken directions, and basic conversations. Finally, developing basic reading skills is essential. This includes the ability to comprehend short texts, such as news articles, emails, or simple stories.

Recommended A2 French Textbooks in PDF Format

Embarking on your A2 French learning journey with the right textbook can significantly enhance your progress. Numerous A2 French textbooks are available in PDF format, offering a convenient and accessible way to learn. These textbooks provide structured lessons, grammar explanations, vocabulary building exercises, and engaging practice activities.

Here are some highly recommended A2 French textbooks in PDF format⁚

  • “French for Beginners” by Dinesh Chander Kapoor offers a comprehensive introduction to the French language, covering essential grammar, vocabulary, and pronunciation.
  • “Bloggers 3” by Kerg, Le, Petteni, caters to learners at the A2-B1 level, featuring engaging content related to blogging and social media, encouraging interactive learning.
  • “French Texts for Beginners” provides a collection of short stories and texts specifically designed for A1/A2 level learners, enhancing reading comprehension and vocabulary development.

These textbooks, readily available in PDF format, provide valuable tools for mastering French at the A2 level.

Colloquial French Series

The Colloquial French series stands out as a popular choice for learners seeking comprehensive and engaging French textbooks. These books are known for their user-friendly approach, combining clear explanations with practical exercises that cater to different learning styles. The series emphasizes real-life communication, equipping learners with essential vocabulary and grammar for everyday conversations.

The Colloquial French series offers a structured learning path, starting with the basics and progressively building upon those foundations. The books include audio components, allowing learners to practice pronunciation and listen to authentic French speech. They also feature cultural insights and practical tips, helping learners understand the nuances of French culture and communication.

If you’re looking for a well-respected and comprehensive French textbook series, the Colloquial French series is a strong contender. It provides a solid foundation for A2 French learning, helping you develop fluency and confidence in the language.

Alter Ego Method Textbooks

The Alter Ego Method textbooks are renowned for their communicative approach to French language learning. They emphasize real-life scenarios and authentic language use, encouraging learners to actively engage with the material and develop practical communication skills. The series features engaging dialogues, realistic situations, and interactive exercises that help learners solidify their understanding of grammar and vocabulary.

The Alter Ego Method textbooks are designed to be flexible and adaptable to different learning styles and needs. They offer a variety of resources, including audio recordings, online activities, and supplementary materials, catering to both self-study and classroom environments. The series also includes a strong focus on cultural awareness, providing learners with insights into French culture and customs.

If you’re looking for a French textbook series that promotes active learning, real-life communication, and cultural understanding, the Alter Ego Method textbooks are an excellent choice. They offer a well-structured and engaging learning experience, helping you master the essential skills needed to communicate effectively in French.

“French for Beginners” by Dinesh Chander Kapoor

“French for Beginners” by Dinesh Chander Kapoor presents a comprehensive introduction to the French language, particularly suitable for individuals at the A1/A2 level. The book emphasizes a practical approach, aiming to equip learners with the fundamental vocabulary, grammar, and conversational skills necessary for basic communication in French.

The book’s content is structured to provide a gradual and systematic learning experience. It covers essential topics such as greetings, introductions, basic verbs, and everyday expressions. Kapoor’s writing style is clear and concise, making the material accessible even to those with no prior knowledge of French. The book also includes numerous exercises and activities to reinforce learning and enhance comprehension.

“French for Beginners” is a valuable resource for self-study or classroom use, offering a solid foundation in the French language. It provides a practical and engaging approach to learning, enabling learners to confidently navigate basic conversations and understand simple texts in French.

“Bloggers 3” by Kerg, Le, Petteni

“Bloggers 3” by Kerg, Le, and Petteni is a captivating French textbook specifically designed for learners at the A2-B1 level. This engaging resource utilizes the power of blogging to immerse students in authentic French communication, fostering a deeper understanding of the language and culture.

The textbook presents a variety of blog posts, articles, and multimedia content that explore themes relevant to young adults, including technology, travel, social media, and current events. This approach not only encourages language acquisition but also provides a window into contemporary French society and its cultural nuances.

“Bloggers 3” features interactive exercises, vocabulary building activities, and grammar practice that reinforce key concepts. The book’s digital extras, including audio recordings and online resources, enhance the learning experience and provide additional opportunities for practice. Whether used in a classroom or for self-study, “Bloggers 3” offers a dynamic and engaging approach to learning French, making the language come alive for learners at the A2-B1 level.

“French Texts for Beginners”

“French Texts for Beginners” is a valuable resource for those seeking to enhance their reading comprehension skills in French at the A1/A2 level. This collection of carefully curated texts provides a stepping stone for beginners, gradually introducing them to the nuances of the French language.

The texts are thoughtfully selected to engage learners with everyday topics and situations, making the learning process both enjoyable and practical. By exposing learners to authentic French prose, “French Texts for Beginners” helps build confidence and fluency in reading.

The collection often includes vocabulary lists, grammar explanations, and comprehension exercises to reinforce learning. The inclusion of English translations for challenging passages ensures accessibility while encouraging learners to actively decipher the French text. “French Texts for Beginners” serves as a gateway to the world of French literature, paving the way for a deeper understanding and appreciation of the language.

Online Resources for A2 French Learning

The digital age offers a wealth of online resources for A2 French learners, providing supplementary materials and interactive platforms to complement traditional textbooks. Websites like Duolingo and Memrise offer gamified language learning experiences, making vocabulary acquisition and grammar practice engaging and accessible.

For those seeking a more comprehensive approach, online courses like “French for Beginners” on platforms like Coursera or edX provide structured lessons, interactive exercises, and personalized feedback from instructors. These courses often incorporate audio and video components, enhancing listening comprehension and pronunciation skills.

Additionally, numerous websites and apps offer French-language news articles, podcasts, and videos, providing authentic exposure to spoken and written French. These resources cater to various interests, allowing learners to engage with content that resonates with their personal preferences, making the learning process more enjoyable and motivating.

Embarking on your French A2 learning journey with the right resources can significantly enhance your progress and make the experience rewarding. Whether you prefer traditional textbooks, online courses, or a combination of both, remember that consistent practice and immersion in the language are key to achieving fluency.

The recommended books in this guide provide a solid foundation for mastering A2 French, while online resources offer a dynamic and interactive learning environment. By utilizing these tools effectively and engaging in regular practice, you can confidently navigate the world of French language and culture, opening doors to new experiences and connections.

Remember, learning a language is a journey, not a destination. Embrace the challenges, celebrate your successes, and enjoy the rewarding experience of expanding your linguistic horizons.

needlepoint stitch guides

Needlepoint Stitch Guides⁚ A Comprehensive Guide

Needlepoint stitch guides are indispensable tools for needlepointers of all levels. They provide detailed instructions on how to execute various stitches, often featuring diagrams and color charts. Stitch guides are especially helpful for beginners, as they make learning the different stitches easier and help avoid frustration. Even experienced needlepointers can benefit from using stitch guides, especially for complex designs or new stitch techniques.

Introduction

Needlepoint, a captivating art form that involves stitching yarn onto a canvas, has experienced a resurgence in popularity. As a versatile craft, needlepoint allows for the creation of a wide range of projects, from stunning wall hangings to intricate pillows. To achieve the desired designs, needlepointers often rely on stitch guides, which serve as essential roadmaps for navigating the intricate world of needlepoint stitches. These guides provide detailed instructions, diagrams, and color charts, making the process of creating beautiful needlepoint pieces both enjoyable and achievable.

Types of Needlepoint Stitches

The world of needlepoint stitches is vast and diverse, offering a multitude of options for creating textures, patterns, and visual effects. Basic stitches, such as the Tent Stitch, Continental Stitch, and Basketweave Stitch, form the foundation of needlepoint. These stitches are relatively simple to learn and are essential for creating solid areas of color and basic patterns. Beyond these basic stitches, a wide range of decorative stitches exists, each adding its unique character to needlepoint projects. These decorative stitches can be used to create intricate details, borders, and special effects, adding depth and complexity to the finished piece.

The Importance of Stitch Guides

Stitch guides are crucial for successful needlepoint projects, particularly for beginners. They serve as a roadmap, providing clear instructions on how to execute each stitch and where to place it on the canvas. The guides often include color charts, indicating which thread color corresponds to each area of the design. This simplifies the process, preventing confusion and ensuring that the finished piece matches the intended design. For complex patterns or intricate details, stitch guides are invaluable, as they break down the process into manageable steps, making even challenging designs achievable.

Reading a Stitch Guide

Reading a stitch guide is essential for successful needlepoint. It requires careful attention to detail and understanding the symbols and instructions. Start by familiarizing yourself with the stitch guide’s layout, noting the key for different stitch types and color codes. Each stitch guide will typically include a legend explaining the symbols used in the chart. Carefully study the diagrams, noting the direction of the stitches and their placement on the canvas. It’s helpful to practice a few stitches before starting the project to gain confidence in your execution. Remember, patience and a methodical approach are crucial when working with stitch guides.

Basic Needlepoint Stitches

Mastering a few basic needlepoint stitches is essential for beginners. These stitches form the foundation for more complex techniques and allow you to create a variety of textures and patterns. The most common basic stitches include the Tent Stitch, the Continental Stitch, and the Basketweave Stitch. Each stitch has a unique appearance and purpose, and understanding their variations can enhance your needlepoint skills. Start by learning the basics and gradually progress to more intricate stitches as your confidence grows.

Tent Stitch

The Tent Stitch is a foundational needlepoint stitch, known for its simplicity and versatility. It’s created by bringing the needle diagonally across the canvas, forming a small, angled stitch. This stitch is ideal for filling large areas, creating smooth transitions, and outlining shapes. Rows of Tent Stitches lay flat and are easy to work with, making it a great choice for beginners. The Tent Stitch also serves as the basis for other stitches, like the Basketweave stitch, and can be used in various decorative patterns.

Continental Stitch

The Continental Stitch is another essential needlepoint stitch, known for its smooth, even appearance. It’s worked diagonally across the canvas, similar to the Tent Stitch, but with a slight twist. The needle enters the canvas from the back, creating a small loop on the front before emerging. This creates a more polished, less textured effect compared to the Tent Stitch. The Continental Stitch is often used for filling large areas, outlining shapes, and creating intricate details. It’s a slightly more challenging stitch than the Tent Stitch, but it’s well worth mastering for its beautiful results.

Basketweave Stitch

The Basketweave Stitch is a popular choice for needlepoint projects, offering a unique textured appearance. It’s a variation of the Tent Stitch, but instead of working in straight rows, it’s executed in diagonal rows that overlap. This creates a woven effect, resembling a basket weave. The Basketweave Stitch is often used for filling large areas, adding visual interest to backgrounds, and creating a textured look for specific elements. While it takes a bit more practice than the basic Tent Stitch, it’s a rewarding stitch to master for its unique visual appeal and its ability to add depth and dimension to a needlepoint piece.

Advanced Needlepoint Stitches

Beyond the foundational stitches, needlepoint offers a world of intricate and decorative techniques. These advanced stitches can add depth, texture, and visual interest to your projects. Some popular examples include the French Knot, creating tiny, raised dots for accents; the Colonial Knot, offering a more substantial knot for textured effects; and the Satin Stitch, used for creating smooth, filled areas. These advanced stitches can be found in detailed stitch guides, often with step-by-step instructions and diagrams. Mastering these techniques takes practice and patience, but the results are worth the effort, adding a unique and professional touch to your needlepoint projects.

Creating Your Own Stitch Guide

For needlepointers who enjoy a creative challenge, crafting their own stitch guides can be a rewarding experience. This allows you to tailor the instructions specifically to your project, canvas, and desired stitch techniques. Start by carefully planning the design and choosing the desired stitches for each section. Use graph paper or a digital design program to create a visual representation of the stitches and their placement on the canvas. You can use color codes or symbols to represent different threads and stitches. Include detailed descriptions of each stitch, along with clear diagrams or photographs. Remember to clearly mark the starting and ending points of each stitch to ensure consistency. Once complete, your personalized stitch guide will be a valuable resource for your current project and a keepsake for future reference.

Resources for Needlepoint Stitch Guides

Fortunately, needlepointers have a wealth of resources at their fingertips when it comes to finding stitch guides. Many needlepoint retailers offer a wide selection of printed and downloadable guides, often tailored to specific canvases or stitch techniques. Online platforms such as Etsy and Shopify host independent designers and needlepoint studios selling their unique stitch guides. For those looking for free resources, numerous blogs and websites dedicated to needlepoint provide free stitch guides and tutorials for various stitches and patterns. Needlepoint communities and forums offer a space for sharing stitch guides and seeking advice from experienced stitchers. No matter your level of expertise or preferred stitch style, a plethora of resources exist to help you find the perfect stitch guide to enhance your needlepoint journey.

Needlepoint stitch guides are invaluable companions for any needlepointer, from novice to expert. They demystify the intricacies of different stitches, providing clear instructions and visual aids. Whether you are tackling a simple design or a complex tapestry, utilizing stitch guides can significantly enhance your stitching experience. They empower you to confidently execute diverse stitches, achieve stunning results, and unlock the full creative potential of needlepoint. So, embrace the world of needlepoint stitch guides and embark on a rewarding journey of artistic expression and skillful craftsmanship.

bible reading plan old and new testament pdf

Bible Reading Plans⁚ A Comprehensive Guide

A Bible reading plan is a structured way to read through the Bible, often with a specific goal in mind, such as reading the entire Bible in a year or focusing on a particular theme. These plans can be helpful for developing a consistent Bible reading habit, gaining a deeper understanding of Scripture, and growing closer to God.

Introduction

Engaging with the Bible can be a transformative journey, offering profound insights and spiritual nourishment. However, the sheer volume of Scripture can feel daunting, leading many to struggle with consistency and a sense of overwhelm. This is where Bible reading plans come into play, providing a structured framework for navigating the vast landscape of God’s Word. These plans, often available as downloadable PDF documents, offer a roadmap for reading the Bible systematically, making the task more manageable and purposeful.

The beauty of Bible reading plans lies in their ability to cater to diverse needs and preferences. From chronological journeys through Scripture to focused studies on specific themes, there’s a plan for every individual, regardless of their experience level or time constraints. Whether you’re seeking a comprehensive overview of the Bible, exploring a particular book in depth, or simply desiring daily spiritual nourishment, a well-designed plan can be a valuable companion on your faith journey.

This guide aims to provide a comprehensive overview of different types of Bible reading plans, outlining their unique features, benefits, and resources. We will delve into chronological plans, Old and New Testament together plans, one-year plans, and printable PDF resources. We will also offer practical tips for successful Bible reading and explore valuable resources to support your journey.

Types of Bible Reading Plans

The world of Bible reading plans is surprisingly diverse, offering a range of approaches to suit various learning styles and goals. Understanding these different types can help you choose a plan that resonates with you and effectively guides your journey through Scripture. Here are some common types of Bible reading plans⁚

  • Chronological Plans⁚ These plans follow the Bible’s historical timeline, allowing you to experience Scripture as a continuous narrative. You’ll witness the unfolding story of God’s interaction with humanity, from Genesis to Revelation, gaining a deeper understanding of the interconnectedness of events and themes.
  • Old and New Testament Together Plans⁚ These plans provide a balanced approach, reading passages from both the Old and New Testaments simultaneously. This method highlights the rich tapestry of Scripture, revealing how the Old Testament foreshadows and anticipates the New Testament, creating a harmonious understanding of God’s overarching message.
  • One-Year Bible Reading Plans⁚ As the name suggests, these plans aim to guide you through the entire Bible within a year. They often divide Scripture into manageable daily readings, making it possible to engage with a wide range of passages while maintaining consistency.
  • Theme-Based Plans⁚ These plans focus on specific themes or topics, such as grace, love, or redemption. They offer a deeper exploration of particular aspects of Scripture, providing valuable insights and practical applications for your life.

Beyond these common types, there are many other variations, including plans for specific books, devotional plans, and plans tailored to particular life stages or challenges. The key is to find a plan that aligns with your personal needs, preferences, and goals.

Chronological Bible Reading Plans

Chronological Bible reading plans offer a unique perspective on Scripture, guiding you through the Bible in the order events occurred. This approach allows you to experience the Bible as a continuous narrative, witnessing the unfolding story of God’s interaction with humanity from Genesis to Revelation. It provides a deeper understanding of the interconnectedness of events and themes, revealing how earlier events foreshadow and influence later ones.

By following a chronological plan, you can trace the development of God’s covenant with humanity, the rise and fall of nations, the lives of key figures like Abraham, Moses, and Jesus, and the progression of God’s redemptive plan for humanity. You’ll also gain a clearer understanding of how the Old Testament foreshadows and anticipates the New Testament, highlighting the unity of Scripture and God’s overarching message.

Chronological plans can be particularly helpful for those who find it challenging to grasp the flow of biblical history or who want to see the connections between different events and themes. They can also be a rewarding experience for those who enjoy understanding the bigger picture and seeing how individual events fit into the grand narrative of God’s work.

Old and New Testament Together Plans

Old and New Testament together plans are designed to provide a comprehensive and integrated understanding of God’s message across both testaments. These plans typically involve reading a passage from the Old Testament and a passage from the New Testament each day, fostering a deeper appreciation for the interconnectedness of God’s word and the continuity of his story.

By reading the Old and New Testaments simultaneously, you can discover how the New Testament fulfills and expands upon the promises, prophecies, and themes found in the Old Testament. You’ll also gain a greater understanding of how the Old Testament provides the historical and theological context for the New Testament, making the teachings of Jesus and the apostles more meaningful and relevant.

These plans are particularly beneficial for those who want to see the big picture of God’s word and understand how the Old Testament foreshadows and informs the New Testament. They can also be helpful for those who desire to see the unity of Scripture and appreciate how God’s message unfolds throughout history, culminating in the person and work of Jesus Christ.

One-Year Bible Reading Plans

One-year Bible reading plans are designed to guide you through the entire Bible in a year, providing a comprehensive overview of God’s word. These plans typically involve reading a specific portion of Scripture each day, ensuring that you cover all 66 books of the Bible within a 12-month period. One-year plans are popular for their practicality and their ability to foster a consistent reading habit.

There are various types of one-year plans, including those that read straight through the Bible from Genesis to Revelation, those that combine readings from the Old and New Testaments daily, and those that follow a chronological order, placing the scriptures in the order of historical events. Many one-year plans are available online and in printed formats, offering flexibility and convenience.

One-year plans are a great way to gain a broad understanding of the Bible’s message and to develop a deeper connection with God’s word. They can also be a valuable tool for personal reflection, spiritual growth, and prayer; With its manageable daily reading assignments, a one-year plan can help you cultivate a consistent Bible reading habit and enrich your spiritual life.

Printable PDF Bible Reading Plans

Printable PDF Bible reading plans offer a convenient and readily accessible way to engage with Scripture. These downloadable plans are easily customizable, allowing you to print them out and keep them handy for reference throughout your Bible reading journey. The portability of PDF plans makes them perfect for taking with you wherever you go, whether it’s to church, a coffee shop, or simply your own personal space.

PDF plans are also highly versatile. You can choose from a wide variety of reading schedules, including one-year plans, chronological plans, and plans that focus on specific themes or books of the Bible. Many PDF plans are accompanied by helpful features such as daily reflections, study questions, and space for journaling, enhancing your Bible reading experience.

The ability to print out PDF plans also enables you to personalize your reading experience. You can highlight key passages, jot down personal insights, and create your own visual aids to enhance your understanding and retention of God’s word. Printable PDF plans are a valuable resource for individuals seeking a tangible and flexible approach to consistent Bible reading.

Resources for Bible Reading Plans

Finding the right Bible reading plan can feel overwhelming, but thankfully there are numerous resources available to guide you. Online platforms like YouVersion, Bible Gateway, and the Bible Project provide a vast selection of plans, catering to various interests and time commitments. These platforms often offer customizable options, allowing you to adjust the length of the plan, choose specific books to focus on, and even integrate daily devotionals or study materials.

Many churches and Christian organizations also create and distribute their own Bible reading plans. These plans may be tailored to specific denominations or theological perspectives, providing a valuable resource for those seeking a community-oriented approach to Scripture study. You can often find these plans on church websites, in printed materials, or through outreach programs.

Beyond online resources, consider exploring physical books and journals designed to accompany Bible reading plans. These resources often include insightful commentary, reflection prompts, and space for journaling, enriching your understanding and personal application of the text. Whether you prefer digital or physical resources, ample options exist to support your journey through the Bible.

Tips for Successful Bible Reading

Embarking on a Bible reading plan is a rewarding journey, but it requires commitment and intentionality. Here are some helpful tips to make your experience fruitful⁚

  • Start Small⁚ Begin with a manageable plan, perhaps focusing on a single book or a few chapters a day. Gradually increase your reading time as you build consistency.
  • Choose a Plan That Fits You⁚ Don’t force yourself into a plan that doesn’t align with your schedule or preferences. Explore different options until you find one that suits your needs.
  • Make It a Habit⁚ Set aside a specific time each day for Bible reading, even if it’s just for a few minutes. Consistency is key to developing a lasting routine.
  • Don’t Be Afraid to Ask Questions⁚ Scripture can be complex and challenging at times. Don’t hesitate to seek clarification from pastors, teachers, or online resources.
  • Journal Your Reflections⁚ Write down your thoughts, insights, and prayers as you read. This practice helps you engage with the text on a deeper level and track your spiritual growth.

Remember, Bible reading is a personal journey, so approach it with patience, grace, and a desire to learn from God’s Word.

In conclusion, Bible reading plans offer a structured and purposeful way to engage with God’s Word. Whether you choose a chronological, thematic, or devotional approach, these plans provide a framework for consistent study and spiritual growth. By incorporating the tips outlined above, you can maximize your experience, fostering a deeper understanding of Scripture and a closer relationship with God.

Remember that Bible reading is not merely an intellectual exercise, but a journey of faith and transformation. Allow God’s Word to challenge your perspectives, inspire your heart, and guide your steps as you navigate the complexities of life. Embrace the opportunity to encounter the living God through His written word, and let His truth shape your life in profound ways.

first aid for usmle step 2 ck pdf

First Aid for the USMLE Step 2 CK⁚ A Comprehensive Guide

This guide provides a comprehensive overview of “First Aid for the USMLE Step 2 CK,” a renowned high-yield review book designed to help students excel on the USMLE Step 2 CK exam. We will delve into its importance, key features, content coverage, study tips, and additional resources to optimize your preparation.

Introduction

The USMLE Step 2 CK is a crucial exam for medical students, assessing their clinical knowledge and problem-solving abilities. Passing this exam is a significant milestone in the journey to becoming a licensed physician. To navigate the complexities of this exam, students often rely on high-yield review materials. Among these, “First Aid for the USMLE Step 2 CK” stands out as a widely trusted and popular resource. This comprehensive guide aims to provide a detailed overview of this book, exploring its importance, key features, and how it can be effectively used to prepare for the Step 2 CK exam.

The “First Aid for the USMLE Step 2 CK” book is a culmination of the expertise of a team of authors who have dedicated themselves to guiding students towards success on the USMLE. With its user-friendly format, comprehensive coverage, and focus on high-yield topics, it has become an indispensable tool for countless medical students.

Importance of First Aid for USMLE Step 2 CK

The USMLE Step 2 CK is a challenging exam, covering a vast range of clinical topics. It requires a deep understanding of medical principles, clinical reasoning, and the ability to apply knowledge to real-world scenarios. “First Aid for the USMLE Step 2 CK” plays a crucial role in preparing students for this exam by providing them with a structured and comprehensive review of essential concepts. This book serves as a valuable tool for consolidating knowledge, identifying high-yield topics, and reinforcing important clinical skills.

The book’s emphasis on high-yield topics ensures that students focus on the most frequently tested areas, maximizing their study time. Its concise and accessible writing style, coupled with the use of mnemonics, tables, and diagrams, makes complex information easier to understand and retain; The authors’ expert knowledge and experience in medical education are evident in the book’s thoroughness and accuracy, providing students with reliable and up-to-date information.

Key Features of First Aid for USMLE Step 2 CK

“First Aid for the USMLE Step 2 CK” stands out as a comprehensive study companion, offering a unique blend of features designed to enhance understanding and facilitate efficient learning. The book’s hallmark lies in its concise, bulleted presentation, effectively distilling complex medical information into easily digestible summaries. This format allows students to quickly grasp essential concepts and review key points with ease. Furthermore, the authors incorporate numerous high-yield tables, diagrams, and flowcharts to visually represent critical information, aiding in memory retention and comprehension.

Beyond its content, the book is enriched with effective learning tools, including mnemonics and clinical vignettes. Mnemonics provide a clever and memorable way to recall important facts and associations, while clinical vignettes offer realistic scenarios that bridge the gap between theoretical knowledge and practical application. These features enhance the book’s value by promoting active learning and fostering a deeper understanding of clinical medicine.

Content Coverage

“First Aid for the USMLE Step 2 CK” provides a comprehensive overview of the core clinical disciplines tested on the USMLE Step 2 CK exam. The book meticulously covers a vast range of subjects, ensuring that students are well-equipped to tackle the diverse clinical scenarios encountered on the exam. It delves into the intricacies of clinical medicine, surgery, obstetrics and gynecology, pediatrics, psychiatry, and other essential specialties. The authors prioritize high-yield topics, ensuring that students focus on the most frequently tested concepts and clinical presentations.

The book’s content is meticulously updated to reflect the latest advancements in medical knowledge and practice. The authors incorporate the most current guidelines, diagnostic techniques, and treatment modalities, ensuring that students are equipped with the most relevant and up-to-date information. This commitment to currency ensures that the book remains a reliable resource for students preparing for the USMLE Step 2 CK exam.

Clinical Medicine

The “Clinical Medicine” section of “First Aid for the USMLE Step 2 CK” is a cornerstone of the book, providing a thorough overview of the most common and high-yield clinical conditions encountered in everyday practice. It delves into the intricate details of disease pathogenesis, clinical manifestations, diagnostic approaches, and management strategies. The authors prioritize a clear and concise writing style, making complex medical concepts readily accessible to students.

This section covers a vast array of clinical disciplines, including cardiology, pulmonology, nephrology, endocrinology, gastroenterology, neurology, rheumatology, and infectious diseases. It emphasizes the importance of recognizing clinical patterns and building illness scripts, enabling students to effectively approach patient encounters. The book also includes numerous tables, figures, and algorithms to facilitate comprehension and retention of key information. The “Clinical Medicine” section serves as a valuable resource for students seeking to solidify their understanding of common clinical conditions and develop the clinical reasoning skills necessary to excel on the USMLE Step 2 CK exam.

Surgery

The “Surgery” section of “First Aid for the USMLE Step 2 CK” is a comprehensive resource designed to equip students with the surgical knowledge and skills necessary to navigate the challenges of the USMLE Step 2 CK exam. It covers a wide range of surgical specialties, including general surgery, trauma surgery, vascular surgery, neurosurgery, orthopedic surgery, and plastic surgery. The authors present a clear and concise overview of essential surgical concepts, procedures, and management strategies.

This section emphasizes the importance of recognizing surgical emergencies, understanding pre-operative and post-operative care, and interpreting surgical pathology reports. It includes numerous high-yield surgical topics, such as abdominal emergencies, trauma management, common surgical procedures, and complications. The book also features illustrative diagrams, flowcharts, and tables to facilitate comprehension and retention of key surgical information. The “Surgery” section is an invaluable tool for students aiming to solidify their understanding of surgical principles and prepare for the challenges of the USMLE Step 2 CK exam.

Obstetrics and Gynecology

The “Obstetrics and Gynecology” section of “First Aid for the USMLE Step 2 CK” provides a concise and comprehensive overview of essential concepts and clinical scenarios frequently encountered in this field. It covers a wide range of topics, including normal pregnancy, labor and delivery, postpartum care, common gynecological conditions, and reproductive endocrinology. The authors effectively condense complex medical information into easily digestible bullet points and tables, emphasizing the high-yield knowledge crucial for the exam.

This section delves into key areas such as gestational complications, labor management, postpartum hemorrhage, contraception, infertility, and sexually transmitted infections. It also includes a thorough discussion of common gynecological procedures, such as hysterectomy and laparoscopic surgery. The book presents a clear and concise approach to understanding the physiological and pathological aspects of female reproductive health, empowering students to confidently address clinical scenarios related to obstetrics and gynecology on the USMLE Step 2 CK exam.

Pediatrics

The “Pediatrics” section of “First Aid for the USMLE Step 2 CK” is a valuable resource for students preparing for the exam, providing a comprehensive overview of common pediatric conditions and essential clinical knowledge. It presents a clear and concise outline of high-yield topics, including newborn care, childhood infections, developmental milestones, and common pediatric emergencies. The authors utilize a bulleted format, making it easy for students to absorb and retain key information.

This section delves into crucial areas such as respiratory distress in infants, febrile seizures, childhood vaccinations, and common genetic disorders. It also covers important topics like child abuse and neglect, nutritional deficiencies, and the management of chronic diseases in children. The book provides a practical and efficient approach to understanding the unique challenges and complexities of pediatric medicine, equipping students with the necessary knowledge and skills to confidently address pediatric scenarios on the USMLE Step 2 CK exam.

Psychiatry

The “Psychiatry” section in “First Aid for the USMLE Step 2 CK” is a crucial resource for understanding the complexities of mental health conditions and their management. It provides a concise and high-yield overview of common psychiatric disorders, covering essential diagnostic criteria, clinical presentations, and treatment approaches; The authors utilize a clear and accessible format, making it easy for students to grasp key concepts and clinical pearls.

This section dives into important topics such as mood disorders, anxiety disorders, schizophrenia, personality disorders, and substance abuse. It provides insights into the principles of psychotherapy, pharmacotherapy, and the ethical considerations involved in psychiatric practice. The book also covers essential aspects of mental health assessment, including the use of standardized scales and the importance of taking a comprehensive psychiatric history. Students will find this section invaluable in preparing for the psychiatric-related questions that are often encountered on the USMLE Step 2 CK exam.

Other Specialties

Beyond the core clinical areas, “First Aid for the USMLE Step 2 CK” also covers a range of other specialties, providing essential knowledge for a well-rounded understanding of clinical medicine. This section delves into topics such as dermatology, ophthalmology, otolaryngology, and emergency medicine. It offers concise summaries of common conditions, diagnostic approaches, and treatment strategies relevant to these specialties.

The authors emphasize high-yield information, focusing on the most frequently tested topics and clinical scenarios encountered in these specialties. Students will find valuable insights into conditions like skin rashes, eye infections, ear disorders, and common emergencies. The book’s presentation of key facts, mnemonics, and comparison tables makes it an effective tool for memorizing essential information and enhancing clinical reasoning skills. By exploring these additional specialties, “First Aid” helps students develop a broader understanding of patient care and the role of different medical professionals in a healthcare setting.

Study Tips and Strategies

Maximizing your success with “First Aid for the USMLE Step 2 CK” requires a strategic approach to studying. Here are some effective tips and strategies to enhance your learning experience⁚

Active Recall⁚ Instead of passively reading, use active recall techniques like flashcards and spaced repetition to test your knowledge. This method helps you retain information better.

Focus on High-Yield Topics⁚ Prioritize the topics most frequently tested on the USMLE Step 2 CK, as outlined in “First Aid.” This ensures you allocate your time effectively.

Create Study Schedules⁚ Develop a structured study plan that includes regular review sessions and breaks to avoid burnout;

Utilize Mnemonics and Tables⁚ “First Aid” provides numerous mnemonics and comparison tables to simplify memorization of key concepts. Take advantage of these learning aids.

Practice Clinical Reasoning⁚ Apply the knowledge gained from “First Aid” to real-world clinical scenarios. Analyze patient presentations, formulate differential diagnoses, and develop treatment plans.

How to Use First Aid Effectively

To maximize the benefits of “First Aid for the USMLE Step 2 CK,” it’s crucial to utilize it effectively. Consider these strategies⁚

Start Early⁚ Begin reviewing “First Aid” well in advance of your exam date to allow sufficient time for comprehensive coverage and repeated review.

Integrate with Other Resources⁚ Use “First Aid” as a foundation and supplement it with other study materials, such as question banks, lectures, and online resources.

Focus on Bulleted Points⁚ “First Aid” presents information in concise bulleted points, making it ideal for quick review. Prioritize understanding these key points.

Utilize the Index and Table of Contents⁚ Quickly locate specific topics using the comprehensive index and table of contents. This streamlines your study process.

Create Your Own Study Aids⁚ Develop personalized flashcards, summaries, and practice questions based on the information in “First Aid” to enhance your learning.

Practice Questions and Self-Assessment

While “First Aid for the USMLE Step 2 CK” provides a comprehensive review of high-yield content, it’s essential to complement your learning with practice questions and self-assessment; This approach solidifies your understanding, identifies knowledge gaps, and prepares you for the exam format.

Utilize Question Banks⁚ Leverage popular question banks like UWorld, Kaplan, or Amboss to practice applying your knowledge to clinical scenarios. These platforms offer detailed explanations and feedback.

Incorporate “First Aid” Cases⁚ “First Aid Cases for the USMLE Step 2 CK” provides textbook-style vignettes of syndromes and cases commonly tested on the exam. Utilize these cases for practice and pattern recognition.

Self-Assess Regularly⁚ After each chapter or section, conduct self-assessments using practice questions or flashcards to evaluate your comprehension and identify areas requiring further review.

Analyze Incorrect Answers⁚ When reviewing practice questions, focus on understanding why you answered incorrectly. This helps you identify weaknesses and refine your understanding of concepts.

Simulate Exam Conditions⁚ As your exam date approaches, practice under simulated exam conditions to improve your time management and stamina. This helps you adapt to the pressure of the real exam.

Additional Resources

While “First Aid for the USMLE Step 2 CK” serves as a cornerstone resource, supplementing your preparation with additional materials can enhance your understanding and broaden your knowledge base. Consider incorporating these resources into your study plan⁚

“First Aid Q&A for the USMLE Step 2 CK”⁚ This companion book provides high-yield questions and answers designed to reinforce key concepts and test your comprehension.

Online Medical Resources⁚ Utilize reputable online medical resources like UpToDate, Medscape, or the National Institutes of Health (NIH) website to access the latest medical information and clinical guidelines.

Medical Journals⁚ Stay abreast of current research and clinical advancements by reading relevant medical journals like the New England Journal of Medicine, JAMA, or The Lancet.

Medical Podcasts⁚ Listen to medical podcasts dedicated to USMLE preparation or covering relevant medical topics. These podcasts offer a convenient way to learn while commuting or engaging in other activities.

Study Groups⁚ Collaborate with fellow students in study groups to discuss concepts, practice questions, and share insights. This interactive approach can enhance learning and provide motivation.

In conclusion, “First Aid for the USMLE Step 2 CK” stands as a valuable and indispensable resource for medical students preparing for the USMLE Step 2 CK exam. Its comprehensive coverage, high-yield content, and user-friendly format make it an effective study tool for mastering clinical knowledge and skills.

By combining “First Aid” with additional resources, developing effective study strategies, and engaging in ample practice, you can maximize your chances of success on the exam. Remember, consistent effort, a well-structured study plan, and a thorough understanding of core clinical concepts will pave the way for a strong performance on the USMLE Step 2 CK.

The path to becoming a physician is demanding but rewarding. With dedication, a strategic approach, and the right resources, you can confidently navigate the challenges of the USMLE Step 2 CK and embark on your journey as a skilled and compassionate healthcare professional.

hayward de filter manual

Hayward ProGrid DE Filter Manual⁚ A Comprehensive Guide

This comprehensive guide provides a detailed overview of the Hayward ProGrid DE filter, encompassing its installation, operation, maintenance, troubleshooting, winterizing, replacement parts, and warranty information. Whether you’re a seasoned pool owner or a first-time user, this manual offers step-by-step instructions to keep your Hayward ProGrid DE filter functioning optimally and ensure crystal-clear pool water.

Introduction

The Hayward ProGrid DE filter is a high-performance filtration system designed for in-ground pools and spas. It utilizes diatomaceous earth (DE), a naturally occurring, highly porous material, to effectively remove particles as small as two microns, ensuring crystal-clear water. This manual serves as your comprehensive guide to understanding and operating your Hayward ProGrid DE filter, empowering you to maintain a sparkling clean swimming environment.

The ProGrid DE filter series boasts a vertical grid design, offering superior water clarity and efficient flow. This advanced technology enables large cleaning capacity, making it suitable for pools and spas of various sizes. The filter’s high-tech features and service-ease design ensure unparalleled filtration performance, minimizing maintenance requirements.

Within this manual, you’ll discover detailed instructions covering installation, operation, maintenance, troubleshooting, winterizing, replacement parts, and warranty information. This guide is designed to equip you with the knowledge necessary for confidently using and caring for your Hayward ProGrid DE filter.

Safety Precautions

Your safety is paramount when operating and maintaining your Hayward ProGrid DE filter. Please adhere to the following safety precautions to prevent potential hazards and ensure a safe swimming environment.

Before commencing any work on your Hayward ProGrid DE filter, always disconnect the power supply to the pump and filter system. This crucial step helps prevent electric shock and ensures a safe working environment. Never attempt to bypass or disable safety features incorporated into the filter system. These features are designed to protect you and your pool.

Always exercise caution when handling the filter system, particularly when lifting or moving heavy components. Utilize proper lifting techniques and, if necessary, seek assistance to avoid strain or injury. When working around the filter system, be mindful of sharp edges and moving parts. Wear appropriate personal protective equipment, such as gloves, safety glasses, and closed-toe shoes, to prevent cuts, scratches, or eye injuries.

Never operate the filter system with a damaged or malfunctioning component. If you notice any defects or signs of wear, immediately discontinue use and contact a qualified professional for repairs. Regularly inspect the filter system for any signs of leakage or damage. Promptly address any issues to prevent potential hazards and ensure the system’s integrity.

Installation

Installing your Hayward ProGrid DE filter requires careful attention to detail and adherence to the instructions provided in the user manual. The installation process typically involves several steps, including⁚

Choosing the Optimal Location⁚ Select a suitable location for the filter, considering factors such as proximity to the pool pump, accessibility for maintenance, and sufficient space for proper operation.

Preparing the Base⁚ Ensure a stable and level base for the filter. Use concrete or a sturdy platform to support the filter’s weight and prevent any instability.

Connecting the Plumbing⁚ Connect the plumbing lines from the pool pump to the filter inlet and from the filter outlet to the pool return line. Use appropriate pipe sizes and fittings to ensure proper flow and pressure.

Securing the Filter⁚ Secure the filter to the base using appropriate fasteners. Ensure that the filter is firmly anchored and cannot move or shift during operation.

Installing the Valve⁚ Install the multiport valve according to the manufacturer’s instructions. This valve controls the flow of water through the filter and allows for backwashing and other functions.

Filling the Filter⁚ Fill the filter tank with water using the drain plug and the manual air relief valve. Ensure that the filter tank is completely filled and that all air is purged from the system.

Testing and Adjusting⁚ After completing the installation, test the filter system for proper operation and adjust any settings as needed.

Always consult a qualified professional if you are unsure about any aspect of the installation process. Proper installation is essential for optimal filter performance and safety.

Operation

Operating your Hayward ProGrid DE filter is a straightforward process, but it’s crucial to understand the various functions and settings to ensure optimal performance. Here’s a step-by-step guide⁚

Start the Pump⁚ Begin by turning on the pool pump, allowing water to flow through the filter system.

Set the Valve to “Filter”⁚ Position the multiport valve to the “Filter” setting, allowing water to flow through the DE grid for filtration.

Monitor Pressure Gauge⁚ Keep an eye on the pressure gauge, which indicates the pressure drop across the filter. As the filter collects debris, the pressure will gradually increase.

Backwash When Needed⁚ When the pressure gauge reaches a predetermined level, typically 8-10 psi above the starting pressure, it’s time to backwash the filter. This process removes accumulated debris and restores the filter’s efficiency.

Backwash Procedure⁚ Rotate the multiport valve to the “Backwash” setting. This reverses the flow of water, flushing the debris out of the filter. Run the backwash cycle until the water exiting the filter is clear.

Rinse and Return to Filter⁚ After backwashing, rotate the valve to the “Rinse” setting for a brief period to remove any remaining debris. Finally, return the valve to the “Filter” setting for normal operation.

Add DE Powder⁚ Periodically, you’ll need to add DE powder to the filter. Follow the manufacturer’s instructions for the correct amount and procedure.

Regularly monitoring the pressure gauge and performing backwashing as needed are key to maintaining optimal filter performance and keeping your pool water crystal clear.

Maintenance

Regular maintenance is essential for keeping your Hayward ProGrid DE filter operating efficiently and extending its lifespan. Here’s a breakdown of key maintenance tasks⁚

Inspect the Filter Regularly⁚ Visually inspect the filter for any signs of damage, leaks, or wear and tear. Check for cracks, loose connections, or worn seals.

Clean the Filter Body⁚ Periodically clean the filter body, especially if you notice a buildup of debris or algae. Use a mild detergent and a soft brush to remove any contaminants.

Replace DE Powder⁚ You’ll need to replace the DE powder in the filter regularly. The frequency depends on usage and water conditions, but typically every 2-4 weeks.

Check the Pressure Gauge⁚ Monitor the pressure gauge regularly to track the filter’s performance. A significant pressure increase indicates a need for backwashing.

Backwash and Rinse⁚ Follow the backwashing and rinsing procedures outlined in the “Operation” section to remove debris and restore filter efficiency.

Inspect and Clean the Valve⁚ Periodically inspect and clean the multiport valve to ensure proper operation. Remove any debris or obstructions.

Lubricate Moving Parts⁚ Lubricate the valve stem and other moving parts with a silicone-based lubricant to prevent rust and corrosion.

By following these maintenance steps, you can ensure that your Hayward ProGrid DE filter functions reliably, providing clean and clear water for your pool enjoyment.

Troubleshooting

While the Hayward ProGrid DE filter is designed for reliable performance, you might encounter occasional issues. This section outlines common troubleshooting steps to address potential problems⁚

Low Water Flow⁚ If you notice a decrease in water flow, check for blockages in the filter, plumbing lines, or pump basket. Make sure the filter is properly primed and that the multiport valve is set to the correct position.

High Filter Pressure⁚ An increase in filter pressure indicates that the filter is dirty and needs backwashing. Follow the backwashing procedures in the “Operation” section to clean the filter media.

Leaking Filter⁚ If you detect a leak, identify the source of the leak and tighten any loose connections. If the leak persists, check for damaged seals or gaskets and replace them as needed.

Uneven DE Distribution⁚ If the DE powder is not evenly distributed, the filter might not be working efficiently. Ensure that the DE powder is properly added and that the filter is properly primed.

Excessive Air in the System⁚ Air in the system can cause noise and reduce efficiency. Make sure all air relief valves are properly opened and that the filter is properly primed.

Filter Not Backwashing Properly⁚ If the filter is not backwashing properly, check the multiport valve settings and ensure that the backwash cycle is functioning correctly.

Pump Problems⁚ If the pump is not operating correctly, it can affect filter performance. Check the pump for any issues and address them accordingly.

If you’re unable to resolve the issue after trying these troubleshooting steps, consult a qualified pool service professional for assistance.

Winterizing

Proper winterizing of your Hayward ProGrid DE filter is crucial to prevent damage from freezing temperatures. Here’s a detailed guide to winterize your filter effectively⁚

Drain the Filter⁚ Start by shutting off the pump and draining the filter completely. Open the drain plug at the bottom of the filter and allow all the water to drain out.

Remove the DE Grids⁚ Carefully remove the DE grids from the filter tank. If the grids are reusable, clean them thoroughly and store them in a dry location.

Clean the Filter Tank⁚ Thoroughly clean the inside of the filter tank using a mild detergent and a soft brush. Rinse the tank thoroughly with clean water to remove any residue.

Add Antifreeze⁚ Fill the filter tank with a non-toxic, RV-grade antifreeze solution. Ensure that the antifreeze solution reaches all parts of the filter, including the pipes and valves.

Close and Secure⁚ Reinstall the DE grids and tighten all the filter components securely. Make sure all the valves are closed tightly to prevent any leaks.

Protect the Filter⁚ Cover the filter with a protective cover or wrap it with insulation to prevent further exposure to the elements.

Inspect Regularly⁚ During the winter months, occasionally check the filter to ensure that the antifreeze remains in place and that there are no signs of leaks or damage.

By following these steps, you can safely winterize your Hayward ProGrid DE filter and protect it from the harsh winter conditions.

Replacement Parts

Over time, wear and tear can affect the performance of your Hayward ProGrid DE filter. Knowing which parts to replace and how to do so can ensure your filter remains efficient and provides clear, sparkling pool water. Here’s a guide to common replacement parts for the Hayward ProGrid DE filter⁚

DE Grids⁚ The DE grids are the heart of the filter, and they need to be replaced periodically as they become worn or damaged. Check them regularly for tears, cracks, or excessive buildup of DE powder.

O-Rings⁚ O-rings seal the filter tank and prevent leaks. If you notice any leaks or if the O-rings are cracked or brittle, replace them immediately.

Filter Body Clamp⁚ The filter body clamp secures the top and bottom halves of the filter tank. Over time, it can become loose or damaged. Replace it if necessary.

Filter Valve⁚ The filter valve controls the flow of water through the filter. If it’s malfunctioning, replace it to ensure proper operation.

Pressure Gauge⁚ The pressure gauge monitors the pressure inside the filter tank. If it’s broken or not functioning correctly, replace it.

Air Relief Valve⁚ The air relief valve releases trapped air from the filter tank. If it’s not working properly, replace it.

Always use genuine Hayward replacement parts to ensure compatibility and optimal performance. Refer to the Hayward ProGrid DE filter manual for detailed information on specific part numbers and replacement procedures.