aroma rice cooker 6 cup manual

Aroma Rice Cooker 6 Cup Manual⁚ A Comprehensive Guide

This manual provides a comprehensive guide to using your Aroma 6-Cup Rice Cooker․ It covers everything from basic operation to advanced features, including steaming, cleaning, troubleshooting, and recipe ideas․ With this manual, you’ll be able to cook perfect rice every time and explore the many possibilities of this versatile appliance․

Introduction

Welcome to the world of effortless rice cooking with the Aroma 6-Cup Rice Cooker! This user-friendly appliance is designed to simplify your life in the kitchen, allowing you to prepare delicious, fluffy rice with minimal effort․ Whether you’re a seasoned chef or a novice cook, this manual will guide you through every step of the process, from basic operation to advanced features․

The Aroma 6-Cup Rice Cooker boasts a compact design, perfect for individuals, couples, or small families․ Its versatile functionality extends beyond rice cooking, offering steaming capabilities for vegetables, fish, and more․ This manual will explore the features and benefits of your new appliance, providing detailed instructions on how to cook different types of rice, steam various dishes, and maintain your rice cooker for optimal performance․

Prepare to embark on a culinary journey with your Aroma 6-Cup Rice Cooker․ With its user-friendly interface and comprehensive features, you’ll be able to create a wide array of delicious meals with ease․ This manual serves as your comprehensive guide, empowering you to unlock the full potential of your Aroma Rice Cooker and enjoy perfect rice every time․

Features and Benefits

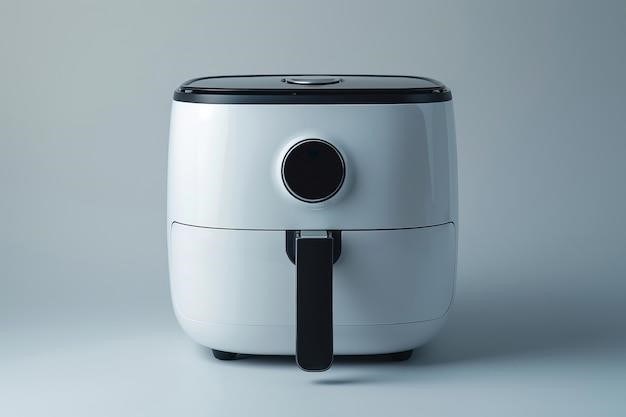
The Aroma 6-Cup Rice Cooker is packed with features that make rice cooking a breeze․ Its simple, one-touch operation ensures effortless rice preparation, while the automatic Keep Warm function keeps your meals warm and ready to serve․ The full-view tempered glass lid allows you to monitor the cooking process, ensuring perfectly cooked rice every time․

Beyond its convenience, the Aroma 6-Cup Rice Cooker offers a range of benefits․ Its nonstick removable inner pot makes cleaning a hassle-free experience, while its versatility extends beyond rice cooking․ The rice cooker doubles as a steamer, allowing you to prepare healthy and flavorful steamed vegetables, fish, and even meat․ This multi-functionality makes the Aroma 6-Cup Rice Cooker an essential addition to any kitchen․

The Aroma 6-Cup Rice Cooker is also designed with safety in mind․ Its cool-touch exterior prevents accidental burns, while its automatic shut-off feature ensures peace of mind․ With its user-friendly design, advanced features, and safety measures, the Aroma 6-Cup Rice Cooker provides a convenient and reliable solution for all your rice cooking needs․

Capacity and Yield

The Aroma 6-Cup Rice Cooker, as its name suggests, has a capacity of 6 cups of cooked rice․ This translates to a maximum uncooked rice capacity of 3 cups of white rice or 2 cups of brown rice․ The rice cooker’s capacity is ideal for individuals, small families, or meal prepping․ It’s perfect for those who enjoy having leftovers or want to prepare a larger batch of rice to enjoy throughout the week․

The rice cooker’s yield is also worth noting․ It can produce up to 6 cups of perfectly cooked white rice from 3 cups of uncooked rice, or 4 cups of cooked brown rice from 2 cups of uncooked brown rice․ This means you can easily prepare a sufficient amount of rice for your needs without the worry of over- or under-cooking․ The Aroma 6-Cup Rice Cooker’s capacity and yield are carefully designed to provide optimal results for various rice types and cooking needs․

The Aroma 6-Cup Rice Cooker comes equipped with a measuring cup specifically designed for rice․ This cup ensures accurate rice measurement, leading to perfectly cooked rice every time․ The rice cooker’s inner pot also features clearly marked lines for different rice quantities, making it easy to determine the appropriate water level for your desired rice yield․ This thoughtful design ensures that you can consistently cook delicious rice with the right amount of water, regardless of your cooking experience․

Cooking Rice

The Aroma 6-Cup Rice Cooker is designed to make cooking rice effortless and enjoyable․ Its simple one-touch operation and automatic Keep-Warm function allow you to prepare perfectly cooked rice with minimal effort․ The rice cooker is specially calibrated to prepare all varieties of rice, including long, medium, and short grains, and even the challenging whole grain brown rice, to fluffy perfection․

The Aroma 6-Cup Rice Cooker features a full-view tempered glass lid, allowing you to easily monitor your rice as it cooks․ The lid is also designed for easy cleaning and removal․ The inner pot is non-stick and removable, making cleanup a breeze․ The included rice measuring cup and serving spatula ensure convenient and efficient rice preparation․

The Aroma 6-Cup Rice Cooker offers a variety of cooking options to suit your preferences․ You can choose from different cooking times and settings to achieve your desired rice texture․ The automatic Keep-Warm function ensures that your rice stays warm and fresh for up to 2 hours after cooking, perfect for busy schedules or those who prefer to enjoy their rice at a later time․ The Aroma 6-Cup Rice Cooker is designed to provide consistent and delicious results, making it a valuable addition to any kitchen․

White Rice

Cooking white rice in your Aroma 6-Cup Rice Cooker is incredibly simple․ The process is designed to be straightforward and requires minimal effort․ Start by using the provided measuring cup to add the desired amount of white rice to the inner pot․ The maximum capacity of this unit is 3 cups of uncooked white rice, which yields 6 cups of cooked rice․ Remember to rinse the rice thoroughly to remove excess starch, then drain it completely before proceeding․

Now, fill the inner pot with water to the line that corresponds to the number of cups of uncooked rice you added․ For example, if you added 2 cups of white rice, fill the pot with water to the line marked “2․” The Aroma Rice Cooker has clearly marked water lines for easy reference․ After adding the water, gently stir the rice to ensure even distribution․

Place the inner pot back into the rice cooker, close the lid tightly, and select the “RICE” function․ Allow the rice to cook until the “COOK” light turns off, indicating that the rice is ready․ Once the cooking cycle is complete, the rice cooker will automatically switch to the “KEEP WARM” mode, keeping your rice warm and fresh for up to 2 hours․ You can now enjoy your perfectly cooked white rice, ready to be served․

Brown Rice

Cooking brown rice in your Aroma 6-Cup Rice Cooker is just as effortless as cooking white rice․ The process is very similar, with only a slight adjustment to the water ratio․ Start by using the provided measuring cup to add the desired amount of brown rice to the inner pot․ The maximum capacity of this unit is 2 cups of uncooked brown rice, which yields 4 cups of cooked brown rice․ Remember to rinse the rice thoroughly to remove excess starch, then drain it completely before proceeding․

Now, fill the inner pot with water to the line that corresponds to the number of cups of uncooked brown rice you added․ For example, if you added 1 cup of brown rice, fill the pot with water to the line marked “1․” The Aroma Rice Cooker has clearly marked water lines for easy reference․ After adding the water, gently stir the rice to ensure even distribution․

Place the inner pot back into the rice cooker, close the lid tightly, and select the “BROWN RICE” function․ The Aroma Rice Cooker automatically adjusts the cooking time to accommodate the longer cooking time required for brown rice․ Allow the rice to cook until the “COOK” light turns off, indicating that the rice is ready․ Once the cooking cycle is complete, the rice cooker will automatically switch to the “KEEP WARM” mode, keeping your rice warm and fresh for up to 2 hours․ You can now enjoy your perfectly cooked brown rice, ready to be served․

Other Grains

Your Aroma 6-Cup Rice Cooker is not limited to just rice! It can also be used to cook a variety of other grains, such as quinoa, barley, and wild rice․ These grains offer nutritional benefits and add a delicious twist to your meals․ However, each grain has its own unique cooking time and water requirements․ To ensure perfect results, consult the “Grain & Water Measurement Table” located on page 11 of your instruction manual․

This table provides specific guidelines for different grains, including the recommended amount of uncooked grain, water level, and cooking time․ For example, to cook quinoa, you would use the same amount of water as uncooked grain, and the cooking time is typically around 15-20 minutes․ For barley, you might need a slightly higher water ratio, and the cooking time might be longer․ Always refer to the table for accurate measurements and cooking times for each grain․

Once you’ve determined the correct water ratio and cooking time, the process of cooking other grains in your Aroma Rice Cooker is similar to cooking rice․ Add the desired amount of grain to the inner pot, rinse it thoroughly, and then add the appropriate amount of water according to the table․ Place the inner pot back in the rice cooker, close the lid tightly, and select the “RICE” function․ The rice cooker will automatically adjust the cooking time for different grains, ensuring optimal results․ Enjoy your flavorful and nutritious grain dishes prepared effortlessly in your Aroma Rice Cooker!

Steaming

Beyond its rice-cooking prowess, your Aroma 6-Cup Rice Cooker doubles as a convenient steamer, expanding your culinary horizons․ The included steaming tray, nestled above the inner pot, allows you to cook vegetables, fish, and even meats with minimal effort, preserving their natural flavors and nutrients․ Steaming is a healthy cooking method that doesn’t require added oils or fats, making it ideal for those seeking lighter meals․

To steam food, start by filling the inner pot with about 1 cup of water․ Place the steaming tray on top of the inner pot, ensuring it sits securely․ Add your desired food items to the steaming tray․ Vegetables should be chopped into bite-sized pieces for even cooking․ Fish and meats can be seasoned and placed on the tray as well․ Close the lid tightly and select the “STEAM” function on your rice cooker․ The steaming time will vary depending on the type and thickness of the food being steamed․ Refer to the “Steaming Guide” on page 11 of your instruction manual for suggested times for various ingredients․

Once the steaming cycle is complete, the rice cooker will automatically switch to the “Keep Warm” setting, ensuring your food stays warm until ready to serve․ To check for doneness, gently pierce the food with a fork․ If it offers little resistance, it’s cooked through․ Enjoy the delicious steamed dishes, and don’t hesitate to experiment with different combinations of ingredients for a flavorful and healthy meal․

Cleaning and Maintenance

Maintaining your Aroma 6-Cup Rice Cooker is essential for its longevity and performance․ Regular cleaning ensures that your appliance remains hygienic and functions smoothly․ Start by unplugging the rice cooker from the power outlet before cleaning․ Allow the appliance to cool completely before handling any hot surfaces․

For the inner pot, remove it from the cooker and wash it by hand with warm, soapy water․ Avoid using abrasive cleaners or scouring pads as they can damage the nonstick coating․ Rinse thoroughly and dry the inner pot completely before placing it back in the cooker․ The outer body of the rice cooker can be wiped clean with a damp cloth․ Avoid immersing the entire appliance in water․ The lid can be cleaned with a damp cloth and then dried thoroughly․

To clean the steaming tray, wash it by hand with warm, soapy water․ Rinse thoroughly and dry completely․ The measuring cup and serving spatula can also be washed by hand with warm, soapy water․ Dry them completely before storing․ Regularly check the power cord for any signs of damage․ If you notice any fraying or wear, discontinue use and contact customer support for assistance․ Store the rice cooker in a cool, dry place when not in use․ Following these simple maintenance tips will help ensure your Aroma 6-Cup Rice Cooker provides years of reliable service․

Troubleshooting

While your Aroma 6-Cup Rice Cooker is designed for effortless operation, there might be instances where you encounter minor issues․ This section provides troubleshooting tips to address common problems you might face․ If the rice cooker isn’t turning on, ensure it’s properly plugged into a working electrical outlet․ Check the power cord for any damage or loose connections․ If the rice cooker is plugged in but not functioning, the power switch might be faulty․ Consult the warranty information or contact customer support for assistance․

If the rice isn’t cooking properly, verify that you’ve used the correct water-to-rice ratio according to the instructions․ Ensure that the inner pot is properly placed within the cooker․ If the rice is undercooked, try increasing the cooking time slightly․ If the rice is overcooked, try reducing the cooking time․ If the rice is sticky or mushy, try rinsing the rice thoroughly before cooking․ If the rice is dry or hard, try adding more water during the cooking process․

If the rice cooker isn’t keeping warm, check that the Keep Warm function is activated․ Ensure that the lid is securely closed․ If the Keep Warm function is working but the rice is not staying warm, the heating element might be faulty․ Consult the warranty information or contact customer support for assistance․ In case of any persistent issues, it’s advisable to consult the user manual or contact Aroma customer support for further guidance․

Recipes

Your Aroma 6-Cup Rice Cooker isn’t limited to just rice․ It’s a versatile kitchen companion capable of preparing a variety of delicious dishes․ This section explores some recipe ideas to inspire your culinary adventures․ Beyond classic rice dishes, you can explore the world of flavorful rice bowls․ Combine cooked rice with your favorite ingredients like roasted vegetables, grilled chicken or tofu, and a vibrant sauce for a satisfying and healthy meal․ The rice cooker can also be used to create hearty stews and soups․ Experiment with different combinations of vegetables, beans, and meat or plant-based proteins for a comforting and flavorful meal․

For breakfast, try overnight oats prepared in the rice cooker․ Combine rolled oats, milk, yogurt, and your preferred toppings like fruit, nuts, or seeds in the inner pot․ Let it sit overnight in the refrigerator and enjoy a creamy and nutritious breakfast․ The rice cooker is also great for steaming vegetables․ Simply place your favorite vegetables in the steamer basket and let them cook until tender․ This method preserves the nutrients and vibrant colors of your vegetables․

For a sweet treat, try making rice pudding in your rice cooker․ Combine rice, milk, sugar, and spices like cinnamon or nutmeg in the inner pot․ Cook until the rice is tender and the pudding has thickened․ Enjoy warm or chilled with a sprinkle of cinnamon or a dollop of whipped cream․ These are just a few ideas to get you started․ The possibilities are endless with your Aroma 6-Cup Rice Cooker․ Feel free to experiment with your favorite recipes and ingredients to create delicious and satisfying meals․

Warranty and Customer Support

Aroma Housewares stands behind the quality and reliability of its products․ Your Aroma 6-Cup Rice Cooker comes with a warranty that protects you against manufacturing defects․ To understand the specific terms of your warranty, carefully review the warranty information included with your rice cooker․ It outlines the coverage period, what is covered, and how to file a claim․ Should you encounter any issues with your rice cooker, Aroma Housewares provides comprehensive customer support to assist you․ Their dedicated customer service team is readily available to answer your questions, provide troubleshooting guidance, and address any concerns you may have․

You can reach out to Aroma Housewares through various channels, including phone, email, or their website․ Their contact information is typically provided in the warranty booklet or on the product packaging․ Don’t hesitate to contact Aroma Housewares if you have any questions or require assistance․ Their customer support team is committed to providing you with a positive and helpful experience․

In addition to warranty information, Aroma Housewares also offers valuable resources on their website, such as user manuals, troubleshooting guides, and recipe ideas․ These resources can provide you with helpful information and insights to enhance your experience with your Aroma 6-Cup Rice Cooker․ By leveraging the warranty and customer support resources provided by Aroma Housewares, you can ensure a smooth and satisfying ownership experience with your rice cooker․

heartcode bls 2025 answers pdf

Heartcode BLS 2025⁚ A Comprehensive Guide

This guide provides an overview of the Heartcode BLS 2025 program, a crucial resource for healthcare professionals seeking to acquire and enhance their Basic Life Support skills. The Heartcode BLS 2025 program utilizes a personalized learning path tailored to each individual’s performance, ensuring a comprehensive and effective learning experience.

Introduction

In the realm of emergency medical care, prompt and effective action can make the difference between life and death. The American Heart Association (AHA) plays a pivotal role in equipping individuals with the knowledge and skills necessary to respond to cardiac emergencies. The AHA’s Heartcode BLS 2025 program represents a significant advancement in basic life support (BLS) training, offering a comprehensive and engaging learning experience that empowers healthcare professionals to confidently provide critical care during a medical crisis. The Heartcode BLS 2025 program is a blended learning approach, combining online modules with hands-on training, ensuring a robust understanding of BLS principles and procedures. It encompasses a wide range of essential topics, from early recognition and prevention of cardiac arrest to high-quality CPR, defibrillation, and post-cardiac arrest care. This guide delves into the key features, algorithms, and practical applications of the Heartcode BLS 2025 program, providing a comprehensive resource for those seeking to master the critical skills needed to save lives.

What is Heartcode BLS 2025?

Heartcode BLS 2025 is an innovative online learning program developed by the American Heart Association (AHA) to provide healthcare professionals with a comprehensive and interactive training experience in Basic Life Support (BLS). This program is designed to equip individuals with the essential knowledge and skills needed to respond effectively to cardiac emergencies, ensuring they can provide life-saving care when every second counts. Heartcode BLS 2025 is a cornerstone of the AHA’s commitment to promoting high-quality resuscitation training and improving patient outcomes. It seamlessly integrates online modules with hands-on training, creating a blended learning approach that caters to diverse learning styles and ensures a robust understanding of BLS principles. The program features an adaptive learning algorithm that personalizes the learning path, tailoring content to each individual’s progress and ensuring an efficient and effective learning experience.

Key Features of Heartcode BLS 2025

Heartcode BLS 2025 boasts a range of features designed to enhance the learning experience and ensure comprehensive understanding of Basic Life Support principles. These features include⁚

  • Adaptive Learning Technology⁚ Heartcode BLS 2025 leverages adaptive learning technology to personalize the learning path for each individual. This technology assesses a learner’s progress and adjusts the content and pace accordingly, ensuring a tailored and efficient learning experience.
  • Interactive Modules⁚ The program features interactive modules that engage learners through various activities, such as simulations, videos, and self-assessments. This interactive approach promotes active learning and enhances retention of key concepts.
  • Real-Time Feedback⁚ Learners receive immediate feedback on their performance throughout the program, allowing them to identify areas for improvement and reinforce their understanding. This real-time feedback fosters a continuous learning cycle and promotes mastery of BLS skills.
  • Hands-On Training⁚ The program complements the online modules with hands-on training sessions, providing learners with practical experience in applying BLS skills. This hands-on component ensures that learners can confidently and effectively perform BLS procedures in real-life scenarios.

These key features collectively contribute to making Heartcode BLS 2025 a comprehensive and engaging learning platform that empowers healthcare professionals with the knowledge and skills necessary to provide high-quality BLS care.

BLS Algorithm for Healthcare Providers

The BLS algorithm for healthcare providers, as outlined in the Heartcode BLS 2025 program, provides a structured approach to managing a cardiac arrest situation. This algorithm ensures a consistent and effective response to ensure the best possible outcome for the patient. The key steps involved in the BLS algorithm for healthcare providers are⁚

  1. Scene Safety and Assessment⁚ Prioritize safety by assessing the scene for any potential hazards and ensuring it is safe to approach the victim. This step also involves checking for responsiveness, assessing breathing, and checking for a pulse.
  2. Activation of Emergency Medical Services (EMS)⁚ Immediately activate EMS by calling 911 or your local emergency number. Provide clear and concise information about the situation, including the victim’s location and condition.
  3. High-Quality CPR⁚ If the victim is unresponsive, not breathing, and has no pulse, initiate high-quality CPR. This involves delivering chest compressions at a rate of 100-120 per minute with proper hand placement and depth. Ensure minimal interruptions during compressions.
  4. Defibrillation⁚ If an AED is available, use it as soon as possible. Follow the AED prompts to ensure proper use. Remember to clear the victim before the AED delivers a shock.
  5. Post-Cardiac Arrest Care⁚ Continue CPR and provide oxygen if available, while awaiting the arrival of EMS. Once EMS arrives, follow their instructions and assist with transferring the patient to the hospital.

The BLS algorithm serves as a guide for healthcare providers to act swiftly and efficiently in cardiac arrest situations, maximizing the chances of a positive outcome for the patient.

The Importance of Early Recognition and Prevention

Early recognition and prevention are crucial components of the chain of survival in cardiac arrest situations. Recognizing the signs and symptoms of cardiac arrest promptly can significantly improve the chances of survival. Early recognition allows for immediate action, including calling for help and initiating CPR, which can be the difference between life and death.

Prevention plays a vital role in reducing the risk of cardiac arrest. By adopting healthy lifestyle choices, individuals can significantly reduce their risk of developing heart disease, a major contributing factor to cardiac arrest. These choices include maintaining a healthy weight, engaging in regular physical activity, eating a balanced diet, managing stress effectively, and avoiding smoking.

Early recognition and prevention are not only vital for individuals but also for healthcare providers. By understanding the risk factors and recognizing the signs of cardiac arrest, healthcare professionals can proactively counsel patients on preventative measures and provide timely interventions in case of emergency.

In conclusion, the Heartcode BLS 2025 program emphasizes the importance of early recognition and prevention, highlighting the need for a proactive approach to cardiac health. By promoting awareness and encouraging healthy lifestyle choices, we can reduce the incidence of cardiac arrest and improve the chances of survival for those affected.

High-Quality CPR⁚ The Cornerstone of Resuscitation

High-quality CPR is a cornerstone of resuscitation, serving as a vital link in the chain of survival during cardiac arrest. Effective CPR involves delivering chest compressions at the correct rate and depth, minimizing interruptions, and ensuring proper hand placement. The Heartcode BLS 2025 program emphasizes the importance of delivering high-quality CPR, providing learners with the necessary knowledge and skills to perform effective compressions.

The correct rate for chest compressions for adults is at least 100 compressions per minute, with a depth of at least 2 inches. It is essential to minimize interruptions during CPR, as pauses can significantly reduce the effectiveness of resuscitation efforts. The Heartcode BLS 2025 program incorporates practical training elements that allow learners to practice their CPR skills and develop the necessary dexterity and rhythm to perform high-quality compressions.

Proper hand placement is crucial for delivering effective chest compressions. The Heartcode BLS 2025 program provides clear instructions on the correct hand placement, emphasizing the importance of compressing the center of the chest, just below the nipple line. By adhering to these guidelines, rescuers can ensure that the compressions are delivered effectively, maximizing the chances of restoring blood flow to the brain and heart.

In summary, high-quality CPR is a vital component of resuscitation, playing a crucial role in maintaining blood flow to the brain and heart during cardiac arrest. The Heartcode BLS 2025 program equips learners with the knowledge and skills necessary to perform high-quality CPR, ensuring that they are prepared to respond effectively in emergency situations.

Defibrillation⁚ Restoring a Normal Heart Rhythm

Defibrillation is a life-saving procedure used to restore a normal heart rhythm in individuals experiencing ventricular fibrillation or ventricular tachycardia, two life-threatening arrhythmias that can lead to cardiac arrest. An automated external defibrillator (AED) is a portable device that analyzes the heart’s rhythm and delivers an electrical shock if necessary, effectively resetting the heart to a regular rhythm.

The Heartcode BLS 2025 program emphasizes the importance of defibrillation in the chain of survival, highlighting its potential to significantly improve survival rates for cardiac arrest victims. The program provides learners with a thorough understanding of how AEDs work, including the steps involved in using the device and the importance of following the AED’s prompts.

Learners are instructed on proper pad placement, ensuring that the pads are placed correctly on the victim’s chest, minimizing the risk of burns or other complications. The Heartcode BLS 2025 program also covers the importance of clearing the area around the victim before delivering a shock, ensuring the safety of both the rescuer and the victim.

Defibrillation is a time-sensitive intervention, and prompt action is crucial for maximizing the chances of survival. The Heartcode BLS 2025 program highlights the importance of early defibrillation, emphasizing the need to use an AED as soon as it is available. By equipping learners with the necessary knowledge and skills, the Heartcode BLS 2025 program empowers healthcare professionals to respond effectively during cardiac arrest, increasing the likelihood of successful resuscitation.

Post-Cardiac Arrest Care⁚ Optimizing Recovery

Post-cardiac arrest care is a critical component of the chain of survival, focusing on providing optimal medical management to individuals who have experienced a cardiac arrest. This phase extends beyond the initial resuscitation efforts and aims to minimize the potential for long-term neurological damage, improve overall recovery, and enhance the chances of a favorable outcome.

The Heartcode BLS 2025 program emphasizes the importance of post-cardiac arrest care, recognizing its significance in influencing the patient’s recovery trajectory. It covers key aspects of post-cardiac arrest management, including the need for continuous monitoring of vital signs, maintenance of airway patency, and prompt administration of medications.

The program highlights the crucial role of early recognition and treatment of potential complications such as hypoxemia, hypotension, and arrhythmias. It emphasizes the importance of maintaining adequate oxygenation and perfusion while addressing any underlying causes that may contribute to these complications.

The Heartcode BLS 2025 program provides learners with a comprehensive understanding of the principles and practices of post-cardiac arrest care, equipping them with the knowledge and skills to effectively manage patients in this critical phase. By promoting a proactive approach to post-cardiac arrest care, the program aims to optimize recovery outcomes and improve the long-term well-being of patients who have experienced a cardiac arrest.

Recovery⁚ The Long Road to Full Health

The recovery process following a cardiac arrest is multifaceted and often lengthy, demanding a comprehensive approach that addresses both physical and cognitive rehabilitation. The Heartcode BLS 2025 program recognizes the importance of supporting patients throughout this journey, emphasizing the need for ongoing monitoring and interventions to optimize their overall well-being.

The program highlights the potential for neurological impairments that may arise after a cardiac arrest, emphasizing the need for early identification and intervention. It encourages healthcare professionals to recognize the signs of cognitive dysfunction, such as memory loss, confusion, or difficulty concentrating, and to initiate appropriate rehabilitation strategies.

The Heartcode BLS 2025 program underscores the importance of physical therapy in aiding recovery. It emphasizes the need for individualized exercise programs tailored to each patient’s capabilities, promoting strength, endurance, and mobility. The program also encourages the involvement of occupational therapy to address any functional limitations and enhance daily living skills.

The program emphasizes the importance of a multidisciplinary approach to recovery, involving healthcare professionals from various specialties, such as neurologists, cardiologists, and rehabilitation specialists. This collaborative effort ensures a comprehensive and coordinated plan of care, maximizing the patient’s chances of a successful and fulfilling recovery.

Hands-On Training⁚ The Importance of Practical Skills

While the Heartcode BLS 2025 online program provides a robust foundation in theoretical knowledge, it is crucial to complement this learning with hands-on training to develop and refine practical skills. This practical component is an essential aspect of the blended learning approach, ensuring that healthcare professionals are equipped to confidently and effectively apply their knowledge in real-world scenarios.

The hands-on training component typically involves simulation exercises and practice sessions led by certified instructors. Participants engage in scenarios that mimic real-life emergencies, providing them with the opportunity to practice skills such as chest compressions, airway management, and defibrillation. This hands-on experience allows them to refine their techniques, build muscle memory, and gain confidence in their abilities.

The Heartcode BLS 2025 program emphasizes the importance of feedback and debriefing during hands-on training. Instructors provide constructive criticism and guidance, helping participants identify areas for improvement and refine their skills. This iterative approach ensures that learners are continuously developing their proficiency and acquiring the necessary competence to effectively respond to cardiac emergencies.

The hands-on training component also fosters teamwork and communication skills, crucial for effective resuscitation efforts. Participants learn to work collaboratively, communicate clearly, and efficiently execute their roles within a team, ensuring a coordinated and successful response to cardiac emergencies.

Heartcode BLS 2025 Certification⁚ A Vital Credential

Upon successful completion of both the online and hands-on components of the Heartcode BLS 2025 program, participants are eligible to receive a valuable BLS certification. This certification serves as a testament to their proficiency in basic life support skills and their commitment to providing high-quality care during emergencies.

The Heartcode BLS 2025 certification is widely recognized and respected within the healthcare industry. It signifies that the certified individual possesses the necessary knowledge and skills to respond effectively to cardiac emergencies, making them a valuable asset to any healthcare team. The certification also demonstrates their commitment to continuing education and staying current with the latest guidelines and best practices in resuscitation science.

The BLS certification is often a requirement for employment in various healthcare settings, including hospitals, clinics, and emergency medical services. It also serves as a valuable asset for individuals who work in non-healthcare professions but may encounter emergencies, such as teachers, coaches, and lifeguards.

The certification process typically involves a written exam and a skills assessment. The written exam evaluates the participant’s understanding of BLS principles, algorithms, and procedures. The skills assessment assesses their ability to perform essential BLS techniques, such as chest compressions, airway management, and defibrillation.

The Heartcode BLS 2025 certification is a vital credential that validates a healthcare professional’s competence in basic life support. It is a testament to their commitment to providing high-quality care and their ability to respond effectively during emergencies.

The Heartcode BLS 2025 program provides a comprehensive and effective approach to mastering essential life-saving skills. Its personalized learning path, incorporating adaptive technology, ensures that learners acquire the knowledge and skills needed to respond confidently and effectively to cardiac emergencies. The program’s emphasis on hands-on training further solidifies participants’ understanding and competency, preparing them for real-world scenarios.

The Heartcode BLS 2025 certification, a testament to a healthcare professional’s commitment to providing high-quality care, is a vital credential that opens doors to various career opportunities and enhances professional credibility. The certification serves as a valuable asset for individuals working in various healthcare settings and other professions, demonstrating their readiness to act decisively and effectively during emergencies.

In conclusion, the Heartcode BLS 2025 program offers a comprehensive and engaging learning experience, empowering healthcare professionals and individuals from diverse backgrounds with the knowledge, skills, and certification needed to confidently respond to cardiac emergencies. By embracing the principles and techniques taught in this program, individuals contribute to a safer and healthier community.

the hungry hungry caterpillar pdf

The Very Hungry Caterpillar⁚ A Beloved Children’s Classic

The Very Hungry Caterpillar, written and illustrated by Eric Carle, has become a cherished children’s classic since its publication in 1969. Its simple yet engaging story of a hungry caterpillar’s journey from egg to butterfly has captivated generations of readers worldwide. The book’s vibrant illustrations, die-cut pages, and engaging narrative have made it a timeless favorite for both children and adults.

The Story of a Hungry Caterpillar

The Very Hungry Caterpillar tells the captivating tale of a tiny creature’s insatiable appetite and remarkable transformation. The story begins with a small egg nestled on a leaf, patiently awaiting its moment to hatch. One Sunday morning, the sun warms the egg, and out pops a tiny, very hungry caterpillar. Its hunger is the driving force of the story, leading it on a quest for food that spans an entire week.

The caterpillar’s journey begins on Monday with an apple, but its hunger remains. Each day, the caterpillar devours a new food⁚ two pears on Tuesday, three plums on Wednesday, four strawberries on Thursday, five oranges on Friday, and a huge chunk of Swiss cheese on Saturday. Despite its voracious appetite, the caterpillar remains unsatisfied. The relentless eating culminates in a disastrous Saturday, when the caterpillar consumes a piece of chocolate cake, a pickle, a slice of salami, a lollipop, a piece of cherry pie, a sausage, a cupcake, and a piece of watermelon – a feast that ultimately leads to a painful stomachache.

The caterpillar’s journey, however, is not solely about its insatiable hunger. It’s also a story of growth, change, and the beauty of transformation. After its disastrous Saturday, the caterpillar learns a valuable lesson about moderation and the consequences of overindulgence. This experience sets the stage for a new chapter in its life, one that leads to a remarkable metamorphosis.

A Tiny Caterpillar’s Journey

The Very Hungry Caterpillar’s journey is a captivating exploration of growth, change, and the cycle of life. The story follows the caterpillar’s insatiable hunger as it embarks on a week-long quest for food, consuming a different food each day. From a single apple on Monday to a diverse smorgasbord of treats on Saturday, the caterpillar’s appetite knows no bounds. This journey, however, is not just about eating; it’s also about learning and experiencing the world around it.

The caterpillar’s journey is marked by both successes and setbacks. It encounters various foods, some of which are enjoyed and others that lead to unpleasant consequences. The caterpillar’s experience with the chocolate cake, pickle, salami, and other treats on Saturday illustrates the importance of moderation and the consequences of overindulgence. This experience serves as a turning point for the caterpillar, leading it towards a period of reflection and transformation.

Throughout its journey, the caterpillar undergoes a visible change, growing larger and stronger with each passing day. This physical growth is a metaphor for the caterpillar’s internal growth and development. It learns valuable lessons about the world around it, the importance of balance, and the consequences of its actions. This journey sets the stage for a remarkable transformation, one that will ultimately lead to a beautiful new beginning.

The Caterpillar’s Feast

The Very Hungry Caterpillar’s culinary adventure is a delightful and engaging part of the story, capturing the imagination of young readers. The caterpillar’s relentless hunger drives it to consume a wide variety of foods, each presented in a visually captivating manner through Eric Carle’s signature illustrations. From a single apple on Monday to a feast of treats on Saturday, the caterpillar’s journey through the world of food is both entertaining and educational.

The book’s die-cut pages allow readers to see the caterpillar eating through each food, creating an interactive experience that further enhances the storytelling. The caterpillar’s diverse diet, ranging from juicy pears and plums to a slice of Swiss cheese and a piece of chocolate cake, introduces young readers to a variety of fruits, vegetables, and other foods, fostering a sense of curiosity about the world around them.

The caterpillar’s feast, while seemingly endless, ultimately leads to a pivotal moment in the story. The caterpillar’s overindulgence on Saturday results in a stomachache, a consequence that teaches a valuable lesson about moderation and the importance of a balanced diet; This experience sets the stage for the caterpillar’s transformation, highlighting the connection between what we eat and how we feel.

The Transformation

The Very Hungry Caterpillar’s transformation from a ravenous eater to a beautiful butterfly is a central theme in the story, symbolizing growth, change, and the wonder of nature. After indulging in a week-long feast and experiencing the consequences of overeating, the caterpillar enters a stage of metamorphosis, a process that marks a significant shift in its life cycle.

The caterpillar builds a cocoon around itself, a safe and secluded space where it undergoes a period of rest and internal change. This transformation, depicted in a series of simple yet powerful illustrations, provides a visual representation of the caterpillar’s journey from a simple creature to a more complex and beautiful being. The cocoon serves as a symbol of protection and the necessary space for growth and change.

The caterpillar’s emergence from the cocoon as a butterfly is a moment of triumph, symbolizing the completion of its life cycle and the realization of its full potential. The butterfly, with its vibrant wings and ability to fly, represents freedom, beauty, and the transformative power of nature. The caterpillar’s transformation serves as a reminder that change is a natural part of life and that even the smallest creatures can undergo remarkable transformations.

The Very Hungry Caterpillar⁚ A Symbol of Growth

Beyond its captivating narrative and vibrant illustrations, The Very Hungry Caterpillar serves as a powerful symbol of growth and transformation, resonating with both children and adults. The caterpillar’s journey from a tiny, hungry creature to a magnificent butterfly mirrors the process of human development and the challenges and triumphs that come with it.

The caterpillar’s insatiable appetite represents the boundless curiosity and thirst for knowledge that characterize childhood. Its journey through a variety of foods, from a single apple to a delicious assortment of treats, symbolizes the exploration and experimentation that are essential for learning and growth. The caterpillar’s mistakes, like overeating and experiencing a stomachache, serve as gentle reminders that learning often involves making mistakes and overcoming challenges.

The caterpillar’s transformation into a butterfly represents the potential for growth, change, and the achievement of one’s full potential. The metamorphosis signifies the transition from childhood to adulthood, a process that involves shedding old habits and embracing new possibilities. The butterfly’s wings, representing freedom and beauty, symbolize the rewards that come with embracing growth and pursuing one’s dreams.

The Very Hungry Caterpillar⁚ A Multifaceted Story

The Very Hungry Caterpillar’s enduring appeal lies in its multifaceted nature, offering layers of meaning that resonate with readers of all ages. On the surface, it’s a simple tale of a hungry caterpillar’s journey to satiate its appetite, but beneath this charming facade lies a deeper exploration of themes that transcend age and culture.

The story’s cyclical nature, from the caterpillar’s birth to its metamorphosis, reflects the natural world’s rhythms and the interconnectedness of life. The caterpillar’s journey through the week, from Monday to Sunday, provides a familiar framework for young children, introducing them to the concept of time and the passage of days. The book’s inclusion of the days of the week also subtly introduces early literacy skills, encouraging children to recognize and associate words with their respective days.

Furthermore, the story touches upon themes of perseverance, self-discovery, and the importance of patience. The caterpillar’s relentless pursuit of food, despite facing challenges and setbacks, inspires young readers to embrace resilience and strive for their goals. The caterpillar’s transformation into a beautiful butterfly serves as a reminder that growth and change are inevitable parts of life, and that patience and perseverance lead to rewarding outcomes.

The Book’s Popularity

The Very Hungry Caterpillar’s enduring popularity is a testament to its universal appeal. Since its publication in 1969, the book has become a global phenomenon, captivating readers of all ages and cultures. Its success can be attributed to several factors, including its engaging story, vibrant illustrations, and clever use of interactive elements.

The book’s simple yet engaging story of a hungry caterpillar’s journey to satiate its appetite resonates with children worldwide. The caterpillar’s relentless pursuit of food, its eventual transformation into a beautiful butterfly, and the recurring theme of days of the week provide a familiar and relatable framework for young readers. The book’s charming narrative and engaging illustrations have made it a bedtime favorite for countless children.

The Very Hungry Caterpillar’s popularity is further enhanced by its innovative use of die-cut pages, which add a playful and interactive element to the reading experience. The holes in the pages, representing the caterpillar’s appetite for various foods, engage children’s senses and encourage their participation in the story. This interactive element, combined with the book’s vibrant illustrations and engaging narrative, has made it a beloved classic for generations of readers.

The Very Hungry Caterpillar⁚ A Timeless Classic

The Very Hungry Caterpillar transcends the boundaries of time and continues to enchant readers across generations. Its simple yet powerful narrative, combined with Eric Carle’s iconic illustrations, resonates with children and adults alike, solidifying its status as a timeless classic. The book’s ability to capture the imagination of readers, regardless of their age or background, is a testament to its enduring appeal.

The Very Hungry Caterpillar’s timeless quality is evident in its universal themes of growth, transformation, and the cycle of life. The story’s simple yet profound message of metamorphosis, from a tiny caterpillar to a beautiful butterfly, speaks to the transformative power of nature and the inevitability of change. This message resonates with readers of all ages, reminding them that growth and transformation are essential parts of life’s journey.

The book’s enduring popularity is further reinforced by its timeless illustrations. Eric Carle’s signature style, characterized by bold colors, simple shapes, and a playful use of collage, creates a visually engaging and memorable experience. These illustrations are timeless in their appeal, captivating readers of all generations and cultures. The Very Hungry Caterpillar’s timeless nature, combined with its engaging story and iconic illustrations, ensures its place as a cherished classic for generations to come.

The Very Hungry Caterpillar⁚ A Cultural Icon

The Very Hungry Caterpillar has transcended its status as a beloved children’s book and evolved into a cultural icon, leaving an indelible mark on popular culture. Its iconic imagery, engaging narrative, and universal themes have permeated various aspects of society, from toys and clothing to television shows and educational materials. The book’s enduring presence in popular culture is a testament to its enduring appeal and its ability to connect with audiences across generations.

The Very Hungry Caterpillar’s iconic imagery has been widely adopted in popular culture. The caterpillar itself has become a recognizable symbol of childhood and growth, appearing on everything from clothing and toys to household items and even food products. The book’s vibrant illustrations, particularly the caterpillar’s colorful body and the die-cut pages showcasing its culinary adventures, have become instantly recognizable and widely imitated. The book’s visual impact has extended beyond the printed page, influencing everything from animated adaptations to stage productions.

The Very Hungry Caterpillar’s cultural impact is further evident in its influence on education. The book has been widely incorporated into early childhood education programs, serving as a valuable tool for teaching children about the alphabet, days of the week, and the life cycle of a butterfly. The book’s engaging story and vibrant illustrations have made it a popular choice for reading aloud in classrooms and homes, fostering a love of reading in young children. The Very Hungry Caterpillar’s cultural influence continues to grow, solidifying its status as a true icon of children’s literature.

The Very Hungry Caterpillar⁚ An Educational Tool

Beyond its captivating story and vibrant illustrations, The Very Hungry Caterpillar has proven to be a valuable educational tool for children of all ages. Its simple yet engaging narrative, combined with its rich visual elements, provides a platform for teaching a wide range of concepts, from basic literacy skills to scientific principles. Educators and parents alike have embraced The Very Hungry Caterpillar as a versatile resource for fostering learning and development in young minds.

The book’s straightforward language and repetitive phrases make it ideal for introducing young children to the joys of reading. The simple sentence structure and familiar vocabulary allow children to easily follow along and engage with the story. Additionally, the book’s colorful illustrations and die-cut pages provide visual cues that further enhance comprehension and stimulate interest. The Very Hungry Caterpillar’s emphasis on repetition and visual aids makes it a valuable tool for developing early literacy skills, such as recognizing words and understanding basic concepts. The book also serves as a springboard for introducing children to the concept of sequencing, as they follow the caterpillar’s journey through the days of the week.

Furthermore, The Very Hungry Caterpillar provides opportunities for exploring scientific concepts related to the life cycle of a butterfly. Children can learn about the stages of metamorphosis, from egg to larva to pupa to butterfly, through the book’s depiction of the caterpillar’s transformation. The book’s visual representation of these stages makes them more accessible and engaging for young learners, fostering a sense of wonder and curiosity about the natural world. The Very Hungry Caterpillar’s versatility as an educational tool makes it a valuable resource for educators and parents seeking to engage children in learning and development.

The Very Hungry Caterpillar⁚ A Legacy

The Very Hungry Caterpillar’s enduring popularity has left an undeniable mark on children’s literature, inspiring countless adaptations, spin-offs, and tributes. Its influence extends beyond the world of books, permeating various aspects of culture, from toys and clothing to educational resources and even theatrical productions. This beloved classic has become a cultural phenomenon, leaving a lasting legacy that continues to captivate and inspire generations of readers.

The book’s success has spawned a vast array of merchandise, from plush toys and board games to clothing and home decor. The iconic caterpillar has become a recognizable symbol of childhood, appearing on everything from backpacks and lunchboxes to baby clothes and nursery decorations; The Very Hungry Caterpillar’s popularity has also led to the creation of numerous spin-offs and adaptations, including books, movies, and stage productions. These adaptations have further expanded the book’s reach and ensured its continued relevance to contemporary audiences.

Beyond its commercial success, The Very Hungry Caterpillar has also played a significant role in promoting literacy and education. Its simple yet engaging narrative, coupled with its vibrant illustrations, has made it a valuable tool for introducing young children to the joys of reading. Educators and parents alike have embraced the book as a resource for fostering literacy skills, scientific curiosity, and a love of learning. The Very Hungry Caterpillar’s enduring legacy is a testament to its timeless appeal and its ability to connect with readers of all ages.

brother pt m95 manual

Brother PT-M95 Label Maker Manual⁚ A Comprehensive Guide

Welcome to the comprehensive guide for your Brother PT-M95 label maker․ This manual will walk you through every aspect of using your label maker, from initial setup to creating custom labels and troubleshooting common issues․ Whether you’re a beginner or an experienced label maker user, this guide will equip you with the knowledge and skills to maximize your PT-M95’s potential․

Introduction

The Brother PT-M95 is a user-friendly handheld label maker designed to simplify labeling tasks for both home and office use․ Its compact size and portability make it ideal for organizing and identifying various items, from files and storage bins to school supplies and gift bags․ This versatile label maker offers a range of features to customize your labels, including multiple font styles, frames, decorative patterns, and tape colors․

With its QWERTY keyboard and easy-to-read 12-character display, the PT-M95 provides an intuitive interface for creating labels․ The label maker supports Brother’s M Series tapes, available in 9mm (3/8 inch) and 12mm (1/2 inch) widths, offering flexibility in choosing the right size for your labeling needs․ The PT-M95 uses thermal transfer print technology for clear and precise printing, ensuring durable and long-lasting labels․

This manual serves as your comprehensive guide to the Brother PT-M95, covering everything from initial setup and tape installation to advanced label creation techniques and troubleshooting tips․ It is designed to empower you to fully utilize the features and capabilities of your PT-M95, enabling you to create professional-looking labels for all your organizational needs․

Key Features and Benefits

The Brother PT-M95 boasts a range of features designed to enhance your labeling experience and make organizing a breeze․ Its compact and lightweight design makes it easy to carry and use in various locations, from your home office to the classroom․ The built-in QWERTY keyboard and easy-to-read 12-character display ensure intuitive operation, allowing you to create labels quickly and effortlessly․

The PT-M95 offers a wide array of customization options to personalize your labels․ It includes a variety of font styles, frames, and decorative patterns, enabling you to create labels that reflect your style and preferences․ The label maker supports Brother’s M Series tapes, available in 9mm (3/8 inch) and 12mm (1/2 inch) widths, allowing you to choose the appropriate size for your labeling needs․ The PT-M95’s thermal transfer print technology delivers clear and precise printing, ensuring durable and long-lasting labels․

The PT-M95’s key benefits include its ease of use, versatility, and affordability․ Its intuitive design and user-friendly interface make it suitable for individuals of all skill levels․ Its wide range of customization options and compatibility with various tape sizes offer flexibility for diverse labeling applications․ The PT-M95’s competitive price point makes it an accessible and valuable tool for home and office organization․

Getting Started with Your Brother PT-M95

Before you begin using your Brother PT-M95 label maker, it’s essential to familiarize yourself with the initial setup steps․ These steps will ensure your label maker is ready to create labels efficiently and effectively․

The first step involves installing the power supply and tape cassette․ The PT-M95 can be powered by an optional AC adapter or AAA batteries (LR03)․ To use the AC adapter, insert the small plug on the adapter cord into the AC adapter socket at the top of the machine and then plug the power plug into a standard electrical socket․ When using the AC adapter, it’s recommended to also install AAA batteries for the memory backup feature․

Next, insert the tape cassette into the machine․ Ensure the end of the tape feeds under the tape guides and pulls it straight up․ If you have already installed batteries, remove them before inserting the tape cassette․ Always use genuine Brother M tapes with your PT-M95 label maker․ Remember to turn off the power before replacing batteries or tape cassettes․

Once the power supply and tape cassette are installed, you can proceed to the initial settings, which include selecting the desired language, date format, and other preferences․ Refer to the user manual for detailed instructions on how to navigate these settings and customize your PT-M95 to your liking․

Installing the Power Supply and Tape Cassette

The Brother PT-M95 can be powered by an optional AC adapter or AAA batteries (LR03)․ To use the AC adapter, follow these steps⁚

  1. Insert the small plug on the adapter cord into the AC adapter socket at the top of the machine․
  2. Insert the power plug into the nearest standard electrical socket․

For the memory backup feature, we recommend using AAA alkaline batteries (LR03) together when using the AC adapter․

To install the tape cassette, follow these steps⁚

  1. Open the tape cassette compartment by pressing the release button․
  2. Insert the tape cassette into the compartment, ensuring the tape end is facing the correct direction․
  3. Close the tape cassette compartment․
  4. Ensure the end of the tape feeds under the tape guides, pulling it straight up․ If you have already installed batteries, remove them before inserting the tape cassette․

Always use genuine Brother M tapes with your PT-M95 label maker․ Make sure the power is turned off when replacing batteries or tape cassettes․

Initial Settings

After installing the power supply and tape cassette, you’ll need to configure some initial settings on your Brother PT-M95․ These settings allow you to customize your label creation experience․

First, select your desired language․ The PT-M95 supports multiple languages, including English, Spanish, French, German, and Italian․ To choose your language, press the “Language” button and navigate through the options using the arrow keys․

Next, set the date and time․ The PT-M95 includes a built-in clock that can be used to add the current date and time to your labels․ To access the clock settings, press the “Clock” button and use the arrow keys to adjust the date and time․

You can also customize the label format․ The PT-M95 allows you to choose between different label sizes, print modes, and tape speeds․ To access the label format settings, press the “Format” button and use the arrow keys to select your preferred settings․

Finally, consider setting the print speed․ The PT-M95 offers different print speeds to suit your needs․ To adjust the print speed, press the “Speed” button and use the arrow keys to select your preferred speed․

By configuring these initial settings, you can ensure your Brother PT-M95 is ready to create labels according to your preferences․

Using the PT-M95 for Label Creation

The Brother PT-M95 label maker is designed for easy and intuitive label creation․ With its user-friendly interface and a range of features, you can create professional-looking labels for various purposes․

The PT-M95 offers a QWERTY keyboard for easy text input․ Simply press the keys to enter the desired text․ The label maker also supports accented characters, allowing you to create labels in multiple languages; To access accented characters, press the “Symbols” button and navigate through the available options․

Beyond text, you can enhance your labels with symbols․ The PT-M95 includes a library of over 200 symbols, ranging from common punctuation marks to specialized symbols for different industries․ To add symbols, press the “Symbols” button and select the desired symbol․

The PT-M95 also allows you to design your labels․ You can choose from a variety of font styles, frames, and deco patterns to personalize your labels․ To access design options, press the “Design” button and explore the available choices․

By combining text, symbols, and design elements, you can create unique and informative labels that meet your specific needs․

Entering Text and Accented Characters

The Brother PT-M95 label maker provides a straightforward method for entering text and accented characters․ Its QWERTY keyboard layout makes typing familiar and easy․ Simply press the keys corresponding to the desired letters, numbers, and symbols․ The PT-M95’s display will show the entered text as you type, allowing for easy verification․

To incorporate accented characters into your labels, the PT-M95 offers a dedicated “Symbols” button․ Pressing this button will activate a menu that displays a range of accented characters, including those commonly used in various languages․ You can then navigate through the menu using the arrow keys and select the desired accented character․ This feature ensures that your labels can include text in multiple languages, making them versatile for diverse applications․

The PT-M95’s ability to handle accented characters expands its usability, making it suitable for creating labels that include names, words, or phrases in languages with diacritical marks․ This feature enhances its usefulness for personal, professional, and educational purposes․

Adding Symbols

The Brother PT-M95 label maker goes beyond simple text by offering a diverse collection of symbols for enriching your labels․ To access these symbols, simply press the dedicated “Symbols” button on the keyboard․ This will bring up a menu filled with a wide range of symbols, from basic punctuation marks to more elaborate icons․

Navigating through the symbol menu is easy with the arrow keys․ Use the left and right arrows to scroll through different categories of symbols, while the up and down arrows allow you to select specific symbols within a category․ Once you’ve found the symbol you want, simply press the “Enter” button to add it to your label․

The PT-M95’s symbol library includes a wide selection of choices, covering categories like punctuation, mathematical symbols, arrows, geometric shapes, and even decorative elements․ This abundance of options allows you to personalize your labels and create visually appealing designs that convey information and express your style․

Designing Labels

The Brother PT-M95 offers a range of features for crafting visually appealing and informative labels․ Beyond just text and symbols, you can enhance your labels with various design elements․ The PT-M95 provides a selection of font styles, frames, and even decorative patterns to personalize your labels․ The “Font” button allows you to choose from a variety of font styles, including bold, italic, and even a few fun decorative fonts, giving you the flexibility to express your creativity․

To add a frame, press the “Frame” button․ The PT-M95 offers a variety of frame styles, from simple borders to more intricate designs․ These frames can add a touch of elegance or highlight specific information on your labels․ The “Deco” button unlocks a world of decorative patterns, adding a fun and playful touch to your labels․ These patterns can be used as accents, background elements, or even as separators for different sections of text․

The PT-M95 also allows you to adjust the size and spacing of your labels․ You can use the arrow keys to increase or decrease the font size, ensuring your text is legible and appropriate for the size of your label․ You can also use the space bar to add extra spacing between words or lines, enhancing the readability of your labels and creating a professional look․

Troubleshooting and Support

While the Brother PT-M95 is designed for user-friendliness, you might encounter occasional issues․ Common problems include tape jams, printing errors, or difficulties with label alignment․ The PT-M95’s user manual provides detailed troubleshooting steps for addressing these issues․ If you find yourself unable to resolve a problem, Brother offers a range of support resources․ Their website is a valuable resource, containing a comprehensive FAQ section, video tutorials, and downloadable user manuals․ You can also access their online support chat for instant assistance from a Brother representative․

For more personalized support, you can contact Brother’s customer service line․ Their dedicated support team is available by phone to answer your questions and guide you through troubleshooting steps․ Brother also provides a range of downloadable drivers and software updates to ensure your PT-M95 operates at its best․ These updates can address any compatibility issues or enhance the functionality of your label maker․ By leveraging the support resources available, you can ensure your Brother PT-M95 remains in optimal working condition․

The Brother PT-M95 is a versatile and user-friendly label maker that empowers you to create professional-looking labels for a variety of applications․ Its compact size and portability make it ideal for both home and office use․ With its intuitive interface, easy-to-use features, and a wide selection of tape options, the PT-M95 simplifies the process of labeling and organization․ This guide has equipped you with the knowledge and skills to effectively utilize your PT-M95, from setting it up to creating intricate designs․ By understanding the features and troubleshooting tips, you can maximize the benefits of your label maker and enhance your organizational capabilities․

Remember to refer to the Brother PT-M95 user manual for in-depth instructions and support resources․ Brother’s website provides additional information, FAQs, and downloadable resources․ With proper care and maintenance, your PT-M95 will serve as a reliable tool for labeling and organizing your belongings, creating a more efficient and organized environment․

fridays menu pdf

TGI Fridays Menu⁚ A Guide to the Classics

TGI Fridays has long been a popular destination for casual dining, offering a menu of American classics and signature dishes. The restaurant chain is known for its signature cocktails, appetizers, and entrees, making it a perfect place for a night out with friends or a family gathering. TGI Fridays is also known for its frequent promotions and specials, making it an affordable option for a delicious meal. If you’re looking for a taste of classic American cuisine, TGI Fridays is a great place to start.

Introduction

TGI Fridays, a renowned American restaurant chain, has carved a niche for itself in the casual dining scene, offering a menu brimming with familiar favorites and innovative dishes. The restaurant’s popularity stems from its welcoming ambiance, friendly service, and a menu that caters to diverse palates. Whether you’re craving juicy burgers, sizzling steaks, or comforting pasta dishes, TGI Fridays has something to satisfy your cravings.

The TGI Fridays menu is a culinary journey through American cuisine, showcasing a blend of classic dishes and modern interpretations. From the iconic Loaded Potato Skins to the mouthwatering Jack Daniel’s Glazed Ribs, the menu is a testament to the restaurant’s commitment to quality ingredients and flavorful preparations.

This comprehensive guide will delve into the intricacies of the TGI Fridays menu, providing a detailed overview of the appetizers, entrees, sides, and desserts that make this restaurant a culinary destination. We’ll also explore the restaurant’s beverage selection, special offers, nutritional information, and online ordering options, making it easier than ever to enjoy a TGI Fridays experience.

TGI Fridays Menu⁚ A Blend of American Favorites

TGI Fridays’ menu is a vibrant tapestry woven with threads of American culinary tradition. It’s a testament to the restaurant’s dedication to serving up dishes that resonate with the tastes and preferences of its patrons. The menu features a diverse array of appetizers, entrees, and sides, each crafted to evoke a sense of nostalgia and comfort.

Appetizers like the legendary Loaded Potato Skins, a symphony of creamy cheese, crispy bacon, and tangy sour cream, are a testament to the restaurant’s commitment to classic American flavors. The menu also boasts a selection of juicy burgers, each crafted with a premium beef patty and an array of toppings. From the classic Cheeseburger to the more adventurous Jack Daniel’s Glazed Burger, there’s a burger for every palate.

For those seeking a more substantial meal, TGI Fridays offers a selection of entrees that are sure to satisfy. The menu features a variety of grilled steaks, chicken dishes, and pasta creations. The signature Jack Daniel’s Glazed Ribs, with their sweet and smoky glaze, are a perennial favorite, while the Chicken and Shrimp Scampi offers a lighter and more delicate option. TGI Fridays’ menu is a celebration of American cuisine, a culinary experience that transcends generations and satisfies even the most discerning appetites.

Popular Appetizers

TGI Fridays’ appetizer menu is a symphony of flavors and textures, designed to kickstart your dining experience with a burst of excitement. The restaurant’s commitment to classic American fare is evident in its selection of crowd-pleasing appetizers, each crafted to tantalize your taste buds and set the stage for a memorable meal.

The iconic Loaded Potato Skins are a must-try, a mountain of crispy potato skins piled high with melted cheese, bacon bits, and sour cream. These golden-brown delights are a true testament to TGI Fridays’ dedication to comfort food. For those seeking a lighter option, the Spinach and Artichoke Dip is a creamy and flavorful choice, a perfect balance of savory and tangy.

Another popular appetizer is the Fridays Wings, a basket of crispy chicken wings tossed in a variety of sauces, ranging from the classic Buffalo to the more adventurous Honey BBQ. The menu also features a selection of shareable plates, like the Times Square Big Share, a feast of mozzarella sticks, onion rings, and chicken tenders, perfect for a group gathering. TGI Fridays’ appetizer menu is a culinary adventure, a delightful prelude to the main course, and a testament to the restaurant’s commitment to serving up classic American flavors.

Signature Entrees

TGI Fridays’ signature entrees are a culinary tapestry woven with American classics and innovative twists, showcasing the restaurant’s commitment to delivering satisfying and flavorful dishes. Each entree is a testament to the restaurant’s dedication to crafting memorable dining experiences, ensuring that every visit is a culinary adventure.

The Fridays Legendary Glaze Burger is a standout, a juicy all-beef patty topped with the restaurant’s signature glaze, crispy bacon, and a generous helping of melted cheese. This iconic burger is a testament to TGI Fridays’ dedication to classic American comfort food, satisfying cravings and leaving a lasting impression.

For those seeking a bolder flavor profile, the Jack Daniel’s Glaze Ribs are a must-try. These tender and flavorful ribs are slow-cooked to perfection, then glazed with a tangy and smoky Jack Daniel’s sauce. The restaurant’s commitment to quality ingredients is evident in the rich and succulent flavor of these ribs, making them a true crowd-pleaser.

TGI Fridays’ signature entrees are a testament to the restaurant’s dedication to providing a diverse and exciting dining experience, catering to a wide range of tastes and preferences. Whether you’re in the mood for a classic burger or something more adventurous, TGI Fridays’ signature entrees are sure to leave you satisfied and wanting more.

Sides and Desserts

TGI Fridays’ sides and desserts are a delightful symphony of flavors and textures, complementing the restaurant’s signature entrees and providing a satisfying ending to every meal. From classic favorites to innovative creations, TGI Fridays’ sides and desserts are a testament to the restaurant’s commitment to delivering a complete and memorable dining experience.

The restaurant’s signature Loaded Potato Skins are a crowd-pleaser, crispy potato skins piled high with melted cheese, bacon, and sour cream. These savory and indulgent sides are a perfect accompaniment to any entree, offering a comforting and satisfying experience.

For those seeking a lighter option, the restaurant’s Fresh Cut Fries are a classic choice, crispy on the outside and fluffy on the inside. These simple yet satisfying sides are the perfect complement to a variety of entrees, providing a crispy and flavorful counterpoint to any dish.

TGI Fridays’ dessert menu is a sweet escape, offering a variety of tempting treats. The restaurant’s signature Chocolate Lava Cake is a decadent indulgence, a warm chocolate cake with a molten chocolate center. This rich and satisfying dessert is the perfect ending to a delicious meal, leaving you with a lingering sweetness and a sense of contentment.

TGI Fridays’ sides and desserts are a testament to the restaurant’s commitment to providing a complete and satisfying dining experience. Whether you’re looking for a classic comfort food or something more indulgent, TGI Fridays’ sides and desserts are sure to leave you feeling satisfied and wanting more.

TGI Fridays Menu⁚ A Look at the Drinks

TGI Fridays’ drinks menu is an eclectic mix of classic cocktails, refreshing mocktails, and thirst-quenching beverages, designed to complement the restaurant’s diverse menu and create a lively atmosphere. From signature cocktails that have become synonymous with the TGI Fridays experience to refreshing mocktails and non-alcoholic beverages that cater to a wider audience, the restaurant’s drinks menu offers something for everyone.

One of TGI Fridays’ most iconic drinks is the “Long Island Iced Tea,” a potent mix of vodka, rum, tequila, gin, and triple sec, all blended with cola and lemon-lime soda. This signature cocktail is a popular choice for those looking for a strong and flavorful drink, its complex blend of flavors and high alcohol content making it a true TGI Fridays staple.

For those seeking a more refreshing option, the restaurant’s “Strawberry Lemonade” is a delightful blend of sweet and tart, combining the refreshing flavors of strawberry and lemon. This classic beverage is a perfect choice for those looking for a light and flavorful drink, its simple yet satisfying flavors making it a popular choice for any occasion.

TGI Fridays also offers a variety of non-alcoholic beverages, including sodas, juices, and bottled water. These refreshing options are perfect for those who prefer to abstain from alcohol or are looking for a simple and hydrating beverage.

TGI Fridays’ drinks menu is a testament to the restaurant’s commitment to providing a complete and satisfying dining experience. Whether you’re looking for a signature cocktail, a refreshing mocktail, or a simple beverage, TGI Fridays’ drinks menu offers a variety of options to enhance your dining experience.

TGI Fridays Menu⁚ Special Offers and Promotions

TGI Fridays is renowned for its enticing special offers and promotions, designed to make its diverse menu more accessible and appealing to a wide range of customers. The restaurant chain regularly introduces new deals and promotions, ensuring that there’s always something exciting to try and discover.

One of TGI Fridays’ most popular promotions is its “Kids Eat Free” offer, which allows children to enjoy a complimentary meal when accompanied by an adult dining at the restaurant. This family-friendly initiative makes TGI Fridays an attractive destination for families, allowing parents to enjoy a night out without breaking the bank.

TGI Fridays also frequently features “2 for 1” deals on its signature cocktails, allowing customers to enjoy two cocktails for the price of one. These enticing promotions make TGI Fridays a popular spot for social gatherings and after-work drinks, encouraging customers to indulge in their favorite cocktails without worrying about the cost.

In addition to these regular promotions, TGI Fridays often offers seasonal specials and limited-time deals, featuring new menu items or discounted prices on popular dishes. These seasonal promotions provide customers with a reason to revisit the restaurant and explore new flavors and culinary creations.

TGI Fridays’ commitment to offering special offers and promotions reflects its desire to create a welcoming and affordable dining experience for all. The restaurant chain’s diverse selection of deals and promotions ensures that there’s always something to entice customers and make their TGI Fridays experience even more enjoyable.

TGI Fridays Menu⁚ Nutritional Information

TGI Fridays understands the importance of providing customers with nutritional information to make informed choices about their meals. The restaurant chain makes it easy for customers to access this information, ensuring that they can make conscious decisions about their dietary needs and preferences.

TGI Fridays’ menu features detailed nutritional information for each dish, including calorie counts, fat content, protein, carbohydrates, and other essential nutrients. This comprehensive information empowers customers to make informed choices about their meals, whether they are following a specific diet, managing their weight, or simply seeking healthier options.

The nutritional information provided by TGI Fridays is not only helpful for individual customers but also for those who are responsible for planning group meals. This information allows caterers and event organizers to make healthier choices for their guests, ensuring that everyone can enjoy delicious food while staying mindful of their nutritional needs.

In addition to the nutritional information provided on the menu, TGI Fridays also offers a variety of healthier options, such as grilled dishes, salads, and lighter appetizers. These options allow customers to enjoy a satisfying meal without compromising their dietary goals.

By providing comprehensive nutritional information and offering healthier choices, TGI Fridays demonstrates its commitment to customer satisfaction and well-being. The restaurant chain empowers its customers to make informed decisions about their meals, ensuring that everyone can enjoy a delicious and satisfying dining experience.

TGI Fridays Menu⁚ Online Ordering and Delivery

In today’s fast-paced world, convenience is paramount. TGI Fridays recognizes this and has made it incredibly easy for customers to enjoy their favorite dishes from the comfort of their homes. Through its user-friendly online ordering platform, customers can browse the menu, customize their orders, and select their preferred delivery or pick-up time.

The online ordering system is designed with a seamless user experience in mind. Customers can effortlessly navigate the menu, view detailed descriptions of each dish, and even access nutritional information for informed choices. The platform allows customers to modify their orders, add special instructions, and track the status of their orders in real-time, ensuring a smooth and transparent experience.

TGI Fridays collaborates with reputable delivery partners to ensure timely and reliable delivery services. Customers can select their preferred delivery option based on their location and time constraints. Whether it’s a quick lunch break or a cozy dinner at home, TGI Fridays’ online ordering and delivery services make it possible to enjoy their delicious food whenever and wherever desired.

The online ordering system also offers a convenient way to place orders for special occasions or group gatherings. Customers can easily place large orders for parties, events, or corporate functions, simplifying the process and ensuring a hassle-free experience.

By embracing online ordering and delivery services, TGI Fridays demonstrates its commitment to providing a modern and convenient dining experience for its customers. The restaurant chain recognizes the evolving needs of its patrons and adapts its services to cater to their preferences, making it easier than ever to enjoy the flavors of TGI Fridays at home or on the go.

TGI Fridays Menu⁚ Finding a Location Near You

TGI Fridays prides itself on being a readily accessible dining destination, with locations spread across various cities and towns. Whether you’re craving their signature Jack Daniel’s Glaze Burgers, their legendary Loaded Potato Skins, or their extensive selection of cocktails, finding a TGI Fridays near you is a straightforward process.

The restaurant chain provides a convenient online location finder tool on its website. This tool allows customers to easily locate nearby TGI Fridays restaurants by entering their zip code or city. The interactive map displays the closest locations, their addresses, phone numbers, and operating hours, making it effortless to plan a visit.

For those who prefer a more visual approach, TGI Fridays also offers a mobile app that features a built-in location finder. The app allows customers to search for restaurants within their current location or a specific area. The app also provides details about each restaurant, including its menu, photos, and customer reviews, enabling customers to make informed choices.

Furthermore, TGI Fridays’ website provides a comprehensive list of all its locations, categorized by state and city. This list includes the address, phone number, and operating hours of each restaurant, allowing customers to browse and find the most convenient location for their dining needs.

TGI Fridays makes a conscious effort to ensure its restaurants are conveniently located, making it easy for customers to enjoy their signature dishes and vibrant atmosphere. Whether you’re looking for a quick bite, a casual dinner, or a night out with friends, TGI Fridays is always within reach, ready to provide a satisfying and memorable dining experience.

power xl air fryer manual pdf

PowerXL Air Fryer Manual PDF⁚ A Comprehensive Guide

This comprehensive guide is your ultimate resource for understanding and utilizing your PowerXL air fryer. Whether you’re a seasoned cook or a novice in the kitchen, this manual will equip you with the knowledge to unlock the full potential of your air fryer and enjoy delicious, healthy meals with ease.

Introduction

Welcome to the world of PowerXL air fryers! These versatile kitchen appliances have become increasingly popular for their ability to create crispy, delicious meals with minimal oil. Whether you’re looking to enjoy your favorite fried foods in a healthier way or explore a wide range of culinary possibilities, a PowerXL air fryer can be a game-changer in your kitchen. This manual serves as your comprehensive guide to navigating the features, functions, and operation of your PowerXL air fryer, ensuring you can utilize it effectively and safely to achieve culinary success.

The PowerXL air fryer manual is an essential companion for every owner, providing detailed instructions, safety precautions, troubleshooting tips, and even recipe ideas to help you unlock the full potential of your appliance. It’s designed to guide you through every step, from understanding the basic controls to mastering advanced cooking techniques.

This manual will empower you to confidently explore the world of air frying, enabling you to create healthy and flavorful meals that will impress your family and friends. So, let’s dive in and discover the exciting possibilities that await you with your PowerXL air fryer.

Finding the PowerXL Air Fryer Manual PDF

Locating the PowerXL air fryer manual PDF is a straightforward process, with multiple avenues available to ensure you have the information you need at your fingertips. The first step is to check the packaging your air fryer came in. Many manufacturers include a physical copy of the manual within the box, often tucked alongside the appliance itself. If you can’t find it there, don’t worry; there are several digital options.

The PowerXL website is your next stop. Many manufacturers offer downloadable manuals directly on their website, accessible through a dedicated support section or product information page. Simply search for your specific PowerXL air fryer model on the website and look for a “downloads,” “manuals,” or “support” section. You’ll likely find the PDF version of the manual readily available for download.

If you’re unable to find the manual on the PowerXL website, exploring online retailers can be helpful. Many online stores like Amazon, Walmart, and Target have product pages that include downloadable manuals for their appliances. You can search for your specific PowerXL air fryer model on these platforms and look for a “manual” or “downloads” section within the product details.

Finally, if you’re still struggling to locate the manual, reaching out to PowerXL customer support is your best option. They can provide you with a digital copy of the manual or direct you to the appropriate resources.

Downloading the Manual

Once you’ve located the PowerXL air fryer manual PDF, downloading it is a simple process that usually involves a few clicks. The specific steps may vary depending on where you found the manual. If you’re downloading from the PowerXL website, you’ll typically find a “Download” button next to the manual’s file name. Click this button, and the PDF file will start downloading to your computer. You may be prompted to choose a location on your computer to save the file.

If you’re downloading from an online retailer like Amazon, Walmart, or Target, the process is similar. Look for a “Download” button or link next to the manual’s file name; Click this button, and the PDF file will start downloading to your computer. You may be prompted to choose a location on your computer to save the file.

Once the download is complete, you can open the PDF file using a program like Adobe Acrobat Reader or any other PDF viewer installed on your computer. Now, you have a readily accessible copy of the PowerXL air fryer manual that you can refer to whenever needed. This digital copy is convenient for quick access and easy storage, ensuring you always have the instructions at your fingertips.

Understanding the Manual’s Contents

The PowerXL air fryer manual is a comprehensive guide designed to help you understand and operate your appliance safely and effectively. It’s organized into sections, each covering a specific aspect of your air fryer, making it easy to navigate and find the information you need.

Typically, the manual will start with an introduction, providing an overview of the air fryer’s features and benefits. Following this, you’ll find sections on safety precautions, which are crucial for safe operation. These sections may cover aspects like proper electrical connections, safe handling during operation, and precautions to take when cleaning.

The manual will then delve into the details of using the air fryer, explaining how to set up, preheat, and operate the appliance. It will also include a detailed explanation of the various functions and settings, such as temperature control, timer settings, and cooking presets.

Additionally, the manual will likely offer cleaning and maintenance instructions, ensuring your air fryer remains in optimal condition for years to come. You might also find sections on troubleshooting common problems, providing solutions to potential issues you might encounter while using your air fryer.

The manual’s contents are tailored to ensure you have a smooth and enjoyable experience with your PowerXL air fryer, allowing you to cook delicious, healthy meals with confidence.

Key Features and Functions

PowerXL air fryers boast a range of features designed to make cooking easier and more efficient. These features vary depending on the specific model, but common elements include⁚

  • Adjustable Temperature Control⁚ This allows you to set the optimal temperature for various dishes, from delicate snacks to crispy fried foods.
  • Timer Function⁚ The built-in timer ensures your food cooks evenly and prevents overcooking. Some models may even feature an auto-shutoff function for added safety.
  • Multiple Cooking Presets⁚ Many PowerXL air fryers offer pre-programmed settings for common foods like fries, chicken, and vegetables. These presets streamline cooking, simplifying the process and ensuring consistent results.
  • Large Capacity⁚ PowerXL air fryers come in various sizes, allowing you to cook meals for individuals or families. The larger models offer ample space to cook multiple portions or larger items like whole chickens.
  • Non-Stick Basket⁚ The non-stick coating on the basket facilitates easy food release and simplifies cleaning. This feature helps prevent food from sticking to the basket, making it easier to remove and clean after use.
  • Cool-Touch Handle⁚ The handle is designed to stay cool to the touch during operation, ensuring safe handling while the air fryer is working.
  • LED Display⁚ Many models feature an LED display that clearly shows the set temperature, cooking time, and selected function. This provides clear visual feedback during operation.

These key features and functions combine to provide a versatile and user-friendly cooking experience, making PowerXL air fryers a popular choice for modern kitchens.

Safety Precautions

Safety is paramount when using any electrical appliance, and PowerXL air fryers are no exception. Adhering to these safety precautions will ensure a safe and enjoyable cooking experience⁚

  • Read the Manual Thoroughly⁚ Before using your PowerXL air fryer for the first time, carefully read the entire manual. This will familiarize you with the appliance’s operation, safety features, and potential hazards.
  • Proper Placement⁚ Place the air fryer on a stable, heat-resistant surface, away from flammable materials and water sources. Ensure adequate ventilation around the unit.
  • Unplug When Not in Use⁚ Always unplug the air fryer from the power outlet when not in use, during cleaning, or if it malfunctions. This prevents accidental electrocution or fire hazards.
  • Supervision Required⁚ Never leave the air fryer unattended while it is operating. Closely supervise it, especially when children are present. Keep the cord away from hot surfaces to prevent overheating or damage.
  • Avoid Overfilling⁚ Do not overfill the basket with food as this can hinder air circulation and result in uneven cooking. This could also lead to excessive smoke or potential fire hazards.
  • Use Appropriate Utensils⁚ Use only heat-resistant, non-metallic utensils to handle food inside the air fryer. Avoid using sharp or abrasive tools that could damage the non-stick coating.
  • Clean Regularly⁚ Regularly clean the air fryer basket, tray, and other removable parts as instructed in the manual. This prevents buildup of grease and food particles, which can lead to fire hazards.
  • Keep Children Away⁚ Keep children away from the operating air fryer. The appliance’s hot surfaces and sharp edges pose potential risks to children.

By following these safety precautions, you can enjoy the convenience and deliciousness of your PowerXL air fryer while ensuring a safe and enjoyable cooking experience.

Cleaning and Maintenance

Maintaining a clean PowerXL air fryer is essential for optimal performance and longevity. Regular cleaning prevents buildup of grease and food particles, ensuring your appliance remains hygienic and functions smoothly.

  • Unplug and Cool Down⁚ Always unplug the air fryer from the power outlet and allow it to cool down completely before cleaning. This prevents accidental burns and ensures safe handling.
  • Remove Removable Parts⁚ Carefully detach the basket, tray, and any other removable components. These parts are usually dishwasher-safe, but check the manual for specific cleaning instructions.
  • Clean Removable Parts⁚ Wash the removable parts with warm, soapy water. If using a dishwasher, ensure the parts are placed in the top rack to avoid damage. For stubborn residue, soak the parts in warm soapy water for a few minutes before cleaning.
  • Wipe Down the Interior⁚ Use a damp cloth and mild detergent to wipe down the interior of the air fryer. Avoid using abrasive cleaners or scouring pads as they can damage the non-stick coating.
  • Clean the Exterior⁚ Wipe the exterior of the air fryer with a damp cloth. Avoid immersing the entire unit in water as it can damage electrical components.
  • Dry Thoroughly⁚ Ensure all parts are completely dry before reassembling the air fryer. This prevents moisture from accumulating and causing rust or mildew.
  • Store Properly⁚ Store the air fryer in a cool, dry place. Avoid storing it in a humid environment, as this can contribute to rust and mildew formation.
  • Regular Maintenance⁚ Follow the manufacturer’s recommendations for regular maintenance. This may include replacing filters or cleaning specific components based on usage frequency.

By following these cleaning and maintenance guidelines, you can ensure your PowerXL air fryer remains in top condition, providing years of delicious and convenient cooking.

Troubleshooting Common Problems

While PowerXL air fryers are designed for reliable performance, occasional issues may arise. This section addresses common problems and provides troubleshooting tips to help you resolve them efficiently.

  • Air Fryer Not Heating⁚ If your air fryer fails to heat up, first check if it’s plugged in securely. Ensure the power cord is connected to a working outlet and the power switch is turned on. If the issue persists, inspect the fuse or circuit breaker to ensure it hasn’t tripped. If the problem continues, it may be a faulty heating element, requiring professional repair.
  • Uneven Cooking⁚ Unevenly cooked food can result from overcrowding the basket. Ensure there’s sufficient space between food items to allow for proper air circulation. Additionally, shake or stir the food halfway through the cooking process to ensure even browning and cooking.
  • Food Not Crispy⁚ If your food isn’t getting crispy enough, try increasing the cooking temperature or extending the cooking time. Ensure the air fryer is preheated adequately before adding food. Overcrowding the basket can also hinder crispiness, so adjust food quantity accordingly.
  • Food Sticking⁚ Food sticking to the basket is a common problem. Ensure the basket is clean and lightly coated with oil or cooking spray. If the issue persists, try using parchment paper or silicone liners to prevent sticking.
  • Strange Noises⁚ If your air fryer makes unusual noises, such as clicking or rattling, check if any loose parts are present. Ensure the basket and tray are properly seated. If the noise persists, consult the user manual or contact PowerXL customer support for assistance.
  • Error Messages⁚ Modern PowerXL air fryers may display error messages on their control panels. Refer to the user manual for specific error code meanings and recommended troubleshooting steps. If you’re unable to resolve the issue, contact PowerXL customer support;

By following these troubleshooting tips, you can address common problems and keep your PowerXL air fryer functioning smoothly. If the issue persists despite your efforts, consult the user manual or reach out to PowerXL customer support for further assistance.

Recipes and Cooking Tips

The PowerXL air fryer opens a world of culinary possibilities, allowing you to create delicious and healthy meals with ease. This section provides a taste of what’s possible with your air fryer, featuring a selection of recipes and cooking tips to inspire your culinary adventures.

  • Crispy French Fries⁚ Cut potatoes into fries, toss them with oil and seasonings, then air fry at 400°F for 15-20 minutes, shaking the basket halfway through. For extra crispy fries, consider a second round of air frying at a slightly higher temperature.
  • Juicy Chicken Wings⁚ Toss chicken wings with your favorite marinade or sauce, then air fry at 400°F for 15-20 minutes, flipping halfway through. For crispy skin, consider a higher temperature for the last few minutes.
  • Tender Salmon⁚ Season salmon fillets with salt, pepper, and lemon juice, then air fry at 400°F for 10-12 minutes, depending on thickness. The air fryer’s circulating hot air creates a beautifully cooked, flaky salmon.
  • Roasted Vegetables⁚ Toss your favorite vegetables with olive oil, salt, and pepper, then air fry at 400°F for 10-15 minutes, turning halfway through. The air fryer delivers a crispy exterior and tender interior, perfect for a side dish or a healthy snack.
  • Baked Goods⁚ While not traditionally used for baking, your PowerXL air fryer can handle certain baked goods, like cookies or muffins. Use a silicone baking mold or a baking sheet and adjust cooking times based on the recipe.

These are just a few examples of the many recipes you can create with your PowerXL air fryer. Experiment with different ingredients, seasonings, and cooking times to discover your own favorites. With a little creativity, your PowerXL air fryer will become an indispensable tool in your kitchen, allowing you to enjoy delicious, healthy meals without sacrificing flavor or convenience;

Warranty Information

PowerXL stands behind the quality and performance of its products, offering a warranty that provides peace of mind and ensures your satisfaction. This warranty covers defects in materials and workmanship for a specific period, typically a year from the date of purchase. It’s important to note that the warranty may vary depending on the specific PowerXL air fryer model and where it was purchased.

To ensure you receive the full benefit of the warranty, it’s crucial to retain your original purchase receipt as proof of purchase. The warranty typically covers repairs or replacement of defective parts, excluding damage caused by misuse, neglect, or unauthorized modifications.

For more detailed information about the warranty terms and conditions, including coverage specifics, exclusions, and the process for filing a warranty claim, refer to the warranty booklet included with your PowerXL air fryer. Alternatively, you can visit the PowerXL website or contact their customer support team for assistance. By understanding the terms of the warranty, you can be confident in the reliability of your PowerXL air fryer and enjoy worry-free operation for years to come.

master forge pellet stove manual

Master Forge Pellet Stove Manual⁚ A Comprehensive Guide

This comprehensive guide provides detailed instructions and information on the Master Forge pellet stove, covering everything from safety precautions to troubleshooting․ It serves as a valuable resource for all Master Forge pellet stove owners, ensuring safe and efficient operation of their heating system․ The manual covers various aspects of the stove, including installation, operation, maintenance, and troubleshooting, with clear explanations and helpful diagrams․ Whether you are a seasoned pellet stove user or a first-time owner, this manual will empower you to maximize the benefits of your Master Forge pellet stove․

Introduction

Welcome to the world of efficient and cozy warmth with your Master Forge pellet stove․ This manual serves as your guide to understanding and operating your pellet stove safely and effectively․ It will equip you with the knowledge to maximize the benefits of your heating system, ensuring comfort and peace of mind throughout the colder months․ The Master Forge pellet stove is designed to provide clean and efficient heating for your home․ Its advanced technology allows for a consistent and reliable heat output, while its user-friendly features make it simple to operate․ Whether you are a seasoned pellet stove user or a first-time owner, this manual will help you navigate the intricacies of your Master Forge pellet stove with ease․

This manual contains detailed information on various aspects of your stove, including safety precautions, installation procedures, operation instructions, maintenance tips, and troubleshooting guidance․ By carefully reading and understanding the content of this manual, you will gain a comprehensive understanding of your pellet stove and its features․ We strongly encourage you to read this entire manual before installing and operating your Master Forge pellet stove․ Your safety and the optimal performance of your stove depend on it․

Safety Precautions

Your safety is paramount when operating any heating appliance, and your Master Forge pellet stove is no exception․ This section outlines essential safety precautions that must be strictly adhered to during installation, operation, and maintenance of your stove․ Failure to follow these instructions could result in serious injury, property damage, or even fire․ Please read and understand these safety precautions before proceeding with any activities related to your pellet stove․

Always ensure that your pellet stove is installed and operated in accordance with local building codes and regulations․ Never leave your stove unattended while it is in operation․ Keep flammable materials, such as curtains, furniture, and paper products, at a safe distance from the stove․ Use only approved pellet fuel in your stove․ Never use other types of fuel, such as wood, charcoal, or coal․ Never modify or tamper with the stove’s safety features, such as the thermostat, smoke detector, or overheat sensor․ Keep children and pets away from the stove while it is in operation․ Always use caution when handling hot surfaces․ Never touch the stove’s glass door or firebox while it is in operation․ Wear appropriate protective gear, such as gloves and eye protection, when handling hot ash or cleaning the stove․ Regularly inspect your stove for signs of damage or wear․ If you notice any issues, discontinue use and contact a qualified technician for repairs․ By following these safety precautions, you can significantly reduce the risk of accidents and ensure the safe and efficient operation of your Master Forge pellet stove․

Installation

Proper installation of your Master Forge pellet stove is crucial for ensuring safe and efficient operation․ This section provides detailed instructions to guide you through the installation process․ Before beginning, it’s essential to consult local building codes and regulations to ensure compliance․ You may need to obtain permits or inspections from your local authorities․

Choose a suitable location for your stove that meets all requirements․ Ensure adequate clearance from combustible materials, such as walls, furniture, and curtains, as specified in the stove’s manual․ The installation area should be well-ventilated with sufficient airflow․ Prepare the installation site by ensuring a level and solid foundation․ Follow the manufacturer’s instructions regarding the installation of the stove’s flue pipe, vent system, and other components․ Connect the stove to a dedicated electrical outlet with appropriate amperage․ Ensure all connections are secure and properly grounded․ Once installation is complete, conduct a thorough inspection of all components to confirm proper operation and safety․ If you encounter any difficulties or have any questions, consult a qualified professional for assistance․ Adhering to these instructions ensures a safe and efficient installation for your Master Forge pellet stove, maximizing its performance and longevity․

Operation

Operating your Master Forge pellet stove is straightforward, providing efficient and cozy warmth for your home․ This section outlines the essential steps to safely and effectively operate your stove․ Before using the stove for the first time, carefully read the user manual and familiarize yourself with its features and controls․ Ensure the stove is properly installed, and all connections are secure․ To start the stove, fill the hopper with high-quality wood pellets, leaving a small gap at the top․ Turn the stove on using the control panel and set the desired temperature․ The stove will automatically ignite the pellets and maintain the set temperature․

Monitor the stove’s operation and adjust the temperature as needed using the thermostat․ Regularly check the ash pan and clean it as necessary to prevent build-up and ensure optimal performance․ Keep the stove area clear of combustible materials and ensure proper ventilation․ For safety, never leave the stove unattended while it is operating․ Always use the stove in accordance with the manufacturer’s instructions and local regulations․ By following these guidelines, you can enjoy safe and efficient heating from your Master Forge pellet stove, creating a warm and comfortable environment in your home․

Starting the Stove

Starting your Master Forge pellet stove is a simple process․ First, ensure the stove is properly installed and connected to a power source․ Next, fill the hopper with high-quality wood pellets, leaving a small gap at the top․ The hopper should be filled to the recommended level, typically indicated by a fill line․ Avoid overfilling the hopper, as this can lead to jams and inefficient burning․ Now, locate the control panel on the stove and turn it on․ Use the thermostat to set the desired temperature․ The stove will automatically ignite the pellets and begin heating your home․ You may hear a slight humming sound as the blower fan circulates warm air․

Once the stove is ignited, it will take some time to reach the desired temperature․ The time it takes will depend on factors such as the size of your room and the ambient temperature․ Monitor the stove’s operation and adjust the temperature as needed using the thermostat․ Remember to always follow the manufacturer’s instructions in the user manual for safe and efficient operation․

Adjusting the Temperature

Maintaining a comfortable temperature in your home is crucial for your comfort and well-being․ Your Master Forge pellet stove offers precise temperature control, allowing you to adjust the heat output to suit your needs․ The stove features a thermostat that allows you to set the desired room temperature․ The thermostat works by monitoring the room temperature and automatically adjusting the pellet feed rate to maintain the set temperature․

If you find the room is too warm, simply lower the thermostat setting․ The stove will reduce the pellet feed rate, slowing down the burn and reducing heat output․ Conversely, if the room is too cool, increase the thermostat setting․ The stove will increase the pellet feed rate, accelerating the burn and producing more heat․ Remember, it takes some time for the stove to respond to changes in the thermostat setting․ Be patient and allow the stove to adjust to the new setting․ For optimal performance, it is recommended to avoid frequent temperature adjustments, as this can lead to fluctuations in room temperature and increased fuel consumption․

Fueling the Stove

Fueling your Master Forge pellet stove is a simple process, requiring minimal effort and attention․ The stove features a hopper, which acts as a reservoir for the wood pellets․ The hopper is typically large enough to hold a significant amount of pellets, allowing for extended burn times without frequent refills․ Before fueling the stove, ensure that the ash pan is clean and empty․ This will prevent ash buildup and ensure optimal air flow for efficient combustion․

To fuel the stove, simply open the hopper lid and pour in the desired amount of wood pellets․ The pellets should flow freely into the hopper and settle evenly․ Do not overfill the hopper, as this can restrict the pellet feed mechanism․ Once the hopper is filled, close the lid tightly to prevent pellets from spilling․ The stove will automatically draw pellets from the hopper as needed, feeding them into the burn pot for combustion․ The rate at which pellets are fed into the burn pot can be adjusted to control the heat output, allowing you to fine-tune the temperature to your liking․

Maintenance

Regular maintenance is crucial to ensure the longevity and optimal performance of your Master Forge pellet stove․ By adhering to a simple maintenance schedule, you can prevent potential issues and maximize the efficiency of your heating system․ One of the most important maintenance tasks is cleaning the ash pan․ The ash pan collects ash residue from the combustion process, and it’s essential to empty it regularly to prevent buildup․

A buildup of ash can restrict airflow, leading to inefficient combustion and potentially damaging the stove․ The frequency of ash pan cleaning depends on the usage of the stove, but it’s generally recommended to empty it every few days or after each burn cycle․ Additionally, it’s important to inspect the pellet feed system regularly․ This includes checking the auger for any blockages or obstructions․ A clogged auger can prevent pellets from being fed into the burn pot, resulting in a malfunctioning stove․

Regularly inspect the stove’s exterior for any signs of damage or wear and tear․ Replace any damaged or worn-out components promptly to ensure safe and efficient operation․ Finally, it’s crucial to check the vent pipe for any blockages or obstructions․ A blocked vent pipe can cause a buildup of smoke and gases, leading to potential hazards․ Regularly inspect the vent pipe and clean it as needed to maintain proper airflow․

Troubleshooting

While the Master Forge pellet stove is designed for reliable operation, occasional issues can arise․ This section provides guidance on identifying and resolving common problems, enabling you to maintain optimal stove performance․ One common issue is the stove not igniting․ This could be due to a lack of power, a faulty igniter, or a clogged pellet feed system․ Check the power supply, inspect the igniter for damage, and ensure the auger is clear of obstructions․

If the stove is not producing sufficient heat, the problem could be related to poor airflow, a clogged vent pipe, or insufficient pellet feed․ Inspect the vent pipe for any blockages, check the auger for obstructions, and adjust the pellet feed rate as needed․ If the stove is producing excessive smoke, the issue might be due to a clogged vent pipe, a malfunctioning draft inducer, or poor quality pellets․ Clean the vent pipe, inspect the draft inducer, and switch to higher quality pellets if necessary․

If the stove is making unusual noises, it could be a sign of a loose component or a problem with the motor․ Inspect the stove for loose parts, check the motor for damage, and refer to the troubleshooting section in the owner’s manual for further guidance․ In case of any persistent or complex issues, it’s recommended to consult a qualified technician to diagnose and resolve the problem․

stem activities for preschoolers pdf

STEM Activities for Preschoolers⁚ A Guide to Hands-On Learning

This guide provides a comprehensive overview of STEM activities for preschoolers, covering everything from the benefits of early STEM exposure to practical activity ideas and resources․ It emphasizes the importance of hands-on learning, exploration, and inquiry-based approaches in fostering a love for science, technology, engineering, and math in young children․

Introduction

STEM education, an acronym for science, technology, engineering, and mathematics, is gaining increasing recognition as a crucial aspect of early childhood development․ Preschoolers are naturally curious and eager to explore the world around them, making it an ideal time to introduce them to STEM concepts․ This guide will provide a comprehensive overview of STEM activities suitable for preschoolers, highlighting the benefits of early STEM exposure and offering practical ideas and resources to help parents and educators foster a love of learning in young children․

Benefits of STEM Activities for Preschoolers

Engaging preschoolers in STEM activities offers numerous benefits that extend beyond academic learning․ Exposure to STEM concepts at an early age helps develop critical thinking skills, problem-solving abilities, and creativity․ STEM activities also encourage curiosity, exploration, and a sense of wonder, fostering a lifelong love of learning․ Moreover, these activities enhance fine motor skills, hand-eye coordination, and spatial reasoning, all of which are essential for future success in various fields․

Types of STEM Activities

STEM activities encompass a wide range of engaging experiences that cater to preschoolers’ diverse learning styles․ Science activities involve exploring the natural world through observation, experimentation, and hands-on exploration․ Technology activities introduce young learners to the world of computers, coding, and robotics in a fun and interactive manner․ Engineering activities encourage problem-solving, design thinking, and building with various materials․ Math activities focus on developing number sense, counting skills, patterns, and spatial reasoning through games, puzzles, and hands-on manipulation․

Science Activities

Science activities for preschoolers are all about fostering curiosity and exploration․ Simple experiments, like making a lemon volcano or observing how water evaporates, introduce basic scientific concepts in a fun and engaging way․ Observing nature, such as collecting leaves, rocks, or insects, encourages children to ask questions and make observations․ Sensory play with water, sand, or playdough allows for exploration of textures, shapes, and properties․ These activities promote a foundation for scientific understanding and a love for the natural world․

Technology Activities

Technology activities for preschoolers focus on introducing basic concepts and building skills through play․ Interactive apps and educational games can teach simple coding, problem-solving, and logical thinking․ Creating digital art or stories on tablets or computers encourages creativity and digital literacy․ Using simple tools like cameras or recorders allows children to document their experiences and explore the world around them․ These activities foster a positive and engaging relationship with technology, preparing them for the future․

Engineering Activities

Engineering activities for preschoolers emphasize problem-solving, design, and construction․ Simple building challenges using blocks, LEGOs, or recycled materials encourage creativity and spatial reasoning․ Designing and building structures like bridges, towers, or vehicles helps children understand basic engineering concepts like stability and weight distribution․ Exploring simple machines like pulleys, levers, or wheels and axles through hands-on activities fosters an understanding of how these mechanisms work․ These activities encourage children to think critically and find creative solutions to problems․

Math Activities

Preschool math activities focus on developing foundational skills like counting, sorting, and comparing․ Simple games like matching objects, counting toys, or measuring with blocks introduce basic math concepts in a playful way․ Puzzles and shape sorters help children recognize patterns and geometric shapes․ Creating simple graphs or charts using everyday objects like buttons or blocks helps visualize data and introduce early data analysis․ These activities nurture a love for math by making it engaging and enjoyable for young learners․

STEM Activity Ideas for Preschoolers

Engage preschoolers in hands-on STEM learning with these fun and engaging activities⁚ build a tower using various materials like blocks, cardboard boxes, or recycled items; create a simple catapult using spoons, rubber bands, and a small object to launch; explore the world of coding through age-appropriate apps or online resources; and play math games like counting, sorting, or matching objects․ These activities encourage creativity, problem-solving, and critical thinking, making STEM learning enjoyable and accessible for young learners․

Simple Science Experiments

Spark curiosity and wonder with simple science experiments that are both fun and educational․ Explore the concept of density by floating objects in water, observing how different materials react․ Create a “volcano” using baking soda and vinegar, witnessing the fizzy chemical reaction․ Experiment with colors by mixing food coloring in water and observing the changes․ These experiments provide a hands-on introduction to scientific concepts while encouraging observation and questioning;

Building and Construction

Foster creativity and problem-solving skills through building and construction activities․ Provide a variety of materials like blocks, cardboard boxes, recycled materials, and construction toys․ Encourage children to design and build structures, vehicles, or imaginative creations․ Introduce simple tools like hammers, screwdrivers, and tape to enhance their building experiences․ This hands-on exploration develops spatial reasoning, fine motor skills, and a sense of accomplishment․

Coding and Robotics

Introduce preschoolers to the exciting world of coding and robotics through age-appropriate activities․ Use visual programming tools like ScratchJr or Kodable that allow children to create simple programs by dragging and dropping blocks․ Explore robot toys that respond to commands, promoting understanding of cause and effect․ Encourage children to experiment with coding to control robots and create simple animations, fostering computational thinking and problem-solving abilities․

Math Games and Puzzles

Make math fun and engaging for preschoolers with interactive games and puzzles․ Use manipulatives like blocks, counters, and play money to introduce basic math concepts like counting, sorting, and addition․ Play board games that involve number recognition, pattern matching, and spatial reasoning․ Introduce simple puzzles that require problem-solving and logical thinking․ These activities lay a strong foundation for future math skills and develop critical thinking abilities․

Resources for STEM Activities

There are numerous resources available to support STEM learning at home or in the classroom․ Online platforms like Science Buddies offer free STEM worksheets and printable activities tailored for preschoolers․ Numerous STEM activity books and kits are available for purchase, providing engaging and hands-on learning experiences․ Look for kits that focus on simple science experiments, building and construction, coding and robotics, or math games and puzzles․ Many museums, libraries, and community centers offer STEM programs and workshops designed specifically for preschoolers, providing opportunities for interactive learning and exploration․

Free STEM Worksheets and Printables

Numerous websites offer free STEM worksheets and printables specifically designed for preschoolers․ These resources can complement hands-on activities by providing opportunities for children to record observations, document their findings, and practice early literacy skills․ Look for worksheets that focus on simple science concepts, basic engineering principles, or early math skills․ These resources can be a valuable tool for extending STEM learning beyond the initial activity and encouraging children to reflect on their experiences․

STEM Activity Books and Kits

For parents and educators seeking structured STEM activities, there are a wide range of books and kits available specifically for preschoolers․ These resources often provide step-by-step instructions, engaging storylines, and necessary materials for a variety of science experiments, engineering challenges, and coding introductions․ They can be a convenient way to introduce STEM concepts in a playful and engaging manner, offering guidance and support for both adults and children․

Online STEM Resources

The internet offers a treasure trove of free and accessible STEM resources for preschoolers․ Websites like Science Buddies, for example, provide a wealth of kid-friendly science experiments, engineering challenges, and interactive activities․ Educational platforms like Khan Academy and PBS Kids also offer engaging STEM content, making it easy for parents and educators to find age-appropriate materials․ Online resources can supplement traditional activities, providing a diverse and engaging learning experience for young children․

Tips for Implementing STEM Activities

Successful STEM activities for preschoolers require a thoughtful approach․ Creating a STEM-rich environment is crucial, meaning providing access to materials like building blocks, recycled items, and natural materials․ Encourage exploration and inquiry by posing open-ended questions, allowing children to investigate their own ideas, and celebrating their discoveries․ Finally, provide opportunities for collaboration by encouraging teamwork, communication, and shared problem-solving․ By embracing these tips, you can foster a positive and engaging STEM learning experience for young learners․

Creating a STEM-Rich Environment

A STEM-rich environment for preschoolers is all about providing opportunities for exploration, discovery, and hands-on learning․ This means having readily available materials like building blocks, recycled items, natural materials like sticks and rocks, and simple tools like magnifying glasses and measuring cups․ Encourage the use of these materials for both structured activities and free play, allowing children to experiment, create, and solve problems in their own way․ A STEM-rich environment fosters curiosity and encourages young learners to engage with the world around them․

Encouraging Exploration and Inquiry

Preschoolers are naturally curious, and it’s essential to nurture that curiosity by encouraging exploration and inquiry․ Instead of providing pre-determined answers, ask open-ended questions that spark their thinking․ For example, instead of asking “What color is the sky?” ask “What do you notice about the sky today?” Let them explore materials and experiment freely, encouraging them to ask “why” and “how” questions․ This approach fosters a love for learning and helps children develop critical thinking and problem-solving skills․

Providing Opportunities for Collaboration

Collaboration is key to successful STEM learning․ Encourage preschoolers to work together on projects, share ideas, and build upon each other’s contributions․ Group activities allow children to learn from their peers, develop communication skills, and practice teamwork․ Provide opportunities for them to discuss their ideas, troubleshoot problems together, and celebrate their collective achievements․ Collaborative STEM activities foster a sense of community and empower children to see themselves as active participants in the learning process․

Introducing STEM concepts to preschoolers through engaging activities paves the way for a lifelong love of learning․ By nurturing their natural curiosity and providing hands-on experiences, we empower them to become confident problem-solvers, critical thinkers, and innovators․ Through play-based STEM activities, preschoolers develop essential skills that will serve them well in their academic and personal journeys․ Remember, fostering a love for STEM starts early, and the seeds sown in preschool can blossom into a passion for exploration and discovery that lasts a lifetime․

arnold schwarzenegger workout pdf

Arnold Schwarzenegger Workout PDF⁚ A Guide to the Oak’s Training Regime

Arnold Schwarzenegger, the iconic bodybuilder and actor, has left an enduring legacy in the world of fitness. His workout routines have inspired generations of aspiring bodybuilders and fitness enthusiasts. Many seek out Arnold Schwarzenegger workout PDFs, hoping to unlock the secrets behind his impressive physique. This guide provides an in-depth look at Arnold’s training philosophy, routines, and the principles that propelled him to greatness.

Introduction

Arnold Schwarzenegger, the epitome of bodybuilding and cinematic action, has a name synonymous with strength, dedication, and sheer will. His journey from a young, ambitious Austrian bodybuilder to a global icon is a testament to the power of hard work and unwavering commitment to fitness. His workout routines, meticulously crafted and honed over decades, have become legendary, inspiring countless individuals to pursue their own fitness goals.

The allure of “Arnold Schwarzenegger workout PDF” lies in the desire to unlock the secrets behind his sculpted physique, a physique that redefined the standards of bodybuilding. These PDFs, often circulated online, provide a glimpse into his training philosophy, the exercises he favored, and the intensity with which he approached his workouts. They represent more than just a list of exercises; they offer a window into the mindset of a true champion, a champion who pushed the boundaries of human potential.

This guide delves into the world of Arnold Schwarzenegger’s workout routines, exploring the key principles, exercises, and training philosophies that shaped his physique and his legacy. It will examine the 6-12-25 method, his full-body workout routines, and the importance of compound exercises in his training. We’ll also explore his “Blueprint to Mass” workout plan and the simple yet effective “Arnold 10/10 workout.” Finally, we’ll delve into Arnold’s philosophy on intensity, consistency, and the importance of a proper diet in achieving peak physical condition.

The 6-12-25 Method⁚ A Cornerstone of Arnold’s Training

One of the hallmarks of Arnold Schwarzenegger’s training philosophy is the 6-12-25 method, a strategic approach to muscle building that emphasizes progressive overload and targets different muscle fibers. This method involves performing three sets of exercises for a given muscle group, each set focusing on a different rep range and intensity level;

The first set involves 6-10 repetitions of a heavy compound movement, such as squats, deadlifts, or bench presses. This set focuses on building strength and engaging the fast-twitch muscle fibers responsible for explosive power. The second set consists of 8-12 repetitions with a moderate weight, aiming to increase muscle hypertrophy and further engage both fast and slow-twitch muscle fibers. The final set, with 15-25 repetitions using a lighter weight, focuses on muscle endurance and targeting the slow-twitch fibers, promoting muscle growth and definition.

Arnold Schwarzenegger’s 6-12-25 method exemplifies his belief in a multifaceted approach to bodybuilding. By incorporating a variety of rep ranges and intensities, this method aims to stimulate all aspects of muscle growth, leading to a well-rounded and powerful physique. It serves as a testament to his commitment to pushing boundaries and optimizing training for maximum results.

Arnold Schwarzenegger’s Full Body Workout Routine

Arnold Schwarzenegger’s full-body workout routine is a testament to his belief in the importance of hitting all muscle groups in each session for maximum growth and strength gains. This routine typically involves three days a week of intense training, targeting all major muscle groups in each session. It’s a high-volume approach that demands dedication and recovery.

A typical Arnold Schwarzenegger full-body workout routine might include exercises like squats, bench press, deadlifts, overhead press, rows, pull-ups, bicep curls, tricep extensions, and calf raises. The specific exercises and sets may vary depending on Arnold’s training goals and phase of his training cycle. His full-body approach is a departure from the more common body part split routines, which isolate specific muscle groups on different days.

Arnold’s full-body routine is designed to promote overall strength and muscle growth, and he believed that hitting all major muscle groups in each session was crucial for achieving his desired physique. This routine is not for the faint of heart and requires a high level of commitment and dedication. But for those willing to put in the work, it can be a powerful tool for achieving impressive results.

Chest and Back

Arnold Schwarzenegger’s chest and back workout is a cornerstone of his bodybuilding routine, focusing on building a powerful, symmetrical physique. This demanding workout typically involves a combination of compound exercises like bench press, pull-ups, and rows, which target multiple muscle groups simultaneously. These exercises are essential for building strength and size in the chest and back.

Arnold’s chest routine often includes variations of the bench press, such as the incline bench press, decline bench press, and dumbbell bench press. These exercises target different areas of the chest, ensuring a well-rounded development. He also incorporates exercises like dips and flyes for additional chest isolation. The back workout emphasizes exercises like pull-ups, rows, and lat pulldowns, which engage the lats, traps, and rhomboids, creating a wide and thick back.

Arnold’s chest and back workout is characterized by high intensity and volume. He often utilizes heavy weights and a high number of sets and reps, pushing his muscles to their limits. This demanding workout requires proper form and technique to avoid injury. However, for those willing to put in the effort, it can lead to impressive results in building a powerful and balanced chest and back.

Legs and Arms

Arnold Schwarzenegger’s leg and arm workout is a vital component of his bodybuilding regimen, focusing on building strength and size in these crucial muscle groups. Leg training is characterized by compound exercises like squats, deadlifts, and leg presses, which engage multiple muscle groups simultaneously, promoting overall lower body development. Arnold’s leg workout emphasizes building powerful legs, essential for both aesthetics and functional strength.

His arm workout targets the biceps, triceps, and forearms, focusing on exercises like barbell curls, dumbbell curls, triceps extensions, and overhead triceps press. Arnold’s arm training is known for its intensity and volume, pushing the muscles to their limits with heavy weights and high reps. This demanding routine requires proper form and technique to avoid injury, but can lead to impressive gains in both arm size and definition.

Arnold Schwarzenegger’s leg and arm workout is designed to build a well-rounded physique, focusing on both strength and aesthetics. His approach emphasizes compound exercises for overall development and isolation exercises for specific muscle groups. This meticulous training regimen requires dedication and effort, but can lead to remarkable results in building powerful and defined legs and arms, mirroring the legendary physique of Arnold himself.

The Importance of Compound Exercises in Arnold’s Training

Arnold Schwarzenegger’s training philosophy revolves heavily around the use of compound exercises. These movements, which engage multiple muscle groups simultaneously, were a cornerstone of his approach to bodybuilding, and he considered them essential for building a well-rounded physique. Compound exercises like squats, deadlifts, bench presses, and overhead presses were staples in Arnold’s routine.

Arnold believed that compound exercises were more effective than isolation exercises, which target a single muscle group, because they stimulate a greater number of muscle fibers, leading to increased muscle growth and strength. He also recognized the importance of compound exercises for building functional strength, as they mimic everyday movements and enhance overall athleticism. Arnold’s emphasis on compound exercises is evident in his legendary workout routines, which focus on building a powerful and aesthetically pleasing physique through these multi-joint movements.

The effectiveness of compound exercises in Arnold’s training demonstrates their value in achieving significant muscle growth and functional strength. By incorporating these movements into his routine, Arnold was able to build a physique that would become iconic in the world of bodybuilding. His emphasis on compound exercises remains a valuable lesson for aspiring bodybuilders and fitness enthusiasts, highlighting their importance in building a well-rounded and powerful physique.

Arnold Schwarzenegger’s Blueprint to Mass⁚ A Detailed Workout Plan

Arnold Schwarzenegger’s “Blueprint to Mass” is a comprehensive workout program that focuses on building muscle mass and strength. It emphasizes compound exercises, progressive overload, and a strict diet to achieve optimal results. This program is designed for intermediate to advanced lifters who are serious about achieving significant muscle growth. The program is divided into four phases, each lasting four weeks, with specific exercises and sets for each phase. Each phase focuses on different aspects of bodybuilding, such as building mass, cutting fat, and refining muscle definition.

The “Blueprint to Mass” program involves a rigorous workout schedule that includes six days of training per week, with different muscle groups targeted each day. Arnold’s plan includes a detailed explanation of the exercises, sets, reps, and rest periods for each phase. It also includes a comprehensive nutrition guide, emphasizing the importance of consuming a high-protein diet to support muscle growth and recovery. The program is designed to be challenging and requires a high level of commitment and dedication to achieve the desired results. By following this detailed workout plan, individuals can gain valuable insights into Arnold’s training methodology and potentially achieve significant muscle growth and strength gains.

Arnold’s “Blueprint to Mass” is a testament to his dedication to bodybuilding and provides a roadmap for individuals seeking to achieve their physique goals. The program’s focus on compound exercises, progressive overload, and a strict diet highlights the key principles that guided Arnold’s success. By incorporating these elements into their training, individuals can develop a strong and well-defined physique, drawing inspiration from Arnold’s iconic physique and legendary training regimen;

The Arnold 10/10 Workout⁚ A Simple Yet Effective Routine

The Arnold 10/10 workout is a simple yet effective routine designed for those looking to build strength and endurance. This high-intensity workout, created by personal trainer Cory Gregory, focuses on two fundamental movements⁚ squats and push-ups. The simplicity of the routine makes it accessible to individuals of all fitness levels, from beginners to seasoned athletes. The workout’s effectiveness lies in its progressive nature, as you gradually increase the number of repetitions over a set period. It’s a great way to challenge your body and build strength without requiring complex equipment or a gym membership.

The 10/10 workout is performed in a straightforward manner. You begin by doing one squat followed by one push-up. The next round consists of two squats and two push-ups, and so on, progressively increasing the reps until you reach 10 of each exercise. The goal is to complete this routine within 10 minutes, pushing yourself to your limits and building muscle endurance. This high-intensity approach allows you to maximize your workout in a limited timeframe, making it ideal for individuals with busy schedules. The 10/10 workout is a testament to the effectiveness of simple yet challenging exercises, emphasizing the importance of pushing your limits to achieve fitness goals.

The Arnold 10/10 workout is a great option for individuals seeking a quick and effective way to build strength and endurance. Its simplicity, accessibility, and high-intensity nature make it a valuable addition to any fitness routine. By incorporating this workout into your training regimen, you can challenge your body, improve your fitness levels, and experience the benefits of a simple yet effective routine.

Arnold Schwarzenegger’s Workout Philosophy⁚ A Focus on Intensity and Consistency

Arnold Schwarzenegger’s workout philosophy is deeply rooted in two fundamental principles⁚ intensity and consistency. He believed that pushing yourself beyond your limits was crucial for achieving significant gains in muscle mass and strength. His training routines were characterized by heavy weights, high repetitions, and a relentless pursuit of pushing past perceived limitations. Arnold’s focus on intensity fueled his dedication to achieving optimal results through strenuous workouts, emphasizing the importance of challenging oneself to reach new heights.

Beyond intensity, Arnold stressed the importance of consistency. He understood that achieving lasting success in bodybuilding required unwavering dedication and a disciplined approach. He adhered to a strict workout schedule, remaining committed to his training regimen even during periods of fatigue or discomfort. This unwavering commitment to consistency allowed him to build a foundation of strength and muscle mass, ultimately leading to his remarkable physique. Arnold believed that a consistent approach, coupled with intense training sessions, was the key to unlocking the full potential of the human body.

Arnold Schwarzenegger’s workout philosophy is a testament to the importance of pushing yourself beyond your limits and maintaining consistency in your fitness journey. His unwavering commitment to intensity and consistency served as the foundation for his legendary physique, inspiring generations of bodybuilders and fitness enthusiasts to pursue their own fitness goals with unwavering dedication.

Diet and Nutrition⁚ An Integral Part of Arnold’s Success

Arnold Schwarzenegger understood that a well-structured diet was as crucial as his intense training regimen. His diet was a meticulously planned strategy designed to fuel his body for maximum muscle growth and recovery. He focused on consuming a high-protein diet, prioritizing lean protein sources like chicken, fish, and beef. This protein intake was essential for muscle repair and growth, a cornerstone of his bodybuilding journey.

Carbohydrates were also a key component of Arnold’s diet, providing the energy needed for his demanding workouts. He consumed complex carbohydrates like brown rice, oats, and sweet potatoes, prioritizing those that provided sustained energy release. Arnold’s approach to carbohydrates involved a strategic balance, ensuring adequate energy for workouts while minimizing unnecessary calorie intake.

Arnold emphasized the importance of healthy fats, incorporating sources like olive oil, avocados, and nuts into his diet. These fats provided essential nutrients and contributed to hormone production, both crucial for muscle growth and overall health. Arnold’s diet was a testament to the understanding that a balanced and well-planned approach to nutrition was paramount in achieving peak physical performance and a sculpted physique.

char broil big easy instructions manual

Char-Broil Big Easy Instructions Manual

This manual provides instructions for assembling, using, and maintaining your Char-Broil Big Easy. It includes important safety precautions, cooking tips, troubleshooting advice, and frequently asked questions. Please read this manual carefully before using your Char-Broil Big Easy for the first time. Doing so will help ensure a safe and enjoyable experience.

Introduction

Welcome to the world of effortless outdoor cooking with your Char-Broil Big Easy! This innovative appliance combines the convenience of an electric roaster with the smoky flavor of a traditional smoker. Whether you’re a seasoned grilling enthusiast or a novice cook, The Big Easy offers a unique and versatile way to prepare delicious meals for your family and friends.

With its patented infrared cooking system, The Big Easy delivers consistently juicy and flavorful results, eliminating the need for messy oil-based frying. This user-friendly device features an easy-to-use temperature control system, adjustable racks, and a convenient drip tray for easy cleanup.

This manual is designed to guide you through the assembly, operation, and maintenance of your Char-Broil Big Easy. By following the instructions carefully, you’ll be able to master the art of using this versatile appliance and create mouthwatering dishes that will impress even the most discerning palates.

Safety Precautions

Your safety and the safety of those around you are of paramount importance. Before using your Char-Broil Big Easy, please read and understand the following safety precautions. Failure to follow these instructions could result in serious injury or damage to the appliance.

Always ensure the appliance is placed on a stable, level surface that can withstand its weight. Never operate the Char-Broil Big Easy near flammable materials or in enclosed spaces. Keep children and pets away from the appliance while it is in use. Never leave the Char-Broil Big Easy unattended while it is operating.

Always use the appliance with a properly grounded electrical outlet. Ensure the power cord is free from damage and never use an extension cord. Do not immerse the appliance or its power cord in water. Always unplug the appliance from the electrical outlet before cleaning or when not in use.

Exercise caution when handling the appliance, as it will be hot during and after use. Use oven mitts or pot holders to protect your hands. Never attempt to move the appliance while it is hot or operating. Allow the appliance to cool completely before cleaning or storing.

Assembly

Assembling your Char-Broil Big Easy is a straightforward process. The instructions provided in the manual will guide you through each step, ensuring proper assembly. Before you begin, gather all the necessary components, including the base, cooking chamber, lid, drip pan, and any other accessories.

Start by carefully removing all components from the packaging and laying them out in a clear area. Ensure the surface is clean and free of debris. Begin by assembling the base, following the instructions provided. Attach the cooking chamber securely to the base, ensuring it is properly aligned.

Next, attach the lid to the cooking chamber, making sure it fits securely. Attach the drip pan to the bottom of the cooking chamber, as this will collect any drippings during cooking. Once all components are assembled, inspect the appliance for any loose parts or misalignments. If necessary, tighten any loose screws or adjust the components until everything is secure.

Now that your Char-Broil Big Easy is assembled, you are ready to begin preheating and cooking your favorite dishes.

Using the Char-Broil Big Easy

The Char-Broil Big Easy is designed to make cooking easy and enjoyable. Whether you’re roasting a turkey, smoking ribs, or grilling vegetables, the Big Easy offers a versatile and convenient cooking experience. This section will guide you through the basics of using your Char-Broil Big Easy, including preheating, cooking times, and temperature control.

The Big Easy’s infrared cooking system delivers even heat distribution, ensuring perfectly cooked food every time. Its user-friendly design makes it easy to adjust the temperature and cooking time to suit your preferences. The Big Easy also features a built-in thermometer, allowing you to monitor the internal temperature of your food for precise cooking results.

Before you start cooking, make sure to read the instructions in the manual carefully. This will help you understand the proper use of the Big Easy and ensure safe operation. With a little practice, you’ll be able to master the art of cooking with your Char-Broil Big Easy and create delicious meals that will impress your family and friends.

Preheating

Preheating your Char-Broil Big Easy is crucial for achieving optimal cooking results. Proper preheating ensures that the cooking chamber reaches the desired temperature, allowing for even heat distribution and faster cooking times. Before you start cooking, ensure that the propane tank is connected securely and that the gas valve is closed.

Turn the control knob to the “High” setting and ignite the burner using the igniter button. Allow the Big Easy to preheat for approximately 15-20 minutes. The preheating time may vary depending on the ambient temperature and the size of the cooking chamber. Once the Big Easy has reached the desired temperature, you can start cooking.

During preheating, you can monitor the temperature using the built-in thermometer. The ideal temperature for roasting and smoking is around 250°F (121°C), while for grilling, you can adjust the temperature to a higher setting. Once the temperature stabilizes, you are ready to start cooking your favorite dishes;

Cooking Times

The Char-Broil Big Easy offers a wide range of cooking possibilities, from roasting and smoking to grilling. To ensure perfect results, understanding the appropriate cooking times for various foods is essential. The Big Easy’s infrared cooking system helps to cook food evenly and efficiently, but it’s still important to adjust cooking times based on the size and thickness of the food.

As a general guideline, poultry, like turkey, requires approximately 10 minutes per pound of cooking time. However, it’s always best to use a meat thermometer to determine when the food is cooked through. For example, turkey should reach an internal temperature of 165°F (74°C) to ensure it’s safe to eat.

Other types of meat, like pork, beef, and chicken, have different cooking times based on their size and thickness. Consult a reliable recipe or online resources for specific cooking times for your chosen dish. Remember, it’s always better to err on the side of caution and ensure the food is cooked to the proper internal temperature.

Temperature Control

Maintaining the correct temperature is crucial for achieving delicious and safe results when using the Char-Broil Big Easy. The Big Easy’s infrared cooking system provides precise temperature control, allowing you to cook a variety of dishes to perfection. The adjustable temperature dial on the Big Easy allows you to select the ideal cooking temperature for your desired dish.

When preheating the Big Easy, it’s important to allow sufficient time for the cooking chamber to reach the desired temperature. This ensures even heat distribution and optimal cooking performance. Once the Big Easy has reached the desired temperature, you can place your food inside the cooking chamber and continue monitoring the temperature throughout the cooking process.

To ensure accurate temperature readings, consider using a digital meat thermometer. Insert the thermometer probe into the thickest part of the food, avoiding contact with bones, to obtain an accurate internal temperature reading. This will help you determine when the food is cooked to the desired level of doneness.

Cleaning and Maintenance

Regular cleaning and maintenance are essential for ensuring the longevity and optimal performance of your Char-Broil Big Easy. After each use, allow the appliance to cool down completely before cleaning.

To clean the cooking chamber, remove the cooking basket and racks. Use a soft-bristled brush to remove any food debris or grease buildup. For stubborn stains, you can use a mild dish soap and warm water. Rinse thoroughly and dry completely before reassembling the cooking chamber.

The exterior surfaces of the Big Easy can be cleaned using a damp cloth and mild dish soap. Avoid using abrasive cleaners or scouring pads, as these can damage the finish. After cleaning, wipe down all surfaces with a dry cloth to prevent water spots.

It’s important to check the propane tank hose and regulator for any signs of damage or leaks before each use. If you notice any damage, replace the hose or regulator immediately. Store the Big Easy in a dry, clean location when not in use.

Troubleshooting

While the Char-Broil Big Easy is designed for ease of use, occasional issues can arise. Here are some common troubleshooting tips⁚

  • The Big Easy won’t ignite⁚ Ensure the propane tank is full and the valve is open. Check the gas line for any kinks or blockages. If the igniter isn’t working, replace the battery in the igniter module.
  • The Big Easy won’t reach the desired temperature⁚ Make sure the propane tank is full and the valve is open. Check the burner for any debris or obstructions. Adjust the temperature control knob to the desired setting.
  • Food is not cooking evenly⁚ Ensure the cooking basket is properly positioned in the cooking chamber. Rotate the food halfway through the cooking process to ensure even cooking.
  • The Big Easy is leaking propane⁚ Immediately turn off the propane tank valve and check for any leaks. If you find a leak, replace the hose or regulator.

If you are unable to resolve the issue, contact Char-Broil customer service for assistance.

Recipes

The Char-Broil Big Easy is a versatile appliance that can be used to cook a wide variety of dishes. Here are a few recipe ideas to get you started⁚

  • Roasted Chicken⁚ Season a whole chicken with your favorite herbs and spices, and place it in the cooking basket. Roast until the internal temperature reaches 165°F.
  • Smoked Ribs⁚ Rub ribs with a dry rub and smoke them in the Big Easy until they are tender and juicy.
  • Roasted Vegetables⁚ Toss your favorite vegetables with olive oil, salt, and pepper, and roast them in the Big Easy until they are tender and slightly caramelized.
  • Fried Turkey⁚ The Big Easy can also be used to fry a turkey. Simply follow the instructions in the manual for frying a turkey.

For more recipe ideas, visit the Char-Broil website or search online for “Char-Broil Big Easy recipes.”

Accessories

Char-Broil offers a variety of accessories for the Big Easy, designed to enhance your cooking experience and expand your culinary possibilities. These accessories can help you cook different types of food, improve efficiency, and make cleanup easier.

  • Roasting Rack⁚ This accessory elevates food in the cooking chamber, allowing for even heat distribution and crispier results. It’s especially useful for roasting poultry and larger cuts of meat.
  • Drip Pan⁚ This pan catches drippings from the food, preventing flare-ups and making cleanup a breeze. It’s also great for collecting flavorful drippings that can be used to create sauces and gravies.
  • Smoker Box⁚ For those who enjoy the smoky flavor of wood-fired cooking, a smoker box allows you to add wood chips or pellets to the Big Easy. Experiment with different wood types to achieve your desired smoky flavor profile.
  • Turkey Fryer Basket⁚ This specialized basket is designed for frying turkeys in the Big Easy. It ensures even cooking and makes it easy to remove the turkey from the oil.

Check the Char-Broil website or your local retailer for a complete list of accessories available for the Big Easy.

Warranty

Char-Broil stands behind the quality and durability of its products. Your Char-Broil Big Easy comes with a limited warranty that covers defects in materials and workmanship. The specific terms and conditions of the warranty vary depending on the model and purchase location. To find out more about the warranty coverage for your specific Big Easy, refer to the warranty information included in the product packaging or visit the Char-Broil website.

The warranty typically covers the product for a certain period of time from the date of purchase. It’s important to note that the warranty may not cover damage caused by misuse, abuse, or neglect. Keep your original purchase receipt and registration information in a safe place for easy access in case you need to make a warranty claim.

If you experience any issues with your Char-Broil Big Easy within the warranty period, contact Char-Broil customer service for assistance. They will be happy to help you resolve any problems and ensure your satisfaction with your Big Easy.

Contact Information

If you have any questions or concerns about your Char-Broil Big Easy, you can reach out to their customer service team for assistance. They are available to answer your questions, provide troubleshooting tips, and help you with any warranty-related issues.

To contact Char-Broil customer service, you can call their toll-free number, send an email, or visit their website. You can find their contact information on their website or in the product packaging.

When contacting Char-Broil customer service, be sure to have your product model number and purchase date readily available. This will help them quickly and efficiently assist you with your request. Char-Broil is committed to providing excellent customer service and ensuring your satisfaction with their products.

Frequently Asked Questions

Here are some common questions that customers have about the Char-Broil Big Easy. If you have any other questions, please refer to the user manual or contact Char-Broil customer service for assistance.

What size turkey does Char-Broil the Big Easy?

The Char-Broil Big Easy can accommodate turkeys up to 16 pounds. It’s important to note that this is the maximum size, and it’s always a good idea to check the specific instructions for your model to ensure proper cooking and safety.

How do you preheat a big easy Charbroil?

To preheat your Char-Broil Big Easy, set the burner to high heat and allow it to preheat for about 15 minutes. Once the burner is preheated, you can then place your food in the cooking chamber and begin cooking. The Big Easy will reach a consistent temperature, which is important for ensuring even cooking.

What size turkey does Char-Broil the Big Easy?

The Char-Broil Big Easy is designed to accommodate turkeys up to 16 pounds in weight. This means that you can cook a large turkey for your holiday gatherings or family meals without having to worry about whether it will fit in your cooker. The Big Easy’s spacious cooking chamber and adjustable racks allow you to roast a turkey of this size while ensuring even cooking and a crispy skin.

However, it’s important to note that the 16-pound capacity is the maximum size. If you are planning on cooking a turkey that is close to this size, it’s always a good idea to check the specific instructions for your model to ensure proper cooking and safety. You may also want to consider using a smaller turkey if you are new to using the Big Easy. This will allow you to get a feel for the cooking process before attempting to cook a larger bird.