Optidrive E3 User Manual: Comprehensive Guide
This comprehensive guide‚ alongside the standard User Guide‚ details advanced applications of the Optidrive E3.
It assumes familiarity with basic operation and prioritizes safety‚
covering declarations of conformity‚ fieldbus communication‚ and downloadable resources.
The Optidrive E3 represents Invertek Drives’ commitment to delivering robust and versatile AC variable speed drives. This series‚ ranging from 0.37kW to 22kW (0.5HP to 30HP)‚ is designed for a broad spectrum of applications‚ offering precise motor control and energy efficiency.
This manual serves as a crucial resource for understanding the E3’s capabilities‚ extending beyond the standard User Guide to delve into advanced features and configurations. It’s intended for users requiring a deeper understanding of the drive’s functionality‚ particularly concerning fieldbus integration and specialized control modes.
Before proceeding‚ ensure you’ve reviewed the core safety precautions and installation guidelines detailed in the accompanying standard User Guide. The E3’s adaptability is highlighted by available documentation in multiple languages – English‚ Italian‚ German‚ and Portuguese (Brazil) – facilitating global implementation and support. Access to downloadable resources‚ including brochures and dimensional drawings‚ further enhances usability.
Safety Precautions and Warnings
Prioritizing safety is paramount when installing‚ commissioning‚ and maintaining the Optidrive E3. This drive operates with potentially hazardous voltages and currents; therefore‚ only qualified personnel should undertake these tasks. Always disconnect power before performing any wiring or maintenance procedures.

Adhere strictly to all local and national electrical codes. Ensure proper grounding to prevent electric shock. Never operate the drive with damaged cables or enclosures. Regularly inspect all connections for tightness and integrity.
Be aware of the potential for stored energy within the drive’s capacitors even after power is removed. Allow sufficient discharge time before handling internal components. Refer to the detailed electrical test procedures outlined in the service manual for safe testing practices. Compliance with CE and UKCA declarations ensures adherence to stringent safety standards‚ but user responsibility remains crucial for safe operation.
Understanding the E3 Series Inverters
The Optidrive E3 Series represents a versatile range of AC variable speed drives‚ available in models from 0.37kW to 22kW (0.5HP to 30HP). These inverters are designed for three-phase‚ 110-480V applications‚ offering robust motor control.
Key features include a compact design‚ integrated braking resistors (depending on model)‚ and support for various fieldbus communication protocols. The E3 series boasts an IP66/NEMA 4X enclosure option‚ enhancing suitability for harsh environments.
Understanding the different sizes (Size 1‚ Size 2‚ etc.) is crucial for selecting the appropriate model for your application‚ referencing the dimensional drawings for mounting considerations. The E3’s functionality extends beyond basic speed control‚ encompassing advanced motor control modes and comprehensive protection features‚ detailed in the advanced technical manual.

Installation and Commissioning
Proper installation requires careful unpacking‚ inspection‚ mounting considering environmental factors‚ and secure electrical connections for both input and output power‚
plus control wiring.
Unpacking and Inspection
Upon receiving your Optidrive E3‚ thoroughly inspect the packaging for any signs of damage incurred during transit. Carefully open the package and verify that all components listed on the packing slip are present. This includes the drive itself‚ any optional accessories ordered‚ and the documentation package – encompassing the User Guide and any supplementary materials.
Visually inspect the drive for any physical damage‚ such as cracks‚ dents‚ or loose components. Pay close attention to the terminals and connectors‚ ensuring they are undamaged and securely attached. If any damage is detected‚ immediately document it with photographs and contact your supplier or Invertek Drives for assistance. Do not attempt to operate a damaged drive.
Retain the original packaging materials for potential future returns or servicing. Ensure the drive is stored in a clean‚ dry environment‚ protected from extreme temperatures and humidity. Proper handling during unpacking and inspection is crucial to prevent damage and ensure reliable operation.
Mounting and Environmental Considerations
Proper mounting is essential for optimal Optidrive E3 performance and longevity. Select a location that provides adequate ventilation‚ avoiding direct sunlight‚ excessive dust‚ and corrosive atmospheres. Ensure the mounting surface is flat‚ rigid‚ and capable of supporting the drive’s weight. Maintain sufficient clearance around the drive for easy access for maintenance and wiring.
The Optidrive E3 is available in various enclosure ratings‚ including IP20 and IP66 (NEMA 4X). Choose an enclosure appropriate for the environmental conditions. IP66/NEMA 4X rated drives are suitable for outdoor or harsh environments‚ offering protection against dust and water ingress.
Operating temperature should be between -10°C and +40°C (+14°F and +104°F) for standard models. Avoid exceeding these limits‚ as it can affect performance and lifespan. Consider using derating factors for altitudes above 1000m. Adhering to these guidelines ensures reliable operation and prevents premature failure.
Electrical Connections – Input & Output
Careful electrical connections are crucial for safe and reliable operation of the Optidrive E3. Always disconnect power before making any connections. Verify the supply voltage matches the drive’s rating (110-480V‚ 3-phase). Use appropriately sized conductors and ensure secure terminations to prevent overheating and voltage drops.
Input connections require proper grounding for safety and EMC compliance. Connect the ground wire to the designated grounding terminal. Output connections should be made to the motor terminals‚ observing correct phase sequence. Utilize shielded motor cables to minimize electromagnetic interference.
Double-check all connections before applying power. Incorrect wiring can damage the drive and motor. Refer to the wiring diagrams in the manual for specific connection details. Employ a qualified electrician for installation and ensure compliance with local electrical codes;
Control Wiring and Signal Connections
Precise control wiring enables seamless integration of the Optidrive E3 into automated systems. Digital inputs allow for start/stop‚ direction control‚ and fault reset functionality. Analog inputs facilitate speed control via external potentiometers or voltage signals. Carefully connect these signals to the designated terminals‚ referencing the manual’s wiring diagrams.
Relay outputs provide status indication for functions like drive ready‚ fault‚ and zero speed. These can be used to interface with PLCs or other control devices. Communication ports (Fieldbus) require specific wiring protocols – consult the relevant Fieldbus section for details.
Shielded cables are recommended for signal wiring to minimize noise interference. Ensure proper termination of all control signals and verify voltage levels before energizing the drive. Incorrect wiring can lead to erratic behavior or damage.
Basic Operation and Programming
Navigate the E3’s intuitive menu via the keypad and display. Configure core settings and essential motor parameters for fundamental control‚
ensuring proper operation.
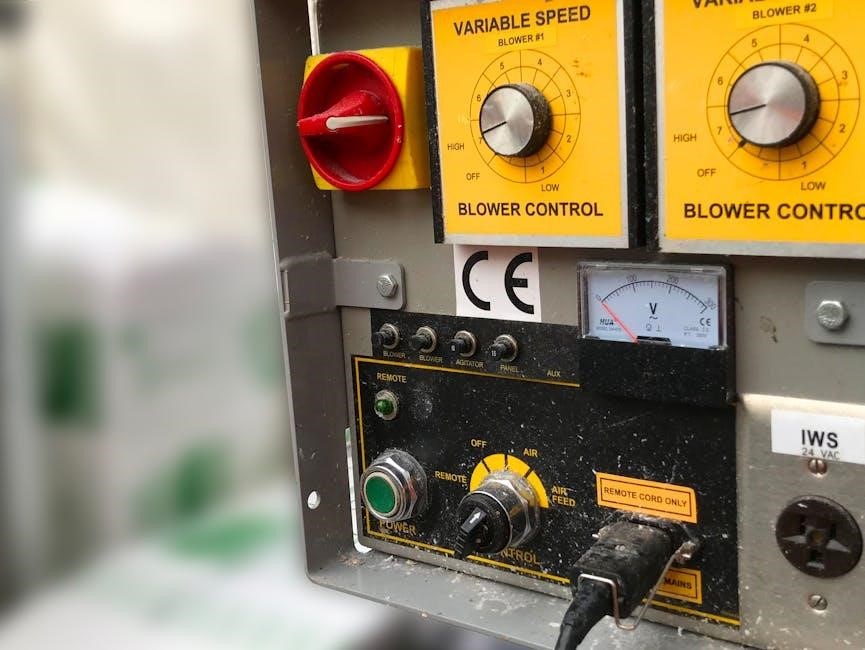
User Interface Overview – Keypad and Display
The Optidrive E3’s user interface centers around a clear‚ concise keypad and display‚ designed for intuitive operation and efficient parameter adjustment. The keypad features tactile buttons for navigating menus‚ entering values‚ and confirming selections. Key functions include ‘Menu’ for accessing the parameter structure‚ ‘Enter’ to confirm changes‚ and ‘Up/Down’ arrows for scrolling through options.
The integrated display provides real-time feedback on drive status‚ motor speed‚ current draw‚ voltage levels‚ and active fault codes. Displayed information is crucial for monitoring performance and diagnosing potential issues. The display’s brightness is adjustable to suit varying ambient light conditions‚ ensuring optimal visibility. Furthermore‚ the interface allows for switching between different display modes‚ presenting data in a format most relevant to the current task. Understanding these elements is fundamental to effective E3 operation.
Navigating the E3 Menu Structure
The Optidrive E3’s menu structure is logically organized into several key sections‚ facilitating efficient access to parameters. Pressing the ‘Menu’ key initiates navigation. The primary menu presents options like ‘Motor Parameters’‚ ‘Ramp Control’‚ ‘Protection’‚ and ‘Communication’. Use the ‘Up’ and ‘Down’ arrow keys to highlight the desired section‚ then press ‘Enter’ to enter it.
Within each section‚ further submenus allow for granular control. The display clearly indicates the current menu location. To return to the previous menu‚ press the ‘Esc’ key. Parameter values are modified using the arrow keys and confirmed with ‘Enter’. Remember to save changes after editing. A thorough understanding of this hierarchical structure is vital for customizing the drive to specific application requirements and optimizing performance. Careful navigation prevents unintended parameter alterations.
Parameter Overview – Core Settings
Core settings within the Optidrive E3 define fundamental drive operation. Key parameters include ‘Motor Nominal Voltage’ and ‘Motor Nominal Current’‚ crucial for accurate motor modeling and protection. ‘Minimum Frequency’ and ‘Maximum Frequency’ establish the operational speed range. ‘Acceleration Time’ and ‘Deceleration Time’ control ramp profiles‚ impacting process smoothness and mechanical stress.
The ‘Motor Control Mode’ parameter selects between scalar and vector control‚ influencing performance characteristics. ‘Overload Protection Level’ safeguards the motor from damage. Proper configuration of these core settings is paramount for reliable operation and optimal efficiency. Incorrect values can lead to instability‚ reduced performance‚ or even equipment failure. Always verify settings against the motor nameplate data and application requirements.
Basic Motor Parameters Configuration
Configuring basic motor parameters accurately is essential for the Optidrive E3’s performance. Begin by entering the ‘Motor Power’ in kilowatts or horsepower‚ ensuring correct units are selected. Input the ‘Motor Nominal Voltage’ precisely as indicated on the motor nameplate. Crucially‚ define ‘Motor Nominal Current’; this value directly impacts overload protection.
Next‚ specify the ‘Motor Frequency’ and ‘Motor Poles’ – these dictate the synchronous speed. The ‘Service Factor’ should also be entered if applicable. Incorrect parameterization can lead to inaccurate speed control‚ reduced torque‚ and potentially‚ motor damage. Double-check all entries against the motor’s documentation before commissioning. Proper configuration ensures optimal drive performance and longevity.

Advanced Features and Programming
Explore sophisticated control via fieldbus communication‚ advanced motor modes‚ and precise ramp control. Optimize performance with configurable protection features and robust fault handling capabilities.
Fieldbus Communication (Supported Protocols)
The Optidrive E3 boasts versatile fieldbus communication capabilities‚ enabling seamless integration into complex automation systems; This inverter supports a wide array of industrial protocols‚ providing flexibility for diverse application requirements. Supported protocols include Modbus RTU‚ allowing for straightforward data exchange and parameter adjustments.
Furthermore‚ the E3 series accommodates Modbus TCP‚ facilitating communication over Ethernet networks for enhanced speed and accessibility. CANopen functionality is also integrated‚ catering to applications demanding deterministic communication and distributed control.
For more advanced systems‚ EtherNet/IP support is available‚ offering robust performance and compatibility with Rockwell Automation platforms. These protocols allow for comprehensive control‚ monitoring‚ and diagnostics‚ streamlining integration and maximizing system efficiency. Detailed configuration instructions for each protocol are available within the comprehensive user manual‚ ensuring a smooth and reliable setup process.

Advanced Motor Control Modes
The Optidrive E3 offers a suite of advanced motor control modes beyond basic V/Hz control‚ optimizing performance and efficiency for specialized applications. Scalar control‚ the standard mode‚ provides reliable operation for general-purpose motors. However‚ for demanding tasks‚ Vector control delivers superior dynamic response and torque accuracy.
Sensorless Vector control eliminates the need for encoder feedback‚ reducing cost and complexity while maintaining excellent performance. Closed-loop Vector control‚ utilizing encoder feedback‚ provides the highest level of precision and control‚ ideal for applications requiring precise speed and position regulation.
Additionally‚ the E3 supports specialized modes like Slip/Flux control‚ tailored for specific motor types and applications. These advanced modes‚ detailed in the user manual‚ allow for fine-tuning of motor parameters and optimization of system performance‚ ensuring optimal efficiency and responsiveness.
Ramp Control and Timing Parameters
The Optidrive E3 provides extensive control over motor acceleration and deceleration through configurable ramp control and timing parameters. These settings are crucial for optimizing process control‚ minimizing mechanical stress‚ and ensuring smooth operation. Acceleration time dictates how quickly the motor reaches the set speed‚ while deceleration time controls the stopping rate.
Users can select from linear‚ S-ramp‚ or custom ramp profiles to tailor the acceleration and deceleration curves to specific application requirements. Adjustable jerk rates limit the rate of change of acceleration‚ preventing abrupt movements and reducing stress on the motor and driven equipment.
Timing parameters‚ such as run-up delay and coasting time‚ further refine the motor’s response. Precise adjustment of these parameters‚ as detailed in the user manual‚ is essential for achieving optimal performance and protecting the driven system.
Protection Features and Fault Handling
The Optidrive E3 incorporates a comprehensive suite of protection features designed to safeguard both the drive and the connected motor. These include overcurrent‚ overvoltage‚ undervoltage‚ overload‚ and short-circuit protection. Temperature monitoring‚ utilizing thermal trip functions‚ prevents damage from overheating. Phase loss protection detects and responds to missing phases‚ while earth fault detection enhances safety.
When a fault occurs‚ the E3 displays a specific fault code‚ aiding in rapid diagnosis and troubleshooting. The user manual provides a detailed list of common fault codes and corresponding solutions. Diagnostic tools and monitoring capabilities allow for proactive identification of potential issues before they escalate into failures.
Proper configuration of protection parameters‚ as outlined in the manual‚ is vital for ensuring reliable operation and maximizing the lifespan of the equipment.

Troubleshooting and Maintenance
Effective troubleshooting relies on understanding fault codes‚ utilizing diagnostic tools‚ and performing routine maintenance. Firmware updates‚ detailed in the manual‚
ensure optimal performance and reliability.
Common Fault Codes and Solutions
The Optidrive E3 employs a comprehensive fault code system to aid in rapid diagnostics. Understanding these codes‚ detailed within the user manual‚ is crucial for efficient troubleshooting. Common faults include Overcurrent (OC)‚ often caused by motor overload or wiring issues – solutions involve checking motor load and wiring integrity. Overvoltage (OV) and Undervoltage (UV) indicate supply voltage problems‚ requiring verification of the incoming power supply.
Motor Overload (MoL) suggests the motor is drawing excessive current for an extended period; reduce load or adjust motor parameters. Thermal Overload (TH) signifies overheating‚ necessitating cooling improvements or reduced duty cycles. Communication Faults‚ particularly with fieldbus systems‚ require checking wiring and protocol settings. The manual provides specific resolution steps for each code‚ including recommended actions and potential causes. Regularly reviewing the fault log offers preventative insights into system health‚ minimizing downtime and maximizing operational efficiency.
Diagnostic Tools and Monitoring
The Optidrive E3 offers robust diagnostic capabilities for comprehensive system monitoring. Real-time parameter display via the keypad allows immediate assessment of critical variables like current‚ voltage‚ frequency‚ and speed. Fault log analysis‚ accessible through the menu‚ provides a historical record of events‚ aiding in identifying intermittent issues. Built-in performance monitoring tracks key metrics‚ enabling proactive maintenance and optimization.
Advanced users can leverage fieldbus communication for remote monitoring and data logging‚ integrating the drive into broader automation systems. Software tools‚ often available from Invertek‚ facilitate detailed analysis and visualization of drive data. Regular monitoring of motor current and temperature prevents potential failures. Utilizing these diagnostic tools ensures optimal performance‚ minimizes downtime‚ and extends the lifespan of both the drive and the connected motor‚ contributing to a more reliable and efficient operation.
Routine Maintenance Procedures
Maintaining the Optidrive E3 ensures long-term reliability and optimal performance. Regularly inspect the unit for dust and debris accumulation‚ particularly in harsh environments; cleaning with compressed air is recommended. Check all electrical connections for tightness and signs of corrosion‚ re-tightening as needed. Verify fan operation‚ ensuring adequate airflow for cooling.
Periodically examine the heatsink for obstructions and clean if necessary. Monitor ambient temperature to confirm it remains within the specified operating range. Review the fault log for any recurring issues that may indicate a developing problem. Software updates‚ when available‚ should be applied to benefit from the latest improvements and bug fixes. Following these simple procedures proactively prevents failures‚ minimizes downtime‚ and extends the operational life of your Optidrive E3.
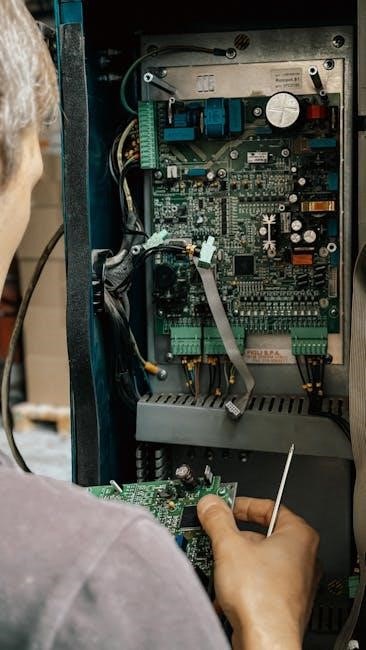
Firmware Updates and Upgrades
Keeping your Optidrive E3 firmware current is crucial for accessing the latest features‚ performance enhancements‚ and bug fixes. Download the latest firmware from the official Invertek Drives website‚ ensuring compatibility with your specific E3 model. Carefully review the release notes accompanying the firmware to understand the changes and any necessary precautions.
Follow the documented upgrade procedure precisely‚ typically involving a connection to a PC via USB or serial communication. Avoid interrupting the update process‚ as this could potentially damage the drive. Back up your existing parameter settings before initiating the upgrade to facilitate easy restoration if needed. Post-update verification is essential; confirm proper operation and functionality after the firmware installation is complete. Regular updates optimize performance and maintain system integrity.
Technical Specifications
Explore detailed specifications‚ including model ranges‚ input/output characteristics‚ and environmental compliance. Access dimensional drawings and mounting details for proper installation and integration.
E3 Series Model Range and Ratings
The Optidrive E3 series boasts a versatile range of models designed to accommodate diverse motor control needs. Available in various frame sizes – typically designated as Size 1 and Size 2‚ as indicated in downloadable DXF files – the E3 caters to applications requiring 0.37kW up to 22kW (or 0.5HP to 30HP).
Voltage input options are comprehensive‚ supporting 110-480V‚ three-phase power configurations. This broad spectrum ensures compatibility with a wide array of global power infrastructures. Specific ratings within the series are detailed in the product catalogue‚ offering granular control selection.
Understanding the model numbering is crucial for accurate specification. Refer to Invertek documentation for a complete breakdown of each model’s capabilities and limitations. Careful consideration of application requirements‚ including motor horsepower and voltage‚ is essential when choosing the appropriate E3 model.
Input and Output Characteristics
The Optidrive E3 inverter exhibits robust input and output characteristics designed for reliable motor control. Input voltage acceptance spans a wide range‚ typically 110-480V AC‚ three-phase‚ ensuring adaptability to various power supplies. Input frequency is commonly 50/60Hz‚ automatically detected by the drive.
Output voltage is variable‚ precisely controlled to match the motor’s requirements‚ delivering smooth acceleration and deceleration. Output frequency ranges are configurable‚ allowing optimization for specific applications. The E3’s output phase is three-phase‚ supporting standard induction motors.
Overload capacity is a key characteristic‚ with models capable of handling sustained overloads. Short-circuit protection is integrated‚ safeguarding both the drive and the connected motor. Detailed electrical specifications‚ including current limits and impedance values‚ are available in the technical documentation.
Environmental and Compliance Standards
The Optidrive E3 is engineered to operate reliably across a broad range of environmental conditions. Operating temperature typically falls between -10°C and 40°C (14°F to 104°F)‚ though extended ranges may be available in specific models. Humidity tolerance is high‚ with drives designed to withstand non-condensing humidity levels.
Compliance with international standards is paramount; the E3 carries a CE marking‚ signifying conformity with European health‚ safety‚ and environmental protection standards. UKCA conformity is also declared for the United Kingdom market. RoHS compliance ensures restricted hazardous substances are minimized.
EMC standards are met to minimize electromagnetic interference; Detailed compliance documentation‚ including declarations of conformity‚ are readily available for download‚ ensuring adherence to regional regulations and industry best practices.
Dimensional Drawings and Mounting Details
Precise mounting is crucial for optimal performance and longevity of the Optidrive E3. Detailed dimensional drawings‚ available in DXF format (e.g.‚ E3 Size 1 IP20.dxf.zip‚ E3 Size 2…)‚ facilitate accurate enclosure design and panel integration. These drawings specify critical dimensions‚ including height‚ width‚ depth‚ and mounting hole locations.
Mounting considerations include ensuring adequate ventilation to dissipate heat effectively. Drives can be DIN rail mounted or screw-mounted to a flat surface. IP20/IP66 (NEMA 4X) enclosure options dictate mounting requirements; IP66 models require secure sealing to maintain ingress protection.
Clearance requirements around the drive are essential for safe operation and maintenance. Refer to the drawings for recommended spacing to allow for wiring access and airflow. Proper mounting minimizes vibration and ensures reliable operation in industrial environments.