south carolina commercial driver license manual

This handbook provides the requirements for obtaining a commercial drivers license in South Carolina. The South Carolina Department of Motor Vehicles (DMV) has various DMV handbooks and drivers manuals available for download, including the SC drivers manual, commercial drivers license manual, and motorcycle handbook. The South Carolina CDL manual covers a variety of topics, and everything you’ll need to study to pass your CDL test or get the endorsement you need, including⁚ CDL general knowledge and requirements, combination vehicles, air brakes, tank vehicles, hazmat, doubles triples, passenger vehicles, school bus, vehicle inspection and road skills test.

Introduction

The South Carolina Commercial Driver License Manual is a comprehensive guide designed to help individuals understand the requirements and procedures for obtaining a Commercial Driver’s License (CDL) in the state of South Carolina. It is essential reading for anyone seeking to operate a commercial motor vehicle, as it provides detailed information on the necessary steps, qualifications, and regulations. The manual serves as a valuable resource for aspiring CDL holders, offering a clear roadmap to navigate the licensing process and ensure compliance with all applicable laws and regulations. It is also crucial for experienced drivers seeking to upgrade their CDL class or add endorsements for specialized vehicle operations.

This manual is a vital tool for both novice and experienced drivers, providing them with the knowledge and understanding required to operate commercial vehicles safely and responsibly. It covers a wide range of topics, from the initial application process to the various CDL classes and endorsements, as well as the associated knowledge and skills tests. The manual also emphasizes safety protocols, road rules, and other important aspects of commercial driving, ensuring that drivers are well-prepared to handle the responsibilities of operating a commercial vehicle on South Carolina roads.

Requirements for Obtaining a Commercial Driver’s License

To obtain a Commercial Driver’s License (CDL) in South Carolina, you must meet specific requirements. These requirements are designed to ensure that all CDL holders possess the necessary knowledge, skills, and physical and mental capabilities to operate a commercial motor vehicle safely and responsibly. These requirements include⁚

  • Age⁚ You must be at least 18 years old to obtain a South Carolina CDL.
  • Residency⁚ You must be a permanent resident of South Carolina.
  • Valid Driver’s License⁚ You must have a valid, unexpired South Carolina driver’s license.
  • Medical Certification⁚ You must provide a valid medical certification from a licensed medical professional confirming that you meet the Federal Motor Carrier Safety Administration (FMCSA) physical qualification standards for commercial drivers. This certification must be on the SCDMV Form DL-405A.
  • Driving Record⁚ You must have a clean driving record, free from any disqualifying violations, such as DUI or reckless driving.
  • Background Check⁚ The South Carolina Department of Motor Vehicles will conduct a thorough background check to ensure you meet the eligibility criteria for a CDL.

It’s crucial to understand and comply with all requirements to ensure a smooth and successful CDL application process.

Commercial Learners Permit (CLP)

A Commercial Learners Permit (CLP) is a necessary step in the process of obtaining a Commercial Driver’s License (CDL) in South Carolina. The CLP allows you to practice driving a commercial motor vehicle under the supervision of a licensed CDL holder, providing valuable experience before taking the CDL skills test. To obtain a CLP, you must⁚

  • Meet the Eligibility Requirements⁚ You must meet all the general requirements for a CDL, including age, residency, a valid South Carolina driver’s license, and a clean driving record.
  • Complete an Application⁚ You must complete a Commercial Driver’s License or Commercial Learners Permit application (SCDMV Form 447-CDL) and submit it to the South Carolina Department of Motor Vehicles (SCDMV).
  • Pass the General Knowledge Test⁚ You must pass the official General Knowledge test on commercial driving theory. This test covers topics related to safe driving practices, vehicle inspection, regulations, and other important aspects of commercial driving. The questions on this test are based on the official South Carolina Commercial Drivers License Manual (South Carolina CDL Handbook 2024).
  • Provide Medical Certification⁚ You must provide a valid medical certification from a licensed medical professional confirming that you meet the FMCSA physical qualification standards for commercial drivers.
  • Pay the Required Fees⁚ You must pay the applicable fees for the CLP application.

Once you have met all the requirements and successfully passed the knowledge test, the SCDMV will issue you a CLP.

Knowledge Tests

To obtain a Commercial Driver’s License (CDL) in South Carolina, you must pass one or more knowledge tests, depending on the class of license and endorsements you require. These tests assess your understanding of the rules, regulations, and safe driving practices related to operating commercial motor vehicles. The knowledge tests are computer-based and cover various topics, including⁚

  • General Knowledge⁚ This test covers fundamental knowledge about commercial driving, including vehicle inspection, pre-trip inspections, safe driving practices, regulations, and traffic laws.
  • Air Brakes⁚ If you are applying for a CDL that requires the operation of vehicles equipped with air brakes, you must pass an air brake knowledge test. This test specifically focuses on the operation, maintenance, and troubleshooting of air brake systems.
  • Tank Vehicles⁚ For CDLs that require the transportation of hazardous materials in tank vehicles, you will need to pass a tank vehicle knowledge test. This test covers the safe handling, loading, unloading, and securing of hazardous materials in tank vehicles, as well as the regulations governing these operations.
  • Hazardous Materials⁚ If you plan to transport hazardous materials, you must pass a hazardous materials knowledge test. This test covers the regulations, procedures, and safety precautions associated with the transportation of hazardous materials.
  • Doubles/Triples: If you are applying for a CDL to operate combination vehicles with doubles or triples trailers, you will need to pass a doubles/triples knowledge test. This test covers the specific regulations and safe driving practices related to operating these types of vehicles.
  • Passenger Vehicles⁚ If you are applying for a CDL to operate passenger vehicles, such as buses, you must pass a passenger vehicle knowledge test. This test covers the regulations, safety procedures, and passenger handling requirements for operating passenger vehicles.
  • School Bus⁚ If you are applying for a CDL to operate a school bus, you must pass a school bus knowledge test. This test covers the regulations, safety procedures, and passenger handling requirements for operating school buses.

The South Carolina Department of Motor Vehicles (SCDMV) provides study materials and practice tests to help you prepare for the knowledge tests. It is highly recommended to thoroughly study the official South Carolina Commercial Drivers License Manual (South Carolina CDL Handbook 2024) and take advantage of the available resources to ensure you are well-prepared.
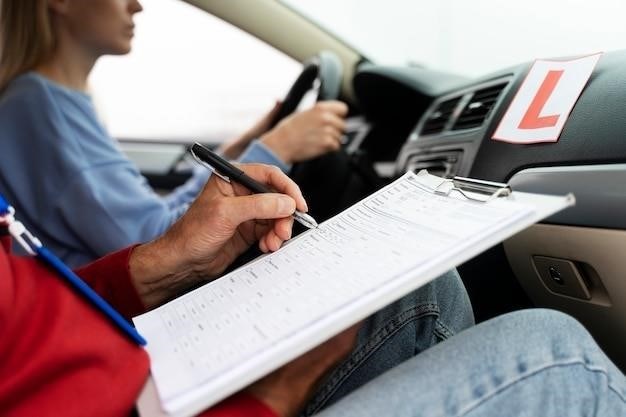
Skills Tests

Once you have successfully passed the required knowledge tests, you will need to demonstrate your driving skills through a series of practical tests. These skills tests are conducted at an approved South Carolina commercial driver’s license testing facility and are designed to evaluate your ability to safely operate a commercial motor vehicle in various situations. The specific skills tests you will need to take depend on the class of CDL you are seeking and any endorsements you require.

The skills tests typically involve⁚

  • Pre-Trip Inspection⁚ You will be required to perform a thorough pre-trip inspection of a commercial vehicle, identifying any potential safety hazards or defects. The inspector will evaluate your knowledge of vehicle components and your ability to identify and address any issues.
  • Basic Vehicle Control⁚ This test assesses your ability to safely operate the vehicle, including basic maneuvers such as backing, turning, and stopping. You will be evaluated on your ability to control the vehicle smoothly and accurately within designated areas.
  • Road Skills Test⁚ This is the most comprehensive part of the skills testing process. You will be required to drive the vehicle on public roads, demonstrating your ability to navigate traffic, obey traffic laws, and maintain safe following distances. The inspector will also assess your ability to handle various driving situations, such as intersections, hills, and curves.

To prepare for the skills tests, it is recommended to practice driving a commercial vehicle in a safe and controlled environment. Consider enrolling in a CDL training program to receive hands-on instruction and guidance from experienced instructors. You should also familiarize yourself with the specific procedures and requirements for the skills tests in South Carolina by reviewing the official CDL manual.

CDL License Classifications

Commercial driver’s licenses in South Carolina are classified based on the type of vehicle you are authorized to operate. The three main CDL classifications are Class A, Class B, and Class C, each with specific requirements and limitations. Understanding these classifications is crucial for determining the type of commercial vehicles you can legally drive.

  • Class A⁚ This class of CDL authorizes you to operate combination vehicles, which are vehicles with a Gross Vehicle Weight Rating (GVWR) of 26,001 pounds or more, pulling a trailer with a GVWR of 10,000 pounds or more. Examples include tractor-trailers, semi-trucks, and buses.
  • Class B⁚ This class of CDL allows you to operate single vehicles with a GVWR of 26,001 pounds or more, or a combination vehicle with a GVWR of 26,001 pounds or more pulling a trailer with a GVWR of less than 10,000 pounds. Examples include single-unit trucks, delivery trucks, and some types of buses.
  • Class C⁚ This class of CDL enables you to operate vehicles designed to transport 16 or more passengers, including buses, or vehicles that transport hazardous materials, regardless of GVWR. It also encompasses vehicles that have a GVWR of less than 26,001 pounds and transport hazardous materials.

The specific requirements for obtaining each CDL class, including knowledge tests and skills tests, may vary depending on the type of vehicle you are seeking to operate. It is essential to consult the South Carolina CDL manual for detailed information on each classification and the associated requirements.

CDL Endorsements

CDL endorsements are special authorizations that allow you to operate certain types of commercial vehicles or transport specific types of cargo. These endorsements are added to your CDL license and demonstrate that you have the necessary knowledge and skills to handle the unique requirements of the endorsed activity. Obtaining a CDL endorsement in South Carolina requires passing an additional knowledge test and, in some cases, a skills test.

Here are some common CDL endorsements in South Carolina⁚

  • H (Hazardous Materials)⁚ This endorsement allows you to transport hazardous materials, requiring additional training and a background check.
  • N (Tank Vehicles)⁚ This endorsement permits you to operate vehicles designed to transport liquid or gaseous materials in bulk, requiring knowledge of tank vehicle safety and handling procedures.
  • P (Passenger Vehicles)⁚ This endorsement enables you to operate vehicles designed to transport 16 or more passengers, including buses, requiring specific knowledge of passenger vehicle safety and operating procedures.
  • S (School Bus)⁚ This endorsement allows you to operate school buses, requiring additional training and a background check;
  • T (Double/Triple Trailers)⁚ This endorsement authorizes you to operate vehicles towing double or triple trailers, requiring knowledge of the unique handling characteristics of these longer combinations.
  • X (Tanker and Hazmat)⁚ This endorsement combines the requirements of the H and N endorsements, allowing you to transport hazardous materials in tank vehicles.

The specific requirements for obtaining each endorsement may vary depending on the type of vehicle or cargo involved. It’s essential to consult the South Carolina CDL manual for detailed information on each endorsement and the associated requirements.

Restrictions on CDL

Restrictions on your South Carolina commercial driver’s license (CDL) are limitations imposed by the state to ensure safety and compliance with specific driving requirements. These restrictions may be placed on your CDL for various reasons, including medical conditions, driving violations, or specific vehicle limitations.

Here are some common types of CDL restrictions in South Carolina⁚

  • Medical Restrictions⁚ If you have a medical condition that could affect your ability to operate a commercial vehicle safely, you might be subject to medical restrictions on your CDL. These restrictions could include limitations on driving hours, specific vision requirements, or the use of certain medications.
  • Driving Record Restrictions⁚ If you have a history of driving violations, such as speeding tickets or accidents, you may be subject to driving record restrictions on your CDL. These restrictions could include limitations on the types of vehicles you can operate, the areas you can drive in, or the number of hours you can drive per day.
  • Vehicle Type Restrictions⁚ Certain CDLs may be restricted to specific types of vehicles, such as those with air brakes or manual transmissions. These restrictions ensure that drivers have the necessary skills and experience to operate the authorized vehicle safely.
  • Other Restrictions⁚ Other restrictions may be placed on your CDL, such as limitations on driving at night, carrying passengers, or transporting specific types of cargo. These restrictions are typically imposed based on individual circumstances and ensure safe operation of commercial vehicles.

It’s crucial to understand the restrictions placed on your CDL and to comply with them diligently. Failure to comply with these restrictions can result in penalties, including fines, suspension of your CDL, or even revocation of your license.

omron bp786 user manual

Omron BP786 User Manual⁚ A Comprehensive Guide

Welcome to the comprehensive guide for the Omron BP786 blood pressure monitor. This manual will provide you with all the necessary information to understand and use your device effectively, ensuring accurate blood pressure readings and optimal health monitoring.

Introduction

The Omron BP786 is an advanced upper arm blood pressure monitor designed to provide accurate and reliable readings for home use. It features a range of innovative technologies and user-friendly functionalities to make monitoring your blood pressure a simple and convenient process. This manual serves as your comprehensive guide to understanding and using the Omron BP786 effectively.

Regularly monitoring your blood pressure is crucial for maintaining overall health and managing potential cardiovascular risks. The Omron BP786 empowers you to take control of your health by providing accurate and consistent blood pressure readings. This manual will walk you through every aspect of the device, from preparation and usage to interpreting your readings and troubleshooting common issues.

By understanding the features and functionalities of the Omron BP786, you will gain valuable insights into your blood pressure trends and be able to make informed decisions about your health. This manual will equip you with the knowledge and confidence to utilize the Omron BP786 effectively and contribute to your overall well-being.

Key Features of the Omron BP786

The Omron BP786 boasts an array of features designed to enhance accuracy, ease of use, and overall user experience. These features contribute to its reputation as a reliable and user-friendly blood pressure monitor.

One of the key features is its advanced accuracy, achieved through the use of the oscillometric method of blood pressure measurement. This method ensures precise and consistent readings, providing you with a clear understanding of your blood pressure levels. Additionally, the BP786 incorporates an Irregular Heartbeat Detection feature, which alerts you if an irregular heartbeat is detected during measurement, promoting early identification of potential cardiac issues.

The Omron BP786 is also designed for user comfort and convenience. It features a large, easy-to-read display that clearly displays the systolic, diastolic, and pulse readings. The intuitive interface and simple button controls make it easy to navigate and operate. The BP786 comes with an inflatable cuff that is designed for a comfortable fit, minimizing discomfort during measurement.

Furthermore, the Omron BP786 offers a memory function, allowing you to store up to 100 readings for each user, facilitating the tracking of your blood pressure trends over time. This feature enables you to share your readings with your healthcare provider and gain valuable insights into your cardiovascular health.

Understanding Blood Pressure Measurement

Blood pressure is the force of blood pushing against the walls of your arteries as your heart pumps. It is a vital indicator of your cardiovascular health and is measured in millimeters of mercury (mmHg). Blood pressure readings consist of two numbers⁚ systolic and diastolic pressure.

Systolic pressure represents the pressure in your arteries when your heart beats, pushing blood out. Diastolic pressure represents the pressure in your arteries when your heart rests between beats. A normal blood pressure reading is typically below 120/80 mmHg; However, blood pressure can fluctuate throughout the day based on various factors such as stress, physical activity, and medication.

High blood pressure, also known as hypertension, is a significant health concern that can lead to various complications, including heart attack, stroke, and kidney disease. Regular monitoring of your blood pressure is crucial for identifying and managing hypertension. The Omron BP786 helps you track your blood pressure readings accurately and efficiently, empowering you to take control of your cardiovascular health.

Understanding your blood pressure readings is essential for making informed decisions about your health. If you notice any unusual changes or consistently high readings, consult your healthcare provider for guidance and appropriate management strategies.

Preparing for Use

Before using the Omron BP786 for the first time, it is crucial to familiarize yourself with its components, ensure proper battery installation, and understand the basic steps for accurate blood pressure measurement. This section will guide you through these essential preparations, ensuring a seamless and reliable experience with your new blood pressure monitor.

Firstly, carefully inspect the components of the Omron BP786, including the monitor unit, cuff, and user manual. Familiarize yourself with the location of the buttons and display symbols. Next, install the batteries correctly according to the instructions provided in the user manual. Ensure that the batteries are fresh and of the appropriate type to guarantee optimal device performance.

To prepare for use, it is recommended to sit comfortably in a quiet and relaxed environment. Avoid smoking or drinking coffee or tea within 30 minutes prior to measurement. Remove any tight clothing from your upper arm, and ensure that the cuff is placed correctly on your bare arm. Ensure that the cuff is snug but not too tight, allowing for comfortable blood flow.

With these preparations in place, you are ready to use the Omron BP786 for accurate and reliable blood pressure readings. Remember to refer to the user manual for detailed instructions and safety guidelines, ensuring a safe and effective monitoring experience.

Using the Omron BP786

Using the Omron BP786 is a straightforward process that involves a few simple steps. Once you have prepared the device and yourself, you can begin taking accurate blood pressure readings with ease. This section will guide you through the step-by-step process of using the Omron BP786, ensuring you obtain reliable results.

Firstly, wrap the cuff securely around your upper arm, ensuring it is positioned correctly and snug but not too tight. Make sure the cuff is level with your heart, which can be achieved by sitting comfortably with your arm resting on a table or your lap. Press the “Start” button on the monitor unit, and the device will automatically inflate the cuff to the appropriate pressure.

During the measurement process, remain still and avoid talking or moving. The monitor will display your systolic and diastolic blood pressure readings as well as your heart rate. Once the measurement is complete, the device will automatically deflate the cuff. It’s important to record your readings in a logbook for future reference and to track any trends in your blood pressure levels.

After using the Omron BP786, remember to remove the cuff and store the device in a safe and dry place. Always consult the user manual for detailed instructions and safety guidelines, ensuring proper use and maintenance of your blood pressure monitor.

Interpreting Your Readings

Understanding your blood pressure readings is crucial for managing your health. The Omron BP786 provides you with clear and accurate measurements, but interpreting those readings requires some knowledge of the basics. This section will guide you through the process of understanding your blood pressure readings and what they mean for your health.

Your blood pressure reading consists of two numbers⁚ systolic and diastolic pressure. Systolic pressure represents the pressure in your arteries when your heart beats, while diastolic pressure represents the pressure when your heart rests between beats. Both numbers are important for assessing your overall cardiovascular health.

Generally, a blood pressure reading below 120/80 mmHg is considered normal. Readings between 120/80 and 139/89 mmHg are considered prehypertension, indicating an increased risk of developing high blood pressure. Readings above 140/90 mmHg are considered high blood pressure, requiring medical attention.

It’s important to remember that a single blood pressure reading doesn’t tell the whole story. It’s best to take multiple readings over time and consult with your doctor to determine if any changes in your blood pressure require further investigation or medical intervention. Regular blood pressure monitoring and a healthy lifestyle can help you maintain optimal cardiovascular health.

Troubleshooting Common Issues

While the Omron BP786 is a reliable blood pressure monitor, occasional issues can arise. This section will guide you through troubleshooting some common problems you might encounter. Before attempting any troubleshooting steps, ensure that you have read and understood the user manual for detailed instructions and safety precautions.

One common issue is an “Error 77” message. This typically indicates that the cuff is not properly inflated. Ensure the cuff is snugly fitted around your upper arm, with the bottom edge aligned with your heart. Another issue might be inconsistent readings. This could be due to factors like movement during measurement, improper cuff placement, or incorrect cuff size. Always follow the instructions in the user manual for accurate readings.

If you continue to experience problems, check the battery life, as low batteries can affect performance. If the issue persists, contact Omron customer support for assistance. They can provide further troubleshooting guidance or advise on potential solutions. Remember, regular maintenance and proper use will help ensure the accuracy and longevity of your Omron BP786.

Cleaning and Maintenance

Regular cleaning and maintenance are crucial for ensuring the longevity and accuracy of your Omron BP786. Following these steps will help keep your device in optimal condition⁚

Cuff Cleaning⁚ Gently wipe the cuff with a soft, damp cloth. Avoid using harsh chemicals, abrasive cleaners, or excessive moisture, as they can damage the cuff material. Allow the cuff to air dry completely before storing.

Device Cleaning⁚ Use a soft, dry cloth to wipe the main unit. Avoid using any liquids or abrasive cleaners on the device. Do not immerse the device in water or any other liquid.

Battery Maintenance⁚ Replace the batteries regularly, following the instructions in the user manual. Ensure you use the correct type and size of batteries. Avoid using old or damaged batteries, as they can affect the device’s performance.

Storage⁚ Store the device in a cool, dry place, away from direct sunlight and extreme temperatures. Avoid storing the device in areas with high humidity or dust.

Regular Checks⁚ Periodically check the cuff for any signs of wear or damage. If you notice any defects, contact Omron customer support for replacement or repair options.

By adhering to these simple maintenance guidelines, you can ensure your Omron BP786 remains accurate and reliable for years to come.

Warranty and Support

Omron provides a comprehensive warranty for its BP786 blood pressure monitor, ensuring peace of mind and long-term reliability. The specific warranty terms and conditions may vary depending on your region of purchase, so it’s essential to refer to the documentation provided with your device or contact Omron customer support for details.

Generally, Omron offers a five-year warranty covering defects in materials and workmanship under normal use and conditions. This warranty typically covers the main unit, cuff, and accessories. However, the warranty may not cover damage caused by misuse, neglect, accidents, or unauthorized repairs.

Beyond the warranty period, Omron provides ongoing customer support for its products. If you encounter any issues or have questions regarding your BP786, you can contact Omron customer support through their website, phone number, or email address. They offer assistance with troubleshooting, repairs, and replacement parts.

Maintaining your device according to the instructions in the user manual and registering your product can help ensure that you receive the full benefit of the warranty and ongoing support from Omron.

Safety Precautions

The Omron BP786 is designed to provide accurate and reliable blood pressure readings, but it’s crucial to follow safety precautions to ensure your well-being and the device’s longevity.

Before using the BP786, carefully read and understand the entire user manual. Pay special attention to the safety instructions and warnings.

Avoid using the device on a person with a pacemaker or other implanted medical device. If you have any doubts, consult your doctor before using the BP786. Do not use the device on a pregnant woman or a child without consulting a medical professional.

Ensure the cuff is properly fitted around your upper arm, snug but not too tight. A loose or overly tight cuff can lead to inaccurate readings. Avoid using the device on a limb with injuries, open wounds, or skin conditions.

Keep the BP786 and its accessories away from moisture, extreme temperatures, and direct sunlight. Do not use the device near flammable materials or in a humid environment. Store the device in a clean and dry place.

Do not attempt to disassemble or modify the BP786. If the device malfunctions or you suspect damage, discontinue use and contact Omron customer support for assistance.

Frequently Asked Questions

Here are some common questions about the Omron BP786 that you might have⁚

Q⁚ What is the difference between the Omron BP786 and the BP786N?

A⁚ The Omron BP786N features Bluetooth connectivity, allowing you to wirelessly transfer your blood pressure readings to a smartphone or tablet using the Omron Connect app. The BP786 does not have Bluetooth capabilities.

Q⁚ What does Error 77 mean on the Omron BP786?

A⁚ Error 77 indicates that the cuff is not properly inflated. Ensure the cuff is securely wrapped around your upper arm and try again. If the error persists, contact Omron customer support.

Q⁚ How often should I take my blood pressure readings?

A⁚ The frequency of blood pressure monitoring depends on individual needs and medical advice. Consult your doctor or healthcare provider for personalized guidance.

Q⁚ Where can I find the user manual for the Omron BP786?

A⁚ You can download the user manual for the Omron BP786 from the official Omron website or from reputable online sources.

Q⁚ How do I know if my blood pressure readings are accurate?

A⁚ The Omron BP786 is designed to provide accurate readings. However, it’s always a good practice to consult your doctor for interpretation and further evaluation.

The Omron BP786 is a reliable and user-friendly blood pressure monitor that empowers you to take control of your health. By understanding the key features, following the instructions, and interpreting your readings correctly, you can effectively monitor your blood pressure and work with your healthcare provider to manage any potential issues.

Remember to consult the user manual for specific instructions and safety guidelines when using any Omron product. This comprehensive guide has provided you with the essential information to get started with your Omron BP786. If you have any further questions or encounter any problems, refer to the troubleshooting section or contact Omron customer support for assistance.

Regular blood pressure monitoring is an essential part of maintaining good health. By using the Omron BP786 responsibly and following the advice of your healthcare professionals, you can contribute to a healthier and more fulfilling life.

hypertherm 65 manual

Hypertherm Powermax 65 Manual⁚ A Comprehensive Guide

This comprehensive guide delves into the Hypertherm Powermax 65 manual, providing essential information for understanding and utilizing this powerful plasma cutting system. From a detailed system overview to troubleshooting common problems, this guide equips users with the knowledge needed to operate the Powermax 65 efficiently and safely.

Introduction

The Hypertherm Powermax 65 is a cutting-edge air plasma cutter designed to provide professional-grade performance for a wide range of applications. This manual serves as your comprehensive guide to understanding and operating this versatile system. Whether you’re a seasoned metalworker or a novice looking to delve into plasma cutting, this manual will empower you with the necessary knowledge to maximize the capabilities of the Powermax 65.

The Powermax 65 excels in both cutting and gouging tasks, making it a valuable tool for various industries. It offers an impressive cutting capacity of up to 20 mm (3/4″) and is renowned for its durability and reliability. This manual will walk you through the system’s features, controls, and safety procedures, ensuring you operate the Powermax 65 with confidence and precision.

From understanding the system’s components and functions to navigating the menu screens and troubleshooting common problems, this manual provides clear and concise instructions to enhance your overall experience with the Powermax 65. By adhering to the guidelines and safety recommendations outlined in this manual, you can ensure a safe and productive working environment.

System Overview

The Hypertherm Powermax 65 is a robust and versatile air plasma cutting system designed to meet the demands of professional metalworkers. It encompasses a range of components that work in unison to deliver precise and efficient cutting performance. At the heart of the system is the Powermax 65 power supply unit, which generates a high-energy plasma arc for cutting through various metal thicknesses.

The power supply unit is paired with a SmartSYNC hand torch, featuring a user-friendly interface and intuitive controls. This torch facilitates precise and comfortable operation, allowing you to maneuver the cutting arc with ease; The Powermax 65 system also includes a comprehensive set of consumables, such as electrodes, nozzles, and shields, designed to optimize cutting performance and ensure long-lasting durability.

To facilitate smooth and efficient operation, the Powermax 65 utilizes a compressed air source. The air pressure plays a crucial role in generating the plasma arc and achieving optimal cutting quality. The system incorporates a range of safety features, including an automatic shut-off system and over-current protection, safeguarding both the user and the equipment during operation.

Recommended Cutting Capacity

The Hypertherm Powermax 65 is a capable cutting system with a recommended cutting capacity of up to 20 mm (3/4 inch). This means that the system is designed to effectively cut through various metal thicknesses within this range, delivering clean, precise cuts with minimal edge beveling. However, the actual cutting capacity can vary depending on several factors, including the type of metal being cut, the thickness of the material, and the specific consumable configuration used.

For optimal cutting performance, it’s crucial to select the appropriate consumables for the specific metal and thickness being cut. Hypertherm provides a comprehensive range of consumables, each optimized for different cutting applications. The manual offers detailed recommendations on consumable selection based on the material being cut and its thickness, ensuring that you achieve the best possible cutting results with the Powermax 65.

The Powermax 65 also boasts a gouging capability, allowing you to remove metal from a workpiece without completely cutting through it. This function is particularly useful for preparing surfaces for welding or creating grooves for specific applications. The manual provides guidelines on setting the system for gouging, ensuring that you achieve the desired depth and width of the gouge.

Operating the System

The Hypertherm Powermax 65 is designed with user-friendliness in mind, incorporating intuitive controls and straightforward operation. This section of the manual guides you through the process of setting up and operating the system, providing detailed instructions on utilizing the front panel controls, navigating the menu screens, and understanding the LED indicators.

The manual highlights the importance of safety precautions during system operation. It stresses the need to wear appropriate personal protective equipment (PPE), such as safety glasses, gloves, and a welding helmet, to safeguard against potential hazards associated with plasma cutting. It also emphasizes the importance of maintaining a safe working environment, ensuring adequate ventilation and a clear workspace free of obstructions.

The Hypertherm Powermax 65 is equipped with a comprehensive system of LED indicators that provide real-time feedback on the system’s status and operation. The manual explains the meaning of each LED indicator, enabling users to quickly diagnose any potential issues and take appropriate action. Understanding the LED indicators is crucial for efficient system operation and troubleshooting.

Using the Front Panel Controls

The Hypertherm Powermax 65 features an intuitive front panel that houses a set of controls designed for ease of use and system management. The manual provides detailed instructions on the function and operation of each control, allowing users to confidently adjust settings and monitor system performance.

The front panel controls include buttons and dials for setting the cutting amperage, adjusting the gas pressure, and selecting the desired cutting mode. The manual explains the different cutting modes available, such as cut, gouge, and pierce, and provides guidance on selecting the appropriate mode for specific cutting applications.

The manual also includes a section on using the front panel controls to access the system’s menu screens. These screens provide access to advanced settings and diagnostic information, allowing users to customize the system to meet their specific needs and troubleshoot any potential issues. The manual clearly outlines the steps involved in navigating the menu screens and utilizing the various options available.

Navigating the Menu Screens

The Hypertherm Powermax 65 offers a user-friendly interface for navigating the system’s menu screens. The manual provides clear instructions on accessing and interacting with these screens, enabling users to customize system settings and access diagnostic information.

The manual details the various menu options, including settings for amperage, gas pressure, and cutting modes. It explains how to adjust these parameters to optimize the system for different cutting applications. Additionally, the manual covers the system’s diagnostic features, allowing users to monitor system performance and identify potential issues.

The manual highlights the importance of understanding the various icons and indicators displayed on the menu screens. These elements provide visual cues for system status, error messages, and other important information. The manual provides a comprehensive explanation of each icon and its significance, ensuring users can interpret the information accurately.

Understanding the LED Indicators

The Hypertherm Powermax 65 features a set of LED indicators on the SmartSYNC hand torch that provide vital information about the system’s status and operation. The manual provides a comprehensive guide to understanding these indicators, allowing users to interpret their meanings and react accordingly.

The manual clearly outlines the different LED colors and their corresponding states. For instance, a green LED indicates that the system is ready to cut, while a red LED signifies an error or fault. The manual also explains the specific error codes associated with each indicator, helping users identify the root cause of the issue and take appropriate action.

Understanding the LED indicators is crucial for ensuring safe and efficient operation of the Powermax 65. By being aware of the system’s status and any potential problems, users can prevent damage to the equipment and ensure a smooth cutting process. The manual emphasizes the importance of familiarizing oneself with the LED indicators and their meanings to maximize the system’s performance and longevity.

Troubleshooting Common Problems

The Hypertherm Powermax 65 manual provides a detailed section dedicated to troubleshooting common problems that users may encounter. This section acts as a valuable resource, guiding users through a systematic approach to identify and resolve issues effectively. The manual covers a wide range of potential problems, from power supply issues and torch malfunctions to consumable wear and system errors.

For each problem, the manual offers clear and concise explanations, accompanied by troubleshooting steps and potential solutions. It outlines common causes, such as incorrect settings, faulty components, or environmental factors. The manual also emphasizes the importance of safety precautions when troubleshooting any electrical or mechanical equipment.

Furthermore, the manual encourages users to contact their Hypertherm distributor or authorized repair facility if they are unable to resolve the issue independently. It provides contact information and resources for obtaining professional support. By providing comprehensive troubleshooting guidance, the manual empowers users to address common problems efficiently and confidently, ensuring optimal performance and longevity of their Powermax 65 system.

Consumables and Maintenance

The Hypertherm Powermax 65 manual dedicates a specific section to consumables and maintenance, recognizing the importance of these aspects for optimal system performance and longevity. This section provides detailed information on the various consumables used with the Powermax 65, including electrodes, nozzles, shields, and cutting tips. It outlines the functions of each consumable and explains how they contribute to the plasma cutting process.

The manual emphasizes the need for regular inspection and replacement of consumables, as wear and tear are inevitable during operation. It provides guidelines for determining when to replace specific consumables based on visual inspection, performance indicators, or cut quality. The manual also includes a troubleshooting section dedicated to consumables, addressing common issues related to their wear, installation, or compatibility.

The manual further covers maintenance procedures for the Powermax 65 system, including cleaning instructions for various components, such as the torch, air filter, and power supply. It stresses the importance of regular maintenance to ensure optimal system operation and prevent potential issues. The manual also provides information on lubrication, air pressure settings, and other important maintenance considerations. By offering comprehensive guidance on consumables and maintenance, the manual empowers users to keep their Powermax 65 system in top condition, ensuring its longevity and optimal performance for years to come.

Safety Precautions

The Hypertherm Powermax 65 manual places a strong emphasis on safety, acknowledging the inherent risks associated with plasma cutting. This dedicated section provides comprehensive safety instructions and precautions to ensure the well-being of operators and those working in the vicinity of the system. It stresses the importance of reading and understanding all safety instructions before operating the Powermax 65, as well as the accompanying Safety and Compliance Manual;

The manual highlights crucial safety aspects, including the need for proper personal protective equipment (PPE), such as safety glasses, gloves, and appropriate clothing. It emphasizes the importance of wearing eye protection and gloves at all times during operation, even when not directly handling the torch. The manual also addresses the dangers of high-voltage electricity, emphasizing the importance of isolating the system from potential contact points.

The manual provides detailed instructions on handling and operating the Powermax 65 safely, including guidelines for proper grounding, ventilation, and fire prevention. It warns against operating the system in confined spaces, and emphasizes the importance of having a fire extinguisher readily available. The manual also covers emergency procedures, providing instructions for handling accidents or malfunctions, and emphasizing the need to seek immediate medical attention in case of injuries. By providing a thorough safety guide, the Powermax 65 manual promotes a culture of safety and empowers users to operate the system responsibly, minimizing the risk of accidents and ensuring their well-being.

freestyle precision neo user manual

FreeStyle Precision Neo User Manual⁚ A Comprehensive Guide

This comprehensive guide provides detailed information about the FreeStyle Precision Neo blood glucose and ketone monitoring system․ From getting started to troubleshooting and maintenance, this user manual covers all aspects of using the device effectively․ It is a valuable resource for individuals who rely on this system for managing their diabetes or other health conditions․

Introduction

Welcome to the FreeStyle Precision Neo blood glucose and ketone monitoring system․ This user manual is your comprehensive guide to using this system effectively․ It provides detailed information about the system’s features, benefits, and how to use it correctly․ The FreeStyle Precision Neo is a vital tool for individuals with diabetes or other health conditions who need to monitor their blood glucose and ketone levels․ It offers a convenient and reliable way to manage your health and make informed decisions about your treatment plan․ This user manual is designed to provide you with the necessary knowledge and understanding to use the FreeStyle Precision Neo system confidently and accurately․ From setting up the system to performing tests and interpreting results, this manual will guide you through every step of the process․

The FreeStyle Precision Neo system is designed to be user-friendly and easy to operate․ It features a compact and portable design, making it convenient to take with you wherever you go․ It also offers a wide range of features, including blood glucose and ketone testing, data storage and tracking, and connectivity to other devices․ This user manual will provide you with all the information you need to get the most out of your FreeStyle Precision Neo system and manage your health effectively․

Key Features and Benefits

The FreeStyle Precision Neo blood glucose and ketone monitoring system is designed to provide you with the tools and information you need to manage your health effectively․ It offers a range of key features and benefits that make it a valuable asset for individuals with diabetes or other health conditions․ The FreeStyle Precision Neo is a compact and portable device, making it easy to take with you wherever you go․ Its user-friendly interface and intuitive design ensure that you can easily navigate the system and perform tests with confidence․ The system is designed for both blood glucose and ketone testing, providing you with a comprehensive understanding of your metabolic health․

One of the key benefits of the FreeStyle Precision Neo is its accuracy and reliability․ The system has been rigorously tested and validated to ensure that it provides accurate and consistent results․ It is also equipped with advanced features that help to minimize the risk of errors, such as automatic calibration and error detection mechanisms․ The FreeStyle Precision Neo system also offers data storage and tracking capabilities, allowing you to monitor your blood glucose and ketone levels over time․ You can use this data to identify trends, track your progress, and work with your healthcare provider to adjust your treatment plan as needed․

System Components

The FreeStyle Precision Neo blood glucose and ketone monitoring system consists of several key components that work together to provide accurate and reliable results․ Understanding the different parts of the system is essential for using it correctly and effectively․ The FreeStyle Precision Neo meter is the central device of the system․ It is a small, handheld device with a user-friendly interface that allows you to perform blood glucose and ketone tests․ The meter is equipped with a display that shows the results of your tests, as well as other important information such as the date, time, and battery status․ The FreeStyle Precision Neo test strips are designed specifically for use with the meter․ Each strip contains a small sensor that reacts with a drop of blood to measure your blood glucose or ketone levels․ The strips are individually packaged and sealed to ensure accuracy and hygiene․ The FreeStyle Precision Neo lancets are used to obtain a small blood sample for testing․ They are designed to be comfortable and safe to use․ The lancets are available in different sizes to suit individual needs․

The FreeStyle Precision Neo system also includes a lancing device that is used to hold the lancet and puncture your finger․ The lancing device is designed to be easy to use and adjust, allowing you to control the depth of the puncture․ You will also need a small alcohol swab to clean your finger before testing․ The FreeStyle Precision Neo system may also include a carrying case to store the meter, test strips, lancets, and other accessories․ The carrying case helps to protect the system from damage and keep all the components organized․

Getting Started

Getting started with the FreeStyle Precision Neo blood glucose and ketone monitoring system is straightforward․ Before you begin using the system for the first time, take a few moments to familiarize yourself with the components and instructions․ The first step is to unpack the FreeStyle Precision Neo system and ensure that you have all the necessary components․ These include the meter, test strips, lancets, lancing device, alcohol swabs, and a user manual․ Once you have all the components, carefully read through the user manual․ The manual provides detailed instructions on how to use the system, including safety precautions, troubleshooting tips, and frequently asked questions․ The user manual is an essential resource for understanding the system’s features and functions․ After reading the user manual, it is important to calibrate the FreeStyle Precision Neo meter․ This process ensures that the meter is providing accurate readings․ The calibration process involves using a control solution that comes with the system․ Follow the instructions in the user manual to calibrate the meter․ Once the meter is calibrated, you are ready to start using it for blood glucose and ketone testing․

To get started with blood glucose testing, follow the instructions in the user manual․ These instructions cover topics such as preparing your finger for testing, inserting a test strip into the meter, and obtaining a blood sample․ Remember to clean your finger with an alcohol swab before testing and to ensure that the blood sample is large enough for the test strip to absorb․ The FreeStyle Precision Neo meter will provide you with your blood glucose reading within a few seconds․

Using the FreeStyle Precision Neo Meter

The FreeStyle Precision Neo meter is designed for ease of use and provides accurate blood glucose and ketone readings․ To use the meter, you will need to follow a few simple steps․ First, insert a test strip into the meter․ The meter will automatically recognize the test strip and be ready for a blood sample․ Next, prepare your finger for testing․ This involves cleaning your finger with an alcohol swab and pricking your finger with a lancet․ The lancet should be used according to the instructions provided in the user manual․ Once you have obtained a blood sample, gently touch the blood sample to the edge of the test strip․ The meter will then draw the blood sample into the test strip and begin analyzing it․ Within a few seconds, the meter will display your blood glucose or ketone reading․ The reading will be displayed in either mmol/L or mg/dL, depending on your preferred unit of measurement․

The FreeStyle Precision Neo meter offers several features that make it user-friendly․ It has a large, easy-to-read display that shows the blood glucose or ketone reading, the date and time, and other relevant information․ The meter also has a memory function that stores your previous readings․ This allows you to track your blood glucose or ketone levels over time and identify any trends․ You can also use the meter’s memory function to download your readings to a computer for analysis or to share with your healthcare provider․

Blood Glucose Testing

The FreeStyle Precision Neo meter is designed to provide accurate and reliable blood glucose readings․ To perform a blood glucose test, you will need to follow these steps⁚

  1. Insert a FreeStyle Precision Neo test strip into the meter․
  2. Wash your hands thoroughly with soap and water and dry them completely․
  3. Prepare your finger for testing by cleaning the area with an alcohol swab and allowing it to air dry․
  4. Use a lancet to prick your finger, gently squeezing the area to obtain a blood sample․
  5. Apply a small drop of blood to the edge of the test strip, ensuring that the blood completely fills the sampling area․
  6. The meter will automatically analyze the blood sample and display your blood glucose reading within a few seconds․
  7. Record your blood glucose reading in your logbook or diabetes management app․

It is crucial to follow the instructions provided in the user manual carefully to ensure accurate results․ If you have any questions or concerns regarding blood glucose testing, consult your healthcare provider or a qualified healthcare professional․

Ketone Testing

The FreeStyle Precision Neo meter is capable of measuring both blood glucose and ketone levels, offering comprehensive monitoring for individuals with diabetes․ Ketone testing is particularly important for people with type 1 diabetes, as it helps detect and manage diabetic ketoacidosis (DKA), a potentially life-threatening condition․ To perform a ketone test, follow these steps⁚

  1. Ensure you are using the correct FreeStyle Precision Neo test strips designed for ketone testing․
  2. Insert the ketone test strip into the meter․
  3. Wash your hands thoroughly with soap and water and dry them completely․
  4. Collect a small sample of urine in a clean container․
  5. Dip the ketone test strip into the urine sample, ensuring that the strip is fully submerged․
  6. Remove the strip from the urine and gently shake off any excess liquid․
  7. Insert the strip into the meter’s designated slot․
  8. The meter will analyze the urine sample and display your ketone reading within a few seconds․
  9. Record your ketone reading in your logbook or diabetes management app․

It is essential to follow the instructions provided in the user manual carefully to ensure accurate ketone test results․ Consult your healthcare provider for guidance on interpreting ketone readings and managing your diabetes effectively․

Calibration and Accuracy

The FreeStyle Precision Neo meter is designed to provide accurate blood glucose and ketone readings․ However, it is important to ensure that the meter is calibrated correctly to maintain its accuracy․ Calibration involves verifying the meter’s readings against a known standard, typically a reference blood glucose solution․ This process helps ensure that the meter is providing reliable results and is consistent with other blood glucose monitoring devices․

The FreeStyle Precision Neo meter does not require regular manual calibration․ The system automatically calibrates itself with each new test strip inserted․ However, it is still recommended to perform occasional calibration checks, especially if you notice any inconsistencies in your blood glucose readings or if you have recently changed your test strips․ Consult your healthcare provider or the user manual for detailed instructions on performing calibration checks and interpreting the results․

Regularly checking the accuracy of the FreeStyle Precision Neo meter is crucial for effective diabetes management․ Consistent and reliable readings allow for better control of blood glucose levels, ultimately promoting overall well-being․

Troubleshooting

While the FreeStyle Precision Neo meter is designed for reliable operation, occasional issues may arise․ This section provides guidance on troubleshooting common problems you may encounter․ If you experience error messages or inconsistent readings, follow the troubleshooting steps outlined below․

Firstly, review the user manual for specific error codes and their corresponding solutions․ Ensure that the test strips are properly inserted and not expired․ Check the battery level of the meter and replace it if necessary․ If the issue persists, inspect the lancet for proper function and replace it if it is damaged or worn․

If the troubleshooting steps do not resolve the issue, contact Abbott Diabetes Care customer service for assistance․ They can provide further guidance and support to address any technical difficulties you may be experiencing․ Remember to keep your meter clean and follow the maintenance instructions provided in the user manual for optimal performance․

Maintenance and Storage

Proper maintenance and storage of your FreeStyle Precision Neo meter are essential for ensuring its accuracy and longevity․ This section outlines the recommended practices for maintaining your device and keeping it in optimal condition․

After each use, gently wipe the meter’s surface with a soft, dry cloth․ Avoid using harsh chemicals or abrasive materials that may damage the device․ Ensure that the lancet is properly disposed of in accordance with local regulations․ Store the meter in a cool, dry place, away from direct sunlight or extreme temperatures․ Avoid exposing it to excessive moisture or humidity․

Regularly check the condition of the lancets and test strips․ Replace them when they are damaged or expired to maintain accurate readings; Always refer to the user manual for specific instructions on cleaning and maintaining your FreeStyle Precision Neo meter, as well as for information on proper storage of the device and accessories․

sandisk mp3 player manual

SanDisk MP3 Player Manuals⁚ A Comprehensive Guide

This comprehensive guide provides a detailed overview of SanDisk MP3 player manuals‚ covering various models‚ user guides‚ and helpful resources. Whether you’re looking for instructions on loading music files‚ basic operation‚ or firmware updates‚ this guide has you covered.

Introduction

SanDisk MP3 players have been a popular choice for music lovers for years‚ offering a convenient and portable way to enjoy your favorite tunes. Whether you’re a seasoned audiophile or a casual listener‚ having access to the right user manual is crucial for maximizing your MP3 player’s potential. SanDisk provides comprehensive manuals for its various MP3 player models‚ offering detailed instructions on everything from loading music files to navigating the interface and customizing settings. These manuals serve as invaluable resources‚ ensuring you can fully utilize your SanDisk MP3 player and enjoy a seamless listening experience.

This guide aims to provide a comprehensive overview of SanDisk MP3 player manuals‚ covering various models‚ user guides‚ and helpful resources. We’ll explore the features and functionalities of different SanDisk MP3 players‚ delve into specific user manuals‚ and guide you through the process of accessing and utilizing these essential resources. Whether you’re a new SanDisk MP3 player owner or a seasoned user seeking to troubleshoot an issue or explore advanced features‚ this guide will be your ultimate companion.

SanDisk MP3 Player Models

SanDisk has produced a diverse range of MP3 players over the years‚ each catering to different needs and preferences. Some of the most popular and widely recognized models include the SanDisk Clip Sport‚ SanDisk Clip Jam‚ SanDisk Sansa Fuze‚ and SanDisk Clip Sport Plus. These models boast varying features‚ design aesthetics‚ and functionalities‚ offering users a wide selection to suit their individual listening habits and requirements.

The SanDisk Clip Sport‚ known for its compact and lightweight design‚ is ideal for fitness enthusiasts and active individuals. The SanDisk Clip Jam‚ with its vibrant colors and user-friendly interface‚ appeals to those seeking a simple and enjoyable listening experience. The SanDisk Sansa Fuze‚ with its larger screen and enhanced storage capacity‚ caters to users who prioritize a more robust and feature-rich audio player. The SanDisk Clip Sport Plus‚ an upgrade to the original Clip Sport‚ offers improved battery life and additional features‚ making it a compelling choice for those seeking a balance of portability and functionality.

Understanding the specific features and functionalities of each SanDisk MP3 player model is essential for choosing the right one for your needs. The user manuals for each model provide a detailed overview of their unique capabilities‚ helping you make an informed decision and ensuring you select an MP3 player that perfectly aligns with your listening preferences;

SanDisk Clip Sport User Manual

The SanDisk Clip Sport User Manual is an essential guide for navigating the features and functionalities of this popular MP3 player. Designed for active individuals‚ the Clip Sport boasts a compact and lightweight design‚ making it ideal for workouts‚ running‚ and other physical activities. The manual provides a comprehensive overview of the player’s various features‚ including music playback‚ volume control‚ battery management‚ and more.

The user manual offers detailed instructions on how to load music files onto the Clip Sport from your computer‚ ensuring a smooth and seamless transfer process. It also covers the basics of navigating the player’s menu‚ selecting tracks‚ and adjusting playback settings. The manual delves into the Clip Sport’s unique features‚ such as the built-in FM radio and voice recording capabilities‚ providing step-by-step instructions on how to utilize these functions effectively.

Furthermore‚ the manual provides valuable information on troubleshooting common issues‚ such as battery problems‚ connectivity issues‚ or unexpected behavior. It also includes a section on safety guidelines‚ ensuring you use the Clip Sport responsibly and avoid any potential hazards. By carefully reviewing the SanDisk Clip Sport User Manual‚ you can fully understand the capabilities of this portable audio player and enjoy a seamless and enjoyable listening experience.

The SanDisk Clip Jam User Manual serves as a comprehensive guide to understanding and operating this compact and affordable MP3 player. This manual provides detailed instructions on various aspects of the Clip Jam‚ from loading music files to navigating its user-friendly interface. The manual is designed to be accessible to users of all technical backgrounds‚ offering clear explanations and straightforward instructions.

The user manual guides you through the process of transferring music files from your computer to the Clip Jam‚ ensuring a seamless and efficient transfer. It also covers the basic operations of the player‚ including selecting tracks‚ adjusting volume‚ and navigating the menu. The manual highlights the Clip Jam’s key features‚ such as its built-in FM radio‚ enabling you to listen to your favorite radio stations on the go.

Furthermore‚ the user manual provides valuable information on troubleshooting common issues‚ such as battery problems‚ connectivity issues‚ or unexpected behavior. It also includes a section on safety guidelines‚ ensuring you use the Clip Jam responsibly and avoid any potential hazards. By thoroughly reviewing the SanDisk Clip Jam User Manual‚ you can gain a comprehensive understanding of this MP3 player’s features‚ functionalities‚ and capabilities‚ enabling you to fully enjoy your listening experience.

The SanDisk Sansa Fuze User Manual is a comprehensive guide that equips users with the knowledge and skills necessary to fully utilize this versatile MP3 player. It provides a detailed exploration of the Fuze’s features‚ functionalities‚ and capabilities‚ guiding users through every aspect of its operation‚ from basic setup to advanced settings. The manual is structured in a clear and concise manner‚ making it easy to navigate and find the information you need.

The user manual covers essential topics such as loading music files‚ navigating the menu system‚ and customizing settings to suit your preferences. It also delves into the Fuze’s advanced features‚ including its FM radio functionality‚ voice recording capabilities‚ and compatibility with various audio formats. Additionally‚ the manual offers troubleshooting tips to address common issues that users may encounter‚ ensuring a smooth and enjoyable experience.

The SanDisk Sansa Fuze User Manual is a valuable resource for anyone who owns this MP3 player‚ providing a comprehensive understanding of its features and how to maximize its potential. It guides users through the process of setting up the Fuze‚ transferring music files‚ and navigating the menu system‚ empowering them to fully utilize its capabilities and enjoy a rich and immersive listening experience. Whether you’re a seasoned MP3 player user or a newcomer‚ this manual is an essential companion that will enhance your enjoyment of the SanDisk Sansa Fuze.

SanDisk Clip Sport Plus User Manual

The SanDisk Clip Sport Plus User Manual is a comprehensive guide designed to equip users with the knowledge and skills necessary to navigate and utilize the features of this robust MP3 player. It provides a step-by-step approach to understanding the device’s capabilities and functionalities‚ guiding users through every aspect of its operation‚ from basic setup to advanced settings. The manual’s clear and concise structure ensures easy navigation and effortless access to the information you need.

The user manual covers essential topics such as loading music files‚ navigating the menu system‚ and customizing settings to suit individual preferences. It also delves into the Clip Sport Plus’s advanced features‚ including its water-resistant design‚ built-in FM radio functionality‚ and compatibility with various audio formats. The manual further provides insights into the device’s battery life‚ charging procedures‚ and troubleshooting tips to address common issues that users may encounter‚ ensuring a seamless and enjoyable listening experience.

The SanDisk Clip Sport Plus User Manual is a valuable resource for anyone who owns this MP3 player‚ offering a thorough understanding of its features and how to maximize its potential. It guides users through the process of setting up the Clip Sport Plus‚ transferring music files‚ and navigating the menu system‚ empowering them to fully utilize its capabilities and enjoy a rich and immersive listening experience. Whether you’re an experienced MP3 player user or a newcomer‚ this manual is an essential companion that will enhance your enjoyment of the SanDisk Clip Sport Plus.

SanDisk Clip Jam User Manual

The SanDisk Clip Jam User Manual is a comprehensive guide that provides users with a thorough understanding of this compact and versatile MP3 player. It serves as a practical companion‚ offering detailed instructions on every aspect of the Clip Jam’s operation‚ from basic setup to advanced features. This user-friendly manual ensures that users of all levels can effortlessly navigate and utilize the Clip Jam’s functionalities‚ maximizing their listening enjoyment.

The manual covers essential topics such as loading music files from a computer‚ navigating the intuitive menu system‚ and customizing settings to suit individual preferences. It guides users through the process of connecting the Clip Jam to a computer‚ transferring music files‚ and organizing their music library. The manual also provides insights into the Clip Jam’s built-in FM radio functionality‚ allowing users to tune into their favorite stations and enjoy live broadcasts.

The SanDisk Clip Jam User Manual further explores the device’s battery life‚ charging procedures‚ and troubleshooting tips to address common issues that users may encounter. It equips users with the knowledge and tools to resolve minor issues independently‚ minimizing downtime and ensuring a seamless listening experience. Whether you’re a seasoned music lover or a first-time MP3 player user‚ the SanDisk Clip Jam User Manual is an indispensable resource that empowers you to fully appreciate the Clip Jam’s capabilities and enjoy its rich audio quality.

SanDisk Sansa Fuze User Manual

The SanDisk Sansa Fuze User Manual serves as a comprehensive guide to navigating and utilizing the Sansa Fuze MP3 player. This user-friendly manual provides detailed instructions on every aspect of the Sansa Fuze’s operation‚ from setting it up for the first time to exploring its advanced features and functionalities. Whether you’re a tech-savvy user or a newcomer to MP3 players‚ this manual is designed to empower you with the knowledge and confidence to fully utilize the Sansa Fuze’s potential.

The manual covers essential topics such as loading music files from your computer‚ transferring playlists‚ and managing your music library on the device. It also delves into the Sansa Fuze’s built-in FM radio‚ allowing you to tune into your favorite stations and enjoy live broadcasts. The manual guides users through the process of customizing settings‚ adjusting volume levels‚ and setting up equalizer presets for a personalized listening experience. It also provides insights into the Sansa Fuze’s audio playback capabilities‚ covering various audio formats supported by the device.

Beyond music playback‚ the manual explores the Sansa Fuze’s additional features‚ such as its ability to record audio‚ play videos‚ and display photos. It offers detailed instructions on how to utilize these features effectively‚ allowing users to expand their entertainment options and enhance their overall multimedia experience. The SanDisk Sansa Fuze User Manual serves as a valuable resource for users of all levels‚ ensuring a smooth and enjoyable experience with this versatile MP3 player.

Loading Music Files

Loading music files onto your SanDisk MP3 player is a straightforward process that allows you to enjoy your favorite tunes on the go. The process typically involves connecting your MP3 player to your computer using a USB cable‚ which acts as a bridge between the two devices. Once connected‚ your MP3 player will appear as a removable drive on your computer‚ allowing you to access its storage space.

To transfer music files‚ simply drag and drop your desired songs‚ albums‚ or playlists from your computer’s music library into the designated folder on your MP3 player. Most SanDisk MP3 players have a dedicated “Music” or “My Music” folder where you can store your audio files. Ensure that the music files you’re transferring are in compatible formats supported by your MP3 player‚ such as MP3‚ WMA‚ or AAC. After transferring the files‚ disconnect your MP3 player from the computer‚ and you’re ready to enjoy your music library on the go.

Some SanDisk MP3 players may come with additional software that simplifies the music transfer process. These software programs often provide a user-friendly interface for organizing‚ managing‚ and transferring music files to your MP3 player. They may also offer features for creating playlists‚ converting audio formats‚ and syncing your music library between your computer and your MP3 player. Regardless of the method you choose‚ loading music files onto your SanDisk MP3 player is a simple and efficient way to create a personalized music experience.

Basic Operation Instructions

Navigating your SanDisk MP3 player is generally intuitive‚ with a straightforward interface designed for ease of use. The player typically features a few essential buttons for controlling playback and navigating menus. The central button‚ often labeled “Power/Select‚” acts as a multi-purpose control‚ powering the device on and off‚ selecting menu options‚ and confirming choices.

To start listening to music‚ simply press the “Power/Select” button to turn on the device. The player will usually boot up into the music playback mode‚ displaying the current song or playlist. Use the navigation buttons‚ typically located on the sides or top of the player‚ to browse through your music library. Scroll through songs‚ albums‚ or playlists by pressing the up and down buttons. The “Play/Pause” button‚ usually located on the front of the player‚ controls the music playback. Pressing it once pauses the current song‚ and pressing it again resumes playback; To adjust the volume‚ use the volume buttons‚ often located on the sides of the player.

Most SanDisk MP3 players also offer additional features like an equalizer‚ allowing you to adjust the audio output to your preference. The player may also have a settings menu where you can customize various options‚ such as display brightness‚ language‚ and audio settings. Familiarize yourself with the specific buttons and functions of your particular SanDisk MP3 player model by referring to the user manual for detailed instructions and helpful tips.

Firmware Updates

Firmware updates for your SanDisk MP3 player are crucial for maintaining optimal performance‚ enhancing features‚ and addressing any known issues. These updates are software upgrades that improve the player’s functionality and stability. To check for available updates‚ you can typically access a dedicated “Firmware Update” section within the player’s settings menu.

The update process usually involves connecting your SanDisk MP3 player to your computer via a USB cable; You can then download the latest firmware update file from the SanDisk website‚ specifically for your model. Once downloaded‚ follow the instructions provided by SanDisk to install the update. Ensure your player is sufficiently charged before starting the update process. The installation typically involves transferring the update file to the player’s internal storage and then restarting the device.

During the update process‚ it’s essential to avoid interrupting the connection or powering off the device. After the update is complete‚ your player will restart‚ and the new firmware will be installed. It’s highly recommended to regularly check for updates‚ as they often include bug fixes‚ performance enhancements‚ and new features. You can find detailed instructions and support information on the SanDisk website‚ specifically for your SanDisk MP3 player model.

Downloading Manuals Online

Finding and downloading the right SanDisk MP3 player manual is a straightforward process‚ thanks to the availability of online resources. The SanDisk website is your primary source for official user manuals. Simply navigate to the support section of the website and search for your specific SanDisk MP3 player model.

Once you’ve located your model‚ you’ll typically find a dedicated “Downloads” or “Manuals” section. Within this section‚ you can browse through various documents‚ including the user manual‚ quick start guide‚ and any other relevant documentation. These manuals are usually available in PDF format‚ making them easily accessible and printable. You can save the PDF file to your computer for future reference or print a physical copy for offline use.

In addition to the SanDisk website‚ other online resources like ManualsOnline and PDF manuals websites can also provide access to SanDisk MP3 player manuals. These platforms often offer a comprehensive collection of user guides for various electronic devices‚ including MP3 players. Search for your specific model on these websites to locate the desired manual. Remember to verify the authenticity of the downloaded manuals from reputable sources to ensure you’re getting accurate information.

whirlpool wtw5000dw3 service manual pdf

The Whirlpool WTW5000DW3 service manual provides essential guidance for maintenance, troubleshooting, and repairs, ensuring optimal performance and longevity of your washing machine. Download the PDF for detailed instructions;

Overview of the Whirlpool WTW5000DW3 Service Manual

The Whirlpool WTW5000DW3 service manual is a comprehensive guide designed to assist users and technicians in maintaining, troubleshooting, and repairing the washing machine. It covers detailed procedures for diagnosing issues, replacing parts, and ensuring optimal performance. The manual includes technical specifications, diagrams, and step-by-step instructions to help users understand and resolve common problems. Additionally, it provides safety precautions and maintenance tips to extend the appliance’s lifespan. Available as a PDF download, this manual is an indispensable resource for anyone seeking to service or repair their Whirlpool WTW5000DW3 washer effectively.

Importance of the Service Manual for Maintenance and Repair

The service manual is crucial for maintaining and repairing the Whirlpool WTW5000DW3 washer. It provides detailed instructions and diagrams to help users diagnose and fix issues, ensuring efficient troubleshooting. The manual also outlines routine maintenance procedures, which are essential for preventing breakdowns and extending the appliance’s lifespan. By following the guidelines, users can perform repairs safely and correctly, avoiding costly damages. Additionally, the manual includes error codes and diagnostic modes, enabling precise identification of problems. Regularly referencing this manual helps users maintain their washer in optimal condition, ensuring reliable performance and longevity. It is a vital tool for both DIY enthusiasts and professional technicians.

Where to Find the Whirlpool WTW5000DW3 Service Manual

The Whirlpool WTW5000DW3 service manual is available on the official Whirlpool website, Sears Parts Direct, and ManualsLib, offering free PDF downloads for easy access.

Official Whirlpool Website and Customer Support

The official Whirlpool website is the most reliable source for the WTW5000DW3 service manual. Users can easily download the PDF version by visiting the Whirlpool Customer Care Center. This platform provides direct access to product manuals, installation guides, and datasheets. Additionally, Whirlpool’s customer support team is available to assist with any inquiries or issues related to the manual. The website also offers a comprehensive search feature, allowing users to quickly locate the specific model they need. By registering your product on the site, you can access exclusive benefits, including service plans and personalized support. This ensures a seamless experience for maintaining and repairing your Whirlpool washing machine.

Third-Party Websites Offering the Manual

Several third-party websites provide access to the Whirlpool WTW5000DW3 service manual, offering convenient downloads for users. Websites like ManualsLib and Sears PartsDirect host a wide range of appliance manuals, including the WTW5000DW3. These platforms often allow free PDF downloads, making it easy to access the manual without visiting the official Whirlpool site. Additionally, some forums and technical support communities share links to the manual, ensuring availability even if the official sources are temporarily inaccessible. However, users should exercise caution when using third-party sites, as they may include ads or require account registration. Always verify the source’s reliability to ensure the manual is genuine and up-to-date. This option is particularly useful for those who prefer alternative download methods.

Direct Download Links and Sources

Understanding the Structure of the Service Manual

The Whirlpool WTW5000DW3 service manual is a comprehensive guide organized into clear sections, including diagrams, technical specifications, and detailed instructions for easy navigation and effective servicing.

Table of Contents and Key Sections

The Whirlpool WTW5000DW3 service manual begins with a detailed table of contents, ensuring easy navigation through its comprehensive sections. Key areas include installation guidelines, routine maintenance procedures, and troubleshooting tips. The manual also covers technical specifications, error codes, and diagnostic modes, providing in-depth information for professionals. Safety precautions and electrical guidelines are emphasized throughout, while diagrams and illustrations enhance understanding of complex repair procedures. Additionally, the manual includes step-by-step instructions for parts replacement and a list of required tools, making it an invaluable resource for both novice and experienced technicians. Each section is designed to address specific needs, ensuring efficient and safe servicing of the appliance.

Diagrams and Illustrations for Better Comprehension

The Whirlpool WTW5000DW3 service manual includes detailed diagrams and illustrations to simplify complex procedures. These visuals provide clear guidance on component locations, wiring connections, and assembly/disassembly steps. High-quality images of internal mechanisms and control panels help technicians identify parts quickly. Illustrations of error codes and diagnostic processes ensure accurate troubleshooting. Step-by-step repair procedures are accompanied by corresponding visuals, reducing confusion and saving time. The manual’s visual aids are particularly useful for DIY enthusiasts and professionals alike, ensuring tasks are performed safely and effectively. By combining textual instructions with visual support, the manual enhances understanding and simplifies the servicing experience for all users.

Technical Specifications and Safety Precautions

The Whirlpool WTW5000DW3 service manual details essential technical specifications, including the washer’s 4.3 cu;ft capacity, 12 wash cycles, and energy-efficient design. It outlines electrical requirements, such as voltage and power consumption, ensuring proper installation and operation. Safety precautions are emphasized, including warnings against improper electrical connections, overloaded circuits, and unbalanced installations. The manual advises users to avoid overloading the washer and to ensure stable placement to prevent accidents. Guidelines for handling cleaning products and emergency procedures, like disconnecting power in case of malfunctions, are also provided. Adhering to these precautions is crucial for safe operation, preventing damage, and ensuring the longevity of the appliance.

Maintenance and Troubleshooting Guide

Regularly clean the filter, check balance, and inspect hoses. Refer to diagnostic modes for error codes and solutions to address common issues promptly and effectively.

Routine Maintenance Procedures

Regular maintenance is crucial for optimal performance and longevity of your Whirlpool WTW5000DW3 washer. Start by cleaning the filter monthly to prevent debris buildup. Check and ensure the machine is properly balanced to avoid vibrations during operation. Inspect hoses for signs of wear or leaks and replace them if necessary. Run a cleaning cycle every 1-2 months to remove detergent residue and odors. Refer to the service manual for specific instructions on these procedures. Additionally, leave the lid open after use to allow internal components to dry, reducing mold and mildew growth. By following these routine steps, you can maintain efficiency, prevent issues, and extend the life of your appliance.

Common Issues and Solutions

Common issues with the Whirlpool WTW5000DW3 washer include error codes, poor drainage, and vibrations. If an error code appears, refer to the manual for specific troubleshooting steps. For drainage problems, check the drain pump filter and ensure it’s clean. Vibrations during operation often result from improper leveling; adjust the machine’s legs to stabilize it. If the washer emits unusual noises, inspect for loose parts or debris. Regularly cleaning the detergent dispenser and gasket can prevent mold and odors. For persistent issues, reset the washer by unplugging it for 30 minutes. Always consult the service manual for detailed solutions and ensure proper maintenance to avoid these problems. Addressing these issues promptly can extend the appliance’s lifespan and ensure efficient performance.

Diagnostic Modes and Error Codes

The Whirlpool WTW5000DW3 service manual details diagnostic modes and error codes to help identify and resolve issues. Enter diagnostic mode by pressing and holding specific buttons, as outlined in the manual. Error codes like “F1” or “F2” indicate specific faults, such as control board malfunctions or sensor issues. The manual provides a list of codes and their meanings, guiding technicians or users to the root cause. By understanding these codes, repairs can be targeted effectively. Regular use of diagnostic modes ensures proactive maintenance, preventing minor issues from escalating. This section is crucial for troubleshooting and ensuring the washer operates efficiently. Always refer to the manual for accurate interpretations and step-by-step solutions. Proper use of diagnostic tools enhances repair accuracy and appliance longevity.

Repair and Replacement Guidelines

The manual provides detailed step-by-step instructions for repairing and replacing parts, ensuring safety and efficiency. Identify faulty components and follow specific procedures for proper installation and testing.

Parts Identification and Replacement

The Whirlpool WTW5000DW3 service manual includes detailed diagrams and descriptions to help identify specific parts that may need replacement. This ensures accurate and efficient repairs. Key components like the drain pump, motor, and tub bearings are highlighted, along with their locations and functions. The manual also provides part numbers, making it easier to order genuine replacements. Clear instructions guide users through the disassembly and reassembly process, emphasizing safety and proper tools. By following the manual’s guidance, technicians and DIYers can replace faulty parts confidently, restoring the washer’s performance and extending its lifespan. Always refer to the manual before starting any replacement to ensure compatibility and adherence to manufacturer recommendations.

Step-by-Step Repair Instructions

The Whirlpool WTW5000DW3 service manual offers detailed, step-by-step repair instructions to address common issues. From diagnosing problems to completing repairs, the manual provides clear, actionable guidance. It includes procedures for replacing faulty components, adjusting settings, and resolving error codes. Each step is accompanied by diagrams and explanations to ensure clarity. The manual emphasizes safety, outlining proper disconnect procedures and tool usage. By following these instructions, technicians and experienced users can perform repairs efficiently. The guide also specifies the use of genuine Whirlpool parts to maintain performance and warranty compliance. Whether it’s a minor adjustment or a major repair, the manual serves as a comprehensive resource for restoring the washer to optimal function. Regular reference to these instructions ensures effective and safe repairs.

Tools and Equipment Required for Repairs

The Whirlpool WTW5000DW3 service manual specifies the essential tools and equipment needed for repairs, ensuring tasks are performed safely and effectively. Common tools include screwdrivers, pliers, and wrenches, while specialized tools like a multimeter may be required for diagnostic procedures. The manual also recommends using Whirlpool-approved test equipment for accurate troubleshooting. Safety gear, such as gloves and safety goggles, is emphasized to protect technicians during repairs. A complete list of required tools is provided in the manual, enabling users to prepare in advance. These specifications ensure repairs are conducted efficiently, minimizing downtime and maintaining the appliance’s performance. Proper tools and equipment are crucial for adhering to safety standards and achieving successful outcomes. Regularly updating your toolkit ensures compatibility with the latest repair procedures. Always refer to the manual for specific recommendations tailored to your washer model. Properly equipped, you can address issues confidently and effectively. By following these guidelines, you ensure repairs are both safe and reliable. The manual’s detailed tool list helps prevent delays and ensures a smooth repair process. This section is designed to empower users with the knowledge needed to handle repairs professionally. Always prioritize using the correct tools to avoid damage and maintain warranty compliance. The Whirlpool WTW5000DW3 service manual is a comprehensive guide for all your repair needs. Tools and equipment are vital for successful repairs, and the manual provides clear instructions to help you get started. With the right tools, you can diagnose and fix issues efficiently, extending the life of your appliance. The manual’s emphasis on proper tool usage underscores its commitment to safety and effectiveness.

Safety Precautions and Warnings

The Whirlpool WTW5000DW3 service manual emphasizes adhering to safety guidelines to prevent accidents. Always disconnect power before repairs, use authorized parts, and follow proper procedures to ensure safety.

  • Avoid electrical hazards by unplugging the washer.
  • Wear protective gear like gloves and safety goggles.
  • Follow all warnings and cautions in the manual.

Electrical Safety Guidelines

When working on your Whirlpool WTW5000DW3 washer, always prioritize electrical safety to avoid hazards. Ensure the machine is unplugged from the power source before starting any repairs. Never attempt to bypass safety features or tamper with electrical components without proper training. Use only authorized replacement parts to maintain safety standards. Keep loose clothing and long hair tied back to prevent entanglement. Avoid working in damp environments, as moisture can increase the risk of electrical shock. Always follow the manual’s instructions for disconnecting and reconnecting electrical connections. If you’re unsure about a procedure, consult a licensed professional to ensure your safety and the appliance’s proper function.

  • Disconnect power before servicing.
  • Avoid damaged cords or plugs.
  • Ensure proper grounding of the appliance.
  • Follow all safety warnings in the manual.

Ignoring these guidelines can lead to severe injury or damage. Always refer to the Whirlpool WTW5000DW3 service manual for specific electrical safety recommendations.

Proper Use of Cleaning and Maintenance Products

Using the right cleaning and maintenance products is crucial for keeping your Whirlpool WTW5000DW3 washer in optimal condition. Avoid harsh chemicals or abrasive cleaners, as they can damage the exterior finish or internal components. For routine cleaning, use mild detergents or products specifically designed for appliance care. Regularly clean the gasket and detergent drawer to prevent mold and odors. Always refer to the service manual for recommended cleaning solutions and procedures. Avoid overusing bleach or strong acids, as they can degrade rubber and plastic parts. For tough stains or odors, follow the manual’s guidelines for safe and effective cleaning methods. Proper maintenance ensures longevity and prevents costly repairs. Always check the manual for specific product recommendations tailored to your washer model.

  • Use mild detergents for exterior cleaning.
  • Avoid harsh chemicals and abrasive cleaners.
  • Clean the gasket and detergent drawer regularly.
  • Refer to the manual for recommended products.

Following these guidelines helps maintain your washer’s performance and appearance. Regular maintenance ensures a fresh, clean, and efficient washing experience.

Emergency Procedures in Case of Malfunction

In case of a malfunction, prioritize safety and follow the service manual’s emergency procedures. Immediately turn off the power supply to the washer at the circuit breaker or fuse box. Do not attempt to repair the machine yourself unless instructed by the manual. If water is leaking, turn off the water supply valves behind the washer. If the machine is making unusual noises or vibrating excessively, stop the cycle and unplug it. Check for blockages in the drain pump or hoses, but avoid disassembling internal components. Refer to the manual for specific guidance on handling malfunctions safely. Contact Whirlpool customer support or an authorized service technician for professional assistance. Always follow the manual’s instructions to avoid further damage or safety risks.

  • Turn off power at the circuit breaker.
  • Stop the cycle and unplug the washer.
  • Check for blockages in the drain system.
  • Contact authorized service professionals.

Never attempt unsafe repairs without proper guidance from the service manual or a certified technician. Your safety and the machine’s integrity depend on following these procedures.

Warranty and Customer Support Information

Whirlpool offers comprehensive warranty coverage and dedicated customer support for the WTW5000DW3. Visit their official website or call 1-800-366-7278 for assistance with repairs, parts, and service plans.

Warranty Coverage and Terms

The Whirlpool WTW5000DW3 is backed by a comprehensive warranty program, ensuring protection for parts and labor under specific conditions. The warranty typically covers defects in materials and workmanship for a defined period, providing peace of mind for users. Detailed terms, including duration and coverage limitations, are outlined in the service manual. Proper registration and adherence to maintenance guidelines are often required to maintain warranty validity. Users are advised to review the manual or contact Whirlpool customer support for precise warranty terms applicable to their model. This ensures clarity on what is covered and any conditions that may void the warranty.

Visit the official Whirlpool website for the latest warranty information and to download the manual for further details.

Contacting Whirlpool Customer Service

For assistance with the Whirlpool WTW5000DW3, customers can reach out to Whirlpool’s dedicated support team. The customer service hotline, 1-800-366-7278, is available Monday through Friday to address inquiries, repair requests, and warranty-related issues. Additionally, users can visit Whirlpool’s official website to access online support resources, including FAQs, troubleshooting guides, and service manuals. Registration of your appliance is recommended to ensure seamless support and warranty validation. For convenience, the service manual can also be downloaded directly from Whirlpool’s website or authorized sources like here. Whirlpool’s customer service team is committed to providing timely and effective solutions to enhance your ownership experience.

Service Centers and Authorized Dealers

For professional assistance, locate Whirlpool-authorized service centers through their official website. These centers provide trusted maintenance and repair services for the WTW5000DW3, ensuring genuine parts and warranty compliance. Dealers are trained to handle complex issues, offering reliable solutions. Visit here for manual downloads, enhancing your service experience with accurate guides and support.

Additional Resources and References

Explore online forums, video tutorials, and FAQs for supplementary guidance on the Whirlpool WTW5000DW3. These resources offer user-generated tips and expert advice for enhanced troubleshooting and maintenance.

Online Forums and Communities

Online forums and communities are invaluable resources for troubleshooting and repair tips related to the Whirlpool WTW5000DW3. Websites like Reddit and specialized appliance repair forums host discussions where users share experiences and solutions. These platforms often include detailed threads on common issues, DIY fixes, and advice from experienced technicians. Additionally, many communities provide access to user-generated repair guides and manuals, which can complement the official service manual. By engaging with these forums, you can gain insights into specific problems, such as error codes or maintenance routines, and learn from others who have faced similar challenges. Active participation in these communities can also help you stay updated on the latest repair techniques and tools, ensuring your washer remains in optimal condition. Always search for specific topics or error codes to find relevant discussions quickly.

Video Tutorials and Repair Guides

Video tutorials and repair guides are excellent supplementary resources for understanding and maintaining the Whirlpool WTW5000DW3 washer. Platforms like YouTube and official Whirlpool channels offer step-by-step visual instructions for common repairs and maintenance tasks. These videos often cover topics such as diagnosing error codes, replacing worn-out parts, and performing routine cleaning. Additionally, some tutorials focus on specific features of the WTW5000DW3, such as the Quick Wash cycle or balancing the washer for optimal performance. Many repair guides are also available as downloadable PDFs, providing detailed diagrams and instructions. By leveraging these resources, users can gain hands-on knowledge and confidence in performing repairs themselves. Always look for tutorials from trusted sources to ensure accuracy and safety.

FAQs and User-Generated Content

FAQs and user-generated content provide valuable insights and solutions for common issues related to the Whirlpool WTW5000DW3 washer. Many users share their experiences and tips on forums and websites, offering practical advice for troubleshooting and maintenance. FAQs often address questions about error codes, noise issues, and optimal usage. Users also discuss their repair experiences, sharing which parts are most likely to need replacement and how to source them. Additionally, some communities create comprehensive guides based on collective knowledge, covering topics like filter cleaning and cycle customization. These resources complement the official service manual, offering real-world perspectives and solutions from fellow users. Engaging with these forums can help users troubleshoot faster and gain confidence in maintaining their appliance effectively.

The Whirlpool WTW5000DW3 service manual is a comprehensive resource for maintaining and repairing your washer. Regularly referring to it ensures optimal performance and extends longevity.

Final Thoughts on Using the Service Manual

The Whirlpool WTW5000DW3 service manual is an invaluable resource for users, providing clear instructions and troubleshooting tips to ensure optimal performance of the washing machine. By following the guidelines outlined in the manual, users can perform routine maintenance, diagnose common issues, and execute repairs effectively. This not only extends the lifespan of the appliance but also enhances its efficiency and reliability. The manual’s detailed diagrams and step-by-step instructions make it accessible to both novice and experienced users. Regular reference to the manual empowers users to take control of their appliance’s care, minimizing the need for professional intervention and reducing maintenance costs over time. It is a comprehensive guide that underscores the importance of proper upkeep for sustained functionality.

Encouragement to Regularly Refer to the Manual

Regularly referring to the Whirlpool WTW5000DW3 service manual is crucial for maintaining the washing machine’s performance and ensuring its longevity. By consulting the manual, users can identify potential issues before they escalate, perform routine maintenance, and optimize the appliance’s functionality. This proactive approach not only prevents costly repairs but also enhances energy efficiency and overall user satisfaction. The manual’s clear instructions and diagrams provide a user-friendly guide, empowering individuals to take charge of their appliance’s care confidently. Consistent reference to the manual fosters a deeper understanding of the machine’s operations, enabling users to address minor problems independently and extend the lifespan of their washer. Regularly reviewing the manual ensures that the appliance continues to deliver reliable service for years to come.

Importance of Proper Maintenance for Longevity

Proper maintenance is vital for extending the lifespan of your Whirlpool WTW5000DW3 washing machine. Regular tasks such as cleaning the filter, checking hoses, and ensuring proper ventilation prevent issues like poor performance and mold buildup. By following the service manual’s guidelines, you can avoid costly repairs and ensure optimal functionality. Maintenance also enhances energy efficiency, reducing utility bills over time. Consistent care helps preserve the machine’s internal components, preventing premature wear and tear. A well-maintained washer delivers consistent results, ensuring cleaner laundry and reliable operation. Investing time in routine upkeep not only safeguards your appliance but also contributes to a safer and more efficient household. Proper maintenance is a cornerstone of extending the longevity and performance of your Whirlpool washer.

laboratory manual for general biology

This laboratory manual serves as a comprehensive guide for undergraduate biology courses, providing foundational knowledge and practical skills through hands-on experiments and detailed explanations. It aligns with course objectives, emphasizing scientific inquiry and critical thinking in biological principles.

1.1 Purpose and Structure of the Manual

This laboratory manual is designed to guide students through hands-on experiments and activities that reinforce key biological concepts. Its primary purpose is to provide a structured framework for exploring fundamental biological principles, ensuring a comprehensive understanding of the subject. The manual is organized into clear sections, each focusing on specific topics such as cell biology, genetics, ecology, and microscopy. Each chapter includes detailed procedures, safety protocols, and expected outcomes to help students navigate lab sessions effectively. The structure encourages active learning, critical thinking, and scientific inquiry, preparing students for advanced studies in biology. By following the manual, students will gain practical skills and a deeper appreciation for the biological sciences, fostering a solid foundation for their academic and professional careers.

1.2 Preparing for Lab Sessions

Preparation is essential for effective and safe participation in lab sessions. Begin by thoroughly reviewing the lab manual and understanding the objectives, materials, and procedures. Organize all required materials, such as lab coats, gloves, and goggles, to ensure compliance with safety protocols. Familiarize yourself with the location of emergency equipment, including fire extinguishers, eyewash stations, and first aid kits. Review any necessary pre-lab readings or videos to grasp key concepts and techniques. Ensure your workspace is clean and well-organized to minimize distractions and hazards. Finally, arrive promptly and follow all instructor guidelines to maximize learning and maintain a safe environment for everyone involved in the lab session.

Lab Safety and Regulations

Laboratory safety is crucial to protect personnel and ensure compliance with regulations. Always wear appropriate PPE, follow proper chemical handling, and know emergency procedures to maintain a safe environment.

2.1 General Lab Safety Rules

Adhering to lab safety rules is essential to prevent accidents and ensure a secure environment. Always wear appropriate personal protective equipment (PPE), such as lab coats, gloves, and goggles, when handling chemicals or biological specimens. Tie back long hair, secure loose clothing, and avoid wearing jewelry that could pose a hazard. Closed-toe footwear is mandatory, and sandals or open-toed shoes are prohibited. Never eat, drink, or chew gum in the lab. Familiarize yourself with the location of emergency equipment, such as fire extinguishers, eyewash stations, and first aid kits. Follow proper procedures for handling and disposing of chemicals, and attend all required safety briefings before starting experiments. Ignorance of these rules can lead to serious injuries or legal consequences.

2.2 Emergency Procedures and Equipment

In case of emergencies, knowing proper procedures and equipment locations is crucial. Fire extinguishers, eyewash stations, first aid kits, and emergency exit routes must be easily accessible and clearly marked. Activate the lab alarm and evacuate the area immediately if a fire or chemical spill occurs. Use fire extinguishers only if the fire is small and you are trained. For chemical exposure, flush affected areas with water for at least 15 minutes using an eyewash station. Report all incidents to the instructor or lab supervisor. Regular safety drills ensure preparedness. Familiarize yourself with emergency equipment during lab orientations. Prompt action can prevent minor incidents from escalating, ensuring safety for everyone in the lab environment. Proper training and awareness are key to effective emergency response.

Microscopy in Biology Labs

Microscopy is essential for studying tiny biological structures. Compound light microscopes provide detailed cellular views, while stereo microscopes are used for dissecting and observing larger specimens or tissues.

3.1 Using the Compound Light Microscope

The compound light microscope is a fundamental tool in biology labs, enabling detailed observation of cellular structures. It consists of an eyepiece, objective lenses, a stage, and a light source. To use it, prepare the microscope by cleaning the lenses with lens paper and adjusting the light source. Place the slide on the stage, secure it with the stage clips, and focus using the coarse and fine adjustment knobs. Start with low magnification (e.g., 4x or 10x) to locate the specimen, then switch to higher magnification (e.g., 40x or 100x oil immersion) for detailed observation. Adjust the condenser lens for optimal light clarity. Proper handling ensures clear visualization of biological samples, making it essential for studying cellular structures and functions.

3.2 Stereo Microscope Techniques

The stereo microscope, also known as a dissecting microscope, provides a three-dimensional view of specimens, making it ideal for observing larger samples like tissues, insects, and small organisms. Unlike the compound microscope, it uses two separate optical paths, allowing for depth perception. To use it effectively, place the specimen on the stage and adjust the light source for proper illumination. Use the zoom feature to magnify the sample without changing objectives, and adjust the interpupillary distance and diopter settings for comfortable viewing. Stereo microscopes are essential for dissections, examining external structures, and studying specimen morphology. They are often used in ecology and anatomy labs to analyze whole organisms or tissues without the need for sectioning. Proper technique enhances the clarity and detail of the observed specimen, aiding in accurate biological investigations and descriptions.

Cell Biology Experiments

Explore cellular structure and function through hands-on activities. Observe live cells, study cell division, and investigate transport mechanisms, enhancing understanding of biological processes at the cellular level.

4.1 Observing Cell Structure and Function

This section focuses on understanding the morphology and function of cells through microscopy. Students learn to prepare and observe slides of plant and animal cells, identifying key structures such as the cell wall, plasma membrane, cytoplasm, nucleus, and organelles. Techniques include staining methods to enhance visibility under a compound light microscope; Observations of living cells and fixed specimens provide insights into cellular dynamics. Additionally, experiments on cell division and organelle function are conducted to explore how cells maintain life, grow, and respond to stimuli. These activities bridge theoretical knowledge with practical skills, fostering a deeper appreciation of cellular biology and its significance in broader biological processes.

4.2 Investigating Cellular Transport Mechanisms

This section explores the movement of materials across cellular membranes, focusing on passive and active transport mechanisms. Experiments include demonstrations of diffusion, osmosis, and active transport using artificial membranes or living cells. Students observe how substances like glucose, ions, and water cross membranes, analyzing factors such as concentration gradients and membrane permeability. Techniques involve measuring transport rates, observing plasmolysis, and using indicators to track movement. These activities provide insights into how cells maintain homeostasis and respond to environmental changes. Practical exercises reinforce theoretical concepts, enabling students to understand the critical role of transport mechanisms in cellular function and overall organismal survival.

Genetics and Heredity

This section introduces fundamental principles of genetics, exploring inheritance patterns, Mendelian laws, and DNA structure. Practical exercises involve analyzing pedigrees and simulating genetic crosses to understand hereditary traits.

5.1 Mendelian Genetics and Inheritance Patterns

This section explores the fundamental principles of Mendelian genetics, focusing on inheritance patterns and laws of segregation and independent assortment. Students engage in hands-on activities, such as creating Punnett squares and analyzing pedigree charts, to predict and understand genetic outcomes. Practical exercises include simulating monohybrid and dihybrid crosses to observe phenotypic ratios. Data interpretation and statistical analysis are emphasized to validate Mendel’s laws. Additionally, the section introduces basic genetic terminology and the role of alleles in determining traits. By combining theoretical concepts with experimental approaches, students gain a deeper understanding of how genetic information is passed through generations.

5.2 DNA Structure and Replication

This section delves into the molecular structure of DNA, emphasizing its double-helix model and the roles of nucleotides, sugars, and phosphates. Lab activities include modeling DNA replication using physical structures and simulating the process of semi-conservative replication. Students explore the functions of key enzymes such as DNA polymerase and ligase, as well as the differences between leading and lagging strand synthesis. Practical exercises involve extracting and visualizing DNA, while theoretical discussions cover the significance of DNA replication in genetic continuity. Data analysis and interpretation of experimental results are integrated to reinforce understanding of DNA’s central role in heredity. This section bridges theoretical concepts with hands-on experimentation to deepen comprehension of DNA’s structure and replication mechanisms.

Ecology and Ecosystems

This section explores the structure and function of ecosystems, focusing on energy flow, nutrient cycles, and interactions between biotic and abiotic components. Lab exercises include field observations, species sampling, and ecosystem modeling to understand ecological principles and biodiversity. Students analyze data to interpret environmental impacts and ecological balance.

6;1 Ecosystem Structure and Components

An ecosystem consists of biotic (living) and abiotic (non-living) components that interact to form a functional unit. Biotic components include producers (plants, algae), consumers (herbivores, carnivores), and decomposers (bacteria, fungi). Abiotic factors such as light, temperature, water, and nutrients play a critical role in shaping ecosystem dynamics. Laboratory exercises focus on identifying and analyzing these components, exploring energy flow through food webs, and understanding nutrient cycling processes. Students learn to classify organisms, measure environmental parameters, and assess the impact of human activities on ecosystem balance. Practical activities include field observations, species sampling, and experiments to demonstrate ecological principles. This section provides hands-on experience in understanding the intricate relationships within ecosystems.

6.2 Population Dynamics and Interactions

Population dynamics involve the study of factors influencing population size, such as birth rates, death rates, immigration, and emigration. Laboratory exercises explore these concepts through simulations and data analysis, enabling students to understand how populations grow, stabilize, or decline over time. Interactions between species, including predator-prey relationships, competition, and symbiosis, are also examined. Practical activities include modeling population growth curves, analyzing species interactions in controlled environments, and interpreting ecological data. These exercises provide insights into how environmental changes and biological interactions shape community structures. By engaging in hands-on experiments and observations, students develop a deeper understanding of the complex dynamics within ecosystems and their implications for biodiversity and ecological balance.

Evolution and Natural Selection

This section explores the fundamental concepts of evolution and natural selection through hands-on activities and observations. Students analyze evidence supporting evolutionary processes, such as fossil records, genetic variations, and adaptations. Practical experiments simulate natural selection pressures, enabling students to understand how populations evolve over time. Key topics include mechanisms of speciation, evolutionary fitness, and the role of environmental factors in shaping biodiversity. These exercises foster a deeper appreciation of evolutionary biology and its relevance to understanding life’s diversity and complexity.

7.1 Mechanisms of Evolution

This section delves into the primary mechanisms driving evolutionary change, focusing on natural selection, genetic drift, mutation, and gene flow. Laboratory exercises simulate these processes, allowing students to observe how populations adapt over generations. Natural selection is explored through experiments demonstrating how environmental pressures favor certain traits, leading to increased fitness. Genetic drift is illustrated using simulations that reveal the impact of random chance on allele frequencies. Mutations are examined as a source of genetic variation, while gene flow activities highlight the importance of population dynamics in maintaining diversity. These hands-on investigations provide a foundational understanding of how evolutionary mechanisms shape biodiversity and species adaptation. Practical data analysis reinforces theoretical concepts, enabling students to critically assess evolutionary outcomes.

7.2 Evidence of Evolution in Laboratory Experiments

Laboratory experiments provide tangible evidence of evolutionary processes, allowing students to witness adaptation and speciation in controlled settings. Activities include the evolution of antibiotic resistance in bacteria, demonstrating natural selection in action. Students observe how environmental pressures drive trait selection, such as pesticide resistance in insect populations. Phylogenetic analysis using molecular techniques reveals evolutionary relationships among organisms. Additionally, simulations of fossil records and comparative anatomy experiments highlight morphological changes over time. These experiments offer empirical support for evolutionary theory, enabling students to analyze data and draw conclusions about the mechanisms and outcomes of evolution. By replicating historical studies, learners gain a deeper appreciation for the scientific evidence underpinning modern evolutionary biology.

Practicum in Biological Techniques

This section focuses on advanced practical applications, including dissection, histology, and ecology field studies. Students develop hands-on skills in biological procedures and apply theoretical knowledge in real-world contexts.

8.1 Dissection and Histology

Dissection and histology exercises provide hands-on experience with anatomical structures and tissue analysis. Students learn to identify organs and systems in various organisms, such as frogs, worms, and plants. Histology involves preparing and staining tissue samples for microscopic examination, enabling the study of cellular arrangements and functions. These activities reinforce anatomical concepts and develop precision skills. Safety protocols and proper use of dissecting tools are emphasized. Through these exercises, students gain a deeper understanding of biological structures and their roles in overall organism function. This practical experience is essential for applying theoretical knowledge in real-world biological studies and research.

8.2 Ecology Field Studies and Observations

Ecology field studies and observations enable students to explore natural environments, collecting data on diverse ecosystems. These activities emphasize understanding interactions between organisms and their habitats. Students conduct species surveys, measure environmental factors like pH and temperature, and analyze nutrient cycling. Fieldwork fosters observation skills and the ability to interpret ecological patterns. By documenting biodiversity and community structures, students apply ecological principles to real-world scenarios. These hands-on experiences promote environmental awareness and reinforce classroom concepts, preparing students for careers in conservation and ecological research. Field studies also encourage critical thinking and teamwork, essential for addressing complex environmental challenges.

Assessment and Evaluation

This section outlines the methods for evaluating student understanding and lab performance, including grading criteria for reports, practical exams, and competency tests. Feedback is provided to improve skills.

9.1 Lab Reports and Data Analysis

Lab reports are critical for documenting experimental procedures, results, and conclusions. They must include materials, methods, data, and discussions. Proper formatting and clarity are essential for accurate communication. Data analysis involves interpreting results, often using graphs and tables to visualize trends. Students are evaluated on their ability to draw logical conclusions and relate findings to biological concepts. Peer and instructor feedback helps refine reporting skills. Adherence to scientific writing standards ensures professionalism and reproducibility. This section provides guidelines for structuring reports and performing statistical analyses to enhance understanding and critical thinking in biological experiments.

9.2 Practical Exams and Competency Tests

Practical exams and competency tests assess students’ hands-on skills and understanding of laboratory techniques. These evaluations simulate real-world scenarios, requiring precise execution of methods and accurate data interpretation. Competency tests focus on specific skills like microscopy, dissection, and experimental design. Practical exams often include stations where students demonstrate tasks under timed conditions. Feedback from instructors helps identify strengths and areas for improvement. High scores reflect mastery of biological techniques essential for future scientific endeavors. These assessments ensure students are well-prepared for advanced lab work and professional environments, emphasizing practical application of knowledge gained throughout the course.

This manual provides a comprehensive foundation in general biology, equipping students with essential skills and knowledge for future academic and professional pursuits in the biological sciences.

10.1 Summary of Key Concepts and Skills

This laboratory manual for general biology has provided a thorough exploration of fundamental biological concepts and practical skills. Students have gained hands-on experience with microscopy, cell structure analysis, and genetic principles. Key skills include laboratory safety, data collection, and scientific reporting. The manual emphasizes critical thinking and scientific inquiry, preparing students for advanced studies in biology. Practical techniques such as dissections, histology, and ecological field observations have been mastered. Understanding of cellular transport, DNA structure, and evolutionary mechanisms has been reinforced. This comprehensive approach ensures students are well-equipped with both theoretical knowledge and practical expertise, essential for pursuing careers in biological sciences.

audi user manual pdf

Audi User Manual PDF⁚ A Comprehensive Guide

An Audi user manual PDF is an essential resource for any Audi owner, providing detailed information on everything from basic operation to advanced features and maintenance. These manuals are available in both physical and digital formats, offering a comprehensive guide to understanding and utilizing your Audi vehicle effectively.

Audi Online Owners Manual

Audi offers a convenient online platform for accessing owners manuals for a wide range of models. You can find the digital owners manual for your Audi vehicle starting from model year 2008 or newer. Audi Online Owners Manual, accessible at ownersmanual.audi.com, provides an intuitive navigation and search function, allowing you to quickly locate the specific information you need. The online platform ensures that your digital owners manual is readily available at any time and from any location. This digital resource eliminates the need for bulky physical manuals and provides a readily accessible source of information for your Audi.

Audi User Manuals⁚ A Detailed Look

Audi user manuals delve into a comprehensive range of topics, providing in-depth information on various aspects of your vehicle. From basic operation to advanced features and maintenance, these manuals serve as your guide to understanding and utilizing your Audi effectively. You can find detailed sections on safety procedures, maintenance schedules, technical data, and self-help tips. The manuals also cover controls and displays, instruments and warning lamps, and the driver information system. Audi user manuals aim to equip owners with the knowledge necessary to ensure a safe, efficient, and enjoyable driving experience; They cover everything from understanding warning lights to performing basic maintenance tasks, empowering you to take care of your Audi with confidence.

Downloading Audi User Manuals

Obtaining an Audi user manual in PDF format is a straightforward process. Audi provides a dedicated online platform, ownersmanual.audi.com, where you can access digital owners manuals for vehicles from model year 2008 onwards. This platform offers an intuitive navigation and search function, allowing you to quickly locate the information you need. Alternatively, numerous websites offer Audi user manuals in PDF format, often organized by model year and vehicle type; These websites often provide free downloads, allowing you to easily access and store the manual on your computer for convenient reference. Remember to ensure you are downloading the manual for your specific Audi model and year to guarantee accuracy and relevance.

Audi User Manual Contents

Audi user manuals are meticulously designed to encompass a wide array of information crucial for operating and maintaining your vehicle effectively. They typically cover a range of topics, including safety procedures, driving tips, general maintenance guidelines, and detailed explanations of various vehicle features. You’ll find sections dedicated to self-help procedures, technical data, controls and displays, instruments and warning lamps, and the driver information system. The manual also provides insights into Audi’s advanced technologies, such as the Audi Drive Select system, Audi Parking System, and Audi Hold Assist. By thoroughly exploring the contents of your Audi user manual, you gain a comprehensive understanding of your vehicle’s capabilities and how to maximize its performance and safety.

Audi User Manual⁚ Safety and Maintenance

The safety and maintenance section of an Audi user manual is paramount for ensuring a safe and reliable driving experience. It provides essential information on various safety features, including seatbelt usage, airbag systems, and child safety restraints. You’ll find detailed explanations of warning lights and their meanings, allowing you to promptly address any potential issues. The manual also offers guidance on routine maintenance tasks, such as checking fluid levels, tire pressure, and brake pad wear. It outlines recommended service intervals and provides insights into proper vehicle care, helping you keep your Audi in optimal condition. Additionally, it may include information on emergency procedures, such as how to use the jack and change a tire. By adhering to the safety and maintenance guidelines outlined in your Audi user manual, you can prioritize the well-being of yourself and your passengers while ensuring your vehicle remains in top shape.

Audi User Manual⁚ Technical Data

The technical data section of an Audi user manual is a valuable resource for understanding the specific details of your vehicle’s engineering and performance. This section provides detailed information on engine specifications, including displacement, power output, and fuel consumption figures. It also outlines transmission details, such as gear ratios and drive modes. You’ll find specifications for braking systems, suspension components, and tire sizes. Additionally, the manual may include technical data related to electrical systems, including battery capacity and alternator output. This information is crucial for informed maintenance, troubleshooting, and even for making modifications or upgrades to your Audi. By understanding the technical specifications of your vehicle, you can better maintain its optimal performance and ensure its longevity.

Audi User Manual⁚ Self-Help

The self-help section of an Audi user manual is a valuable resource for addressing common issues and performing basic maintenance tasks without the need for a professional mechanic. This section often includes step-by-step instructions for simple repairs like changing a flat tire, replacing a fuse, or jump-starting the battery. It may also provide guidance on checking fluid levels, such as engine oil, coolant, and brake fluid. Some manuals might even offer instructions on how to replace bulbs or air filters. While the self-help section encourages a certain level of DIY, it’s important to remember that complex repairs should be left to qualified technicians to ensure safety and avoid potential damage to your vehicle. By familiarizing yourself with the self-help information in your Audi user manual, you can gain confidence in addressing basic maintenance needs and potentially save time and money.

Audi User Manual⁚ Controls and Displays

The controls and displays section of an Audi user manual will guide you through the various buttons, switches, and screens found in your vehicle. This section is crucial for understanding how to operate your Audi’s essential functions, from adjusting climate control and audio settings to navigating menus and accessing driver information. The manual will provide clear illustrations and descriptions of each control, explaining its purpose and how to use it effectively. You’ll learn about the location of key controls, such as the steering wheel buttons, gear selector, and center console controls. The manual will also detail the different displays, including the instrument cluster, infotainment screen, and head-up display, outlining their functionalities and how to interpret the information they present. By thoroughly reviewing the controls and displays section, you can confidently and safely operate your Audi’s various features, ensuring a comfortable and enjoyable driving experience.

Audi User Manual⁚ Instruments and Warning Lamps

The instruments and warning lamps section of your Audi user manual provides vital information about the gauges, indicators, and warning lights found on your vehicle’s dashboard. This section is crucial for understanding the status of your Audi and for recognizing potential issues. The manual will detail the various instruments, including the speedometer, tachometer, fuel gauge, and temperature gauge, explaining their functions and how to interpret the readings. You’ll also find information about the warning lamps, which signal potential problems or system malfunctions. The manual will provide clear descriptions of each warning lamp, including its shape, color, and meaning. It will also explain the appropriate actions to take when a warning lamp illuminates, such as checking the owner’s manual for more information, contacting your dealer, or seeking immediate professional assistance. By familiarizing yourself with the instruments and warning lamps described in your Audi user manual, you can ensure your vehicle’s safety and maintain optimal performance.

Audi User Manual⁚ Driver Information System

The driver information system (DIS) section of your Audi user manual provides a comprehensive guide to the advanced display features available in your vehicle. The DIS is typically located within the instrument cluster and offers a wealth of information beyond the traditional gauges. Your Audi user manual will detail the various functions of the DIS, including its capabilities for displaying information such as current speed, fuel consumption, outside temperature, trip information, and even navigation guidance. The manual will also explain how to navigate the DIS menus, providing instructions on how to access and adjust the displayed information. This section will also cover the use of the on-board computer, which may be integrated into the DIS, allowing you to monitor fuel economy, range, driving time, and other helpful data. Understanding the features and functions of the DIS, as outlined in your Audi user manual, allows you to make informed driving decisions and optimize your driving experience.

kenmore 600 series dryer manual

Kenmore 600 Series Dryer Manual: A Comprehensive Guide

Welcome to the comprehensive guide for your Kenmore 600 Series dryer! This resource provides essential information, from accessing manuals online to troubleshooting common issues and maintaining your appliance. Discover how to keep your dryer running efficiently and safely.

Understanding Your Kenmore 600 Series Dryer

The Kenmore 600 Series dryer is designed for efficient laundry care, featuring various settings and options to accommodate different fabric types; Familiarizing yourself with its functionalities is crucial for optimal performance. The dryer is equipped at the factory for natural gas with a 3/8 N.P.T. gas connection. Whether you’re dealing with delicate items or heavy loads, understanding the dryer’s capabilities ensures proper care. Knowing your model number, typically found inside the dryer door, unlocks access to specific manuals and parts diagrams, aiding in maintenance and repairs. Proper usage extends the dryer’s lifespan and enhances its effectiveness.

Accessing the Kenmore 600 Series Dryer Manual

Finding the manual for your Kenmore 600 Series dryer is simple. Whether online, through Sears Parts Direct, or by downloading a PDF, access to your manual is readily available.

Finding the Manual Online

Accessing your Kenmore 600 Series dryer manual online is a convenient way to get the information you need quickly. Start by visiting the Sears Parts Direct website or the official Kenmore website. These sites often host a digital library of manuals for various models.

Enter your dryer’s model number into the search bar to locate the specific manual for your appliance. The model number can typically be found on a sticker on the dryer itself. Once you’ve entered the correct model number, you should be able to view the manual directly on the website.

This online access allows you to search for specific topics, zoom in on diagrams, and easily navigate through the different sections of the manual. It’s an eco-friendly and efficient way to get the information you need to maintain and repair your Kenmore 600 Series dryer.

Downloading the PDF Manual

For offline access and easy sharing, downloading the PDF manual for your Kenmore 600 Series dryer is highly recommended. Once you’ve located the manual on the Sears Parts Direct or Kenmore website, look for a download link or a PDF icon. This will allow you to save the manual to your computer, tablet, or smartphone.

Having a PDF version of the manual means you can access it anytime, even without an internet connection. This is especially useful when you’re working on repairs in an area with limited connectivity.
Ensure the downloaded file is the correct manual for your specific model number. Keep the PDF readily available for quick reference during troubleshooting, maintenance, or repairs. This proactive step ensures you always have the information you need at your fingertips.

Using Sears Parts Direct for Manuals

Sears Parts Direct is an invaluable resource for obtaining manuals for your Kenmore 600 Series dryer. This platform offers a comprehensive database of appliance manuals, parts diagrams, and repair information. To find your manual, simply visit the Sears Parts Direct website and enter your dryer’s model number in the search bar.

The site provides access to downloadable PDF manuals, allowing for convenient offline viewing. Additionally, Sears Parts Direct offers exploded views and parts lists, which can be particularly helpful when identifying replacement parts or troubleshooting issues.

By using Sears Parts Direct, you gain access to a wealth of information that can assist you in maintaining and repairing your Kenmore 600 Series dryer effectively. This resource ensures you have the correct manual and parts information specific to your appliance model.

Identifying Your Specific Model

Locating your Kenmore 600 Series dryer’s model number is crucial for accessing the correct manual and parts; This ensures accurate troubleshooting and maintenance, tailored to your appliance’s specifications.

Locating the Model Number

Finding the model number on your Kenmore 600 Series dryer is a simple process. Typically, it’s located on a sticker or plate. Look for it in these common areas: inside the dryer door, around the door frame, or on the back panel of the unit. The model number is an alphanumeric code, such as “110.66132411”.

Once you’ve spotted the sticker, carefully note the entire model number. This detailed identifier is necessary for sourcing the correct owner’s manual, replacement parts, and troubleshooting guides specific to your Kenmore 600 series dryer variant.

Having this information will streamline your repair and maintenance efforts.

Why the Model Number is Important

The model number of your Kenmore 600 Series dryer is crucial for several reasons. Firstly, it allows you to access the correct owner’s manual, providing specific instructions for operation, maintenance, and troubleshooting. Without the right manual, you risk using inappropriate techniques that could damage your appliance or void its warranty.

Secondly, the model number ensures you obtain the correct replacement parts when repairs are needed. Kenmore 600 series dryers come in various configurations, and parts are not universally compatible. Using an incorrect part can lead to further damage or malfunction.

Finally, the model number helps identify applicable safety recalls or service bulletins.

Troubleshooting Common Issues Using the Manual

The Kenmore 600 Series dryer manual is your first stop for troubleshooting. Address issues like the dryer not starting, lack of heat, or timer malfunctions effectively using the manual’s guidance;

Dryer Not Starting

If your Kenmore 600 series dryer refuses to start, the manual offers valuable troubleshooting steps. First, ensure the dryer is properly connected to a functioning power outlet with the correct voltage (220V). Check the circuit breaker or fuse box to rule out any electrical issues that may be preventing the dryer from receiving power.

Next, consult the manual for specific diagnostic procedures related to the start button or switch. The manual may suggest testing the continuity of the start switch or inspecting the door switch to confirm it’s properly engaging. A faulty door switch, a common culprit, prevents the dryer from starting for safety reasons. The manual will provide guidance on how to access and test these components, potentially saving you a service call.

No Heat Issues

A Kenmore 600 series dryer that runs but produces no heat requires a systematic approach to diagnosis, often guided by the dryer’s manual. For electric dryers, the heating element is a primary suspect. The manual will outline how to safely access and test the element for continuity, indicating whether it’s still functional. Also, check the thermal fuse, a safety device that can trip and cut off power to the heating element if the dryer overheats.

For gas dryers, the manual will guide you through inspecting the gas valve, igniter, and flame sensor. A faulty igniter might fail to light the gas, while a malfunctioning flame sensor can shut off the gas supply prematurely. The manual offers detailed instructions on how to identify and troubleshoot these components, ensuring a safe and effective repair process.

Timer Problems

Timer issues in a Kenmore 600 series dryer can manifest as the dryer not advancing through cycles, getting stuck on one setting, or not starting at all. The dryer’s manual is crucial for diagnosing these problems. Start by verifying that the timer knob is properly aligned with the cycle settings. If the timer is not advancing, the motor within the timer assembly may be faulty.

The manual will provide wiring diagrams to help you trace the electrical connections to the timer; A multimeter can be used to test for continuity and voltage at the timer terminals, helping to pinpoint the source of the problem. If the timer motor is confirmed to be defective, the manual will guide you through the replacement process, ensuring you choose the correct replacement part and install it correctly.

Maintenance and Repair Information in the Manual

The Kenmore 600 Series dryer manual provides crucial maintenance and repair information to keep your appliance running smoothly. Learn about belt replacement, heating element checks, drum roller inspections, and more for optimal performance.

Replacing the Dryer Belt

Replacing the dryer belt on your Kenmore 600 Series dryer is a manageable task with the right guidance. The manual offers step-by-step instructions to ensure proper installation. First, disconnect the power supply for safety. Then, access the dryer’s interior by removing the front or rear panel, depending on your model’s design.

Locate the old belt, which is typically wrapped around the drum and motor pulley. Remove the worn belt and carefully install the new one, ensuring it’s correctly positioned around the drum and motor. Refer to the diagrams in the manual for precise placement. Reassemble the dryer, reconnect the power, and test its operation. A properly installed belt will restore optimal drying performance;

Checking the Heating Element

The Kenmore 600 Series dryer manual provides detailed instructions for checking the heating element, a crucial component for effective drying. If your dryer isn’t producing heat, the heating element might be the culprit. Begin by disconnecting the dryer from its power source to ensure safety during the inspection.

Access the heating element, usually located at the back of the dryer, by removing the appropriate panels. Visually inspect the element for any signs of damage, such as breaks or burns. Use a multimeter to test the element’s continuity, following the manual’s guidance for accurate readings. If the element shows no continuity, it needs replacement. Consult the manual for part numbers and replacement procedures to restore proper heating function.

Inspecting the Drum Roller

The Kenmore 600 Series dryer manual offers guidance on inspecting the drum rollers, which are vital for smooth drum rotation. Unusual noises or difficulty turning the drum can indicate worn or damaged rollers. Before starting, disconnect the dryer from its power supply to ensure safety during the inspection process.

Access the drum rollers by opening the dryer cabinet, following the steps outlined in the manual. Visually examine each roller for cracks, flat spots, or excessive wear. Manually rotate the rollers to check for smooth, quiet operation. Replace any rollers that show signs of damage or do not rotate freely. Refer to the manual for specific part numbers and instructions on replacing the drum rollers to maintain optimal dryer performance.

Safety Instructions and Warnings

The Kenmore 600 Series dryer manual prioritizes safety. It provides crucial warnings and instructions to prevent hazards related to gas or electrical components. Adhering to these guidelines ensures safe operation and maintenance.

Gas Dryer Safety Precautions

Operating a gas dryer requires strict adherence to safety precautions. First, ensure proper ventilation to prevent carbon monoxide buildup. Regularly inspect the gas connection for leaks using a soap solution; never use an open flame. If you smell gas, immediately shut off the gas supply, evacuate the area, and contact a qualified technician. Keep the area around the dryer clear of flammable materials.

Never attempt repairs yourself unless you are a trained professional. Ensure the dryer is properly grounded to prevent electrical shock. Always disconnect the power supply before performing any maintenance. Heed all warnings in the Kenmore 600 Series dryer manual to protect yourself and your home.

Electrical Safety Instructions

Adhering to electrical safety instructions is crucial when operating and maintaining your Kenmore 600 Series dryer. Always ensure the dryer is properly grounded to a dedicated circuit to prevent electrical shock. Before any maintenance or repairs, disconnect the power supply. Inspect the power cord regularly for damage and replace if necessary.

Never use an extension cord with the dryer. Avoid operating the dryer in damp or wet environments. If the dryer malfunctions or trips the circuit breaker, immediately discontinue use and consult a qualified electrician. Refer to the Kenmore 600 Series dryer manual for detailed electrical specifications and safety guidelines to ensure safe operation.

Parts Information and Diagrams

This section provides critical parts information and diagrams for your Kenmore 600 Series dryer. Learn how to identify replacement parts accurately and use diagrams to guide your repair process effectively.

Identifying Replacement Parts

To ensure your Kenmore 600 series dryer operates efficiently, accurate identification of replacement parts is crucial. Start by locating your dryer’s model number; this is essential for pinpointing the correct components. Use online resources like Sears Parts Direct to cross-reference your model number with available parts. The manual for your Kenmore dryer often includes detailed parts lists and diagrams.

When ordering, double-check the part number and description to avoid errors. Common replacement parts include dryer belts, heating elements, drum rollers, and idler pulleys. Utilizing the diagrams provided in the manual can greatly assist in visually confirming the part’s appearance and location within the dryer assembly, ensuring you select the right replacement.

Using Diagrams for Repair

The Kenmore 600 Series dryer manual provides invaluable diagrams to aid in repair and maintenance. These diagrams offer a visual representation of the dryer’s internal components, making it easier to understand the assembly and identify specific parts. When troubleshooting issues, refer to the diagrams to locate the faulty component and its relationship to other parts.

Before disassembling anything, carefully study the diagram to understand the sequence of steps involved. Diagrams are particularly helpful when replacing parts like the dryer belt, heating element, or drum rollers. They illustrate how parts fit together, ensuring correct reassembly. Always disconnect the power supply before starting any repair work and use the diagrams as a guide throughout the process for safe and accurate repairs.

Installation Instructions (If Applicable)

This section covers installation, if applicable. Refer to this section for gas and electrical connection guidelines. Proper installation ensures safe and efficient dryer operation according to manufacturer specifications and local regulations.

Gas Connection Instructions

If you have a gas dryer, these instructions are crucial for safe installation. Ensure the dryer is equipped for the type of gas available. The dryer typically comes ready for natural gas with a 3/8 N.P.T. connection. To connect the gas supply, carefully follow the steps in the manual, which may include removing the rear panel and attaching the gas supply pipe.

It is essential to check for leaks using a soap and water solution after making the connection. Never use an open flame to check for leaks. If you are not comfortable working with gas lines, it is recommended to hire a qualified technician to perform the installation.

Electrical Connection Instructions

For electric dryers, proper electrical connection is vital. Always disconnect power before beginning any work. Verify your outlet matches the dryer’s voltage requirements (usually 220V). Refer to the manual for specific wiring diagrams and grounding instructions. Incorrect wiring can lead to fire or electrical shock.

Ensure the power cord is securely connected and the grounding is properly installed. If you’re unsure about any part of the electrical connection, consult a qualified electrician. The manual will provide detailed steps on how to safely connect the dryer to your home’s electrical system, minimizing potential hazards and ensuring safe operation.

Operating Instructions and Features

Learn how to effectively use your Kenmore 600 Series dryer. Understand the various cycle selections, control panel functions, and features for optimal drying performance and garment care. Maximize efficiency with these operating insights.

Cycle Selection Guide

Understanding the cycle selection guide is crucial for efficient and effective drying. The Kenmore 600 Series dryer offers a variety of cycles tailored to different fabric types and load sizes. Selecting the appropriate cycle ensures your clothes are dried properly without damage.
Different cycles utilize varying temperatures and drying times, optimizing the drying process for specific needs. For instance, delicate cycles use lower heat to protect sensitive fabrics, while heavy-duty cycles are designed for bulkier items like towels and bedding.
Familiarize yourself with the guide in your manual to make informed decisions, prolonging the life of your clothes and dryer.

Using the Control Panel

The control panel of your Kenmore 600 Series dryer is your primary interface for operating the appliance. Understanding its functions is essential for optimal performance. Typically, the panel includes buttons or knobs to select drying cycles, adjust temperature settings, and set drying times.
Familiarize yourself with each control to customize drying based on your specific needs. Start by understanding the different cycle options available, such as delicate, normal, and heavy-duty.
Learn how to use the temperature settings to prevent damage to sensitive fabrics. With practice, you’ll confidently navigate the control panel, ensuring consistently perfect drying results and minimizing errors.

tuya smart lock manual pdf

Tuya Smart Lock User Manual⁚ A Comprehensive Guide

This comprehensive guide provides step-by-step instructions on how to install, configure, and use your Tuya Smart Lock․ Learn about the various features, unlock methods, user management options, and troubleshooting tips to ensure a seamless smart home experience․ Whether you’re a tech enthusiast or a first-time user, this manual will equip you with the knowledge needed to maximize your Tuya Smart Lock’s potential․

Introduction

Welcome to the world of smart living with your Tuya Smart Lock! This user manual is designed to guide you through every aspect of your lock, from installation to advanced features․ Tuya Smart Locks offer a secure and convenient way to manage access to your home, office, or any other property․ This manual serves as your ultimate resource for understanding the lock’s functionality, operating procedures, and troubleshooting tips․

With your Tuya Smart Lock, you can enjoy the following benefits⁚

  • Enhanced Security⁚ Multiple unlock methods, including fingerprint scanning, password entry, RFID cards, and mechanical keys, provide comprehensive security․
  • Remote Access⁚ Control your lock from anywhere in the world with the Tuya Smart app, granting access to trusted individuals or monitoring activity․
  • Convenience⁚ Eliminate the need for physical keys and unlock your door with ease using your smartphone, fingerprint, or password․
  • User Management⁚ Create and manage multiple user profiles, granting different levels of access based on individual needs․
  • Activity Tracking⁚ View unlock records and monitor access history for increased security and peace of mind․

This manual is your comprehensive guide to mastering your Tuya Smart Lock․ Let’s begin this journey of smart living together!

Downloading the Tuya Smart App

The Tuya Smart app is the central hub for managing and controlling your Tuya Smart Lock․ It’s a free and user-friendly app available on both Android and iOS devices․ Here’s how to download and install the app⁚

  1. Search for “Tuya Smart” in your app store⁚ Open the Google Play Store (Android) or the App Store (iOS) and search for “Tuya Smart․” You should see the official Tuya Smart app listed in the search results․
  2. Download and install⁚ Click the “Install” button to download and install the app on your device․ The download and installation process will take a few minutes depending on your internet connection and device specifications․
  3. Open the app⁚ Once the installation is complete, open the Tuya Smart app on your device․

The Tuya Smart app provides a comprehensive interface for controlling your lock, managing user access, viewing unlock records, and adjusting settings․ To fully utilize your Tuya Smart Lock’s capabilities, ensure you have the Tuya Smart app installed on your smartphone or tablet․

If you encounter any difficulties during the download or installation process, refer to the app store’s help section for assistance․

Registering and Logging In

After successfully downloading the Tuya Smart app, you’ll need to create an account or log in if you already have one․ This will allow you to connect your smart lock to the app and manage its features․

  1. Registering a New Account⁚
    • Tap the “Sign Up” or “Register” button in the Tuya Smart app․
    • Enter your email address, phone number, and create a strong password․
    • Confirm your account by following the instructions sent to your email or phone․
  2. Logging In with an Existing Account⁚
    • Tap the “Log In” button in the Tuya Smart app․
    • Enter your registered email address or phone number and password․
    • Tap the “Log In” button to access your account․
  3. Forgot Password⁚
    • If you forget your password, tap the “Forgot Password” option on the login screen․
    • Follow the on-screen instructions to reset your password using your registered email or phone number․

After successfully registering or logging in, you’ll be ready to add your Tuya Smart Lock to the app and begin using its features․

Adding the Smart Lock to the App

Once you’ve registered or logged into the Tuya Smart app, you can add your smart lock to your account․ This process allows the app to communicate with your lock and enables you to control its features․ Here’s a step-by-step guide⁚

  1. Open the Tuya Smart App⁚ Launch the Tuya Smart app on your smartphone or tablet․
  2. Navigate to “Add Device”⁚ Tap the “+” icon or “Add Device” option in the app․ This usually appears at the top right corner of the screen․
  3. Select “Security & Video”⁚ Choose the “Security & Video” category, as this is where you’ll find smart locks․
  4. Choose “Lock”⁚ Look for the “Lock” option within the “Security & Video” category․
  5. Follow On-Screen Instructions⁚ The app will provide specific instructions based on your lock’s model․ Typically, this involves⁚
    • Waking Up the Lock⁚ You might need to tap the numeric keypad on your lock to wake it up;
    • Entering Network Information⁚ You may need to enter your Wi-Fi network name and password․
    • Confirming Connection⁚ The app will guide you through confirming the lock’s connection to your Wi-Fi network․

After completing the steps, your Tuya Smart Lock will be added to your app․ You can now access its features and manage your lock’s settings․

Key Features and Functions

Tuya Smart Locks offer a range of features and functions that enhance security, convenience, and peace of mind․ These features empower you to manage access to your home, track activity, and receive real-time notifications․ Here’s a breakdown of some essential capabilities⁚

  • Unlock Methods⁚ Most Tuya Smart Locks provide multiple unlock methods, including fingerprint recognition, password entry, RFID card access, and a mechanical key․ This flexibility caters to different user preferences and security needs․
  • Remote Control⁚ Through the Tuya Smart app, you can unlock or lock your door remotely from anywhere with an internet connection․ This feature provides peace of mind, allowing you to grant access to family members or service providers even when you’re away․
  • Access Control⁚ Tuya Smart Locks offer granular access control․ You can create and manage multiple user profiles with specific permissions, such as granting temporary access to guests or restricting certain individuals from entering specific areas․
  • Activity Tracking⁚ The Tuya Smart app typically records unlocking activity, providing you with a detailed log of when and how your door was unlocked․ This information can be helpful for security purposes and for understanding how your lock is being used․
  • Notifications⁚ Tuya Smart Locks often send notifications to your smartphone when the lock is activated or deactivated․ These notifications can alert you to attempted break-ins or provide reassurance that your door is secure․
  • Voice Control⁚ Some Tuya Smart Locks are compatible with voice assistants like Amazon Alexa or Google Assistant, allowing you to control your lock with simple voice commands;

The specific features available may vary depending on the model of Tuya Smart Lock you have․ Consult the user manual for your specific lock to explore all its capabilities․

5․1․ Unlock Methods

Tuya Smart Locks offer a variety of unlock methods, catering to different user preferences and security needs․ These methods provide flexibility and convenience, ensuring that you always have a way to access your home․ Here’s a detailed look at the common unlock methods⁚

  • Fingerprint Recognition⁚ Many Tuya Smart Locks incorporate fingerprint scanners that allow you to unlock your door using your unique fingerprint․ This method offers a secure and convenient way to access your home, eliminating the need for keys or passwords․
  • Password Entry⁚ Traditional password entry remains a popular unlock method for Tuya Smart Locks․ You can set a personalized PIN code that you can enter on the lock’s keypad to unlock the door․ For enhanced security, you can set temporary passwords with limited validity, providing access to guests or service providers without compromising your permanent PIN․
  • RFID Card Access⁚ Some Tuya Smart Locks support RFID (Radio-Frequency Identification) cards․ These cards contain a unique identifier that can be programmed into the lock, allowing authorized users to unlock the door simply by tapping the card against the lock’s reader․ This method is particularly convenient for granting access to family members, employees, or visitors․
  • Mechanical Key⁚ While Tuya Smart Locks primarily rely on digital unlocking methods, they often retain a mechanical key as a backup option․ This ensures that you can still access your home in case of battery failure, app malfunctions, or other unforeseen circumstances․

The specific unlock methods available may vary depending on the model of Tuya Smart Lock you have․ Consult the user manual for your specific lock to explore all its unlocking capabilities․

5․2․ User Management

Tuya Smart Locks empower you to manage access to your home with ease and precision․ The User Management feature allows you to add, modify, or delete users and their associated access privileges․ This grants you granular control over who can enter your home and when․ Here’s a breakdown of the key user management capabilities⁚

  • Adding Users⁚ You can easily add new users to your Tuya Smart Lock through the app․ Simply follow the on-screen prompts and input the user’s information, including their name, contact details, and desired access method․ You can choose to assign them a specific password, fingerprint, or RFID card․
  • Modifying Access Levels⁚ The User Management feature enables you to customize user access levels․ For instance, you can create different user groups with varying permissions․ For example, you might create a “Family” group with full access to the lock at all times, while a “Guest” group might have restricted access during specific hours․
  • Setting Time Limits⁚ Enhance security by setting time limits for user access․ You can specify the days and hours during which a user can unlock the door․ This is particularly helpful for temporary guests or service providers who need access for a limited duration․
  • Deleting Users⁚ If you need to remove a user from your lock’s access list, you can do so easily through the app․ Simply locate the user’s profile and tap the “Delete” option․ This ensures that the user can no longer access your home․

The User Management feature provides a robust way to manage access to your home, ensuring peace of mind and control over who enters your space․ The intuitive app interface makes it easy to add, modify, and delete users, streamlining the process and giving you the power to tailor access rights to suit your specific needs․

5․3․ App Settings

The App Settings section within the Tuya Smart app offers a comprehensive suite of customization options to tailor your smart lock’s behavior and enhance your user experience․ From adjusting notification preferences to modifying the lock’s security settings, this section empowers you to fine-tune your smart lock to perfectly match your individual needs․ Here’s a closer look at some of the key settings you can adjust⁚

  • Notification Settings⁚ Configure notification alerts to stay informed about lock activity․ You can choose to receive notifications for events such as successful unlocks, failed attempts, and low battery warnings․ The app allows you to customize the frequency and type of notifications you receive, ensuring you’re only alerted about events that are relevant to you․
  • Lock Settings⁚ Modify the lock’s operational settings to suit your preferences․ For example, you can adjust the automatic locking delay, which determines how long the lock remains unlocked after a successful unlock attempt․ This setting can be customized based on your individual security needs and lifestyle․
  • Security Settings⁚ Enhance your lock’s security by adjusting the security settings․ You can enable or disable features such as the anti-theft alarm, which triggers an alarm if the lock is tampered with or forcibly opened․ You can also set a time limit for entering a password, preventing unauthorized access through brute-force attempts․
  • Password Settings⁚ Manage your lock’s passwords through the App Settings․ You can create, modify, and delete passwords, ensuring that only authorized individuals have access․ You can also set password complexity requirements, ensuring that your passwords are strong and secure․
  • Fingerprint Management⁚ If your lock supports fingerprint unlocking, you can add, delete, and manage fingerprints through the App Settings․ You can also set the sensitivity level for fingerprint recognition, ensuring that your lock accurately identifies authorized users․

The App Settings section offers a powerful and user-friendly way to customize your Tuya Smart Lock to perfectly match your individual needs and preferences․ The ability to adjust notification preferences, modify lock settings, enhance security, and manage passwords ensures that your smart lock is always operating optimally, providing you with the peace of mind and control you deserve;

Troubleshooting and Support

While Tuya Smart Locks are designed for reliability and ease of use, occasionally you may encounter issues that require troubleshooting․ This section provides a guide to common problems and their solutions, along with information on how to access support resources if needed․ Let’s explore some common troubleshooting scenarios and how to address them⁚

  • Lock Won’t Unlock⁚ If your lock fails to unlock, first check the battery level․ Ensure the batteries are fresh and properly installed․ Next, try unlocking using alternative methods, such as your PIN code, RFID card, or mechanical key․ If these methods fail, try restarting the lock by removing and reinserting the batteries․ If the issue persists, contact Tuya customer support for further assistance․
  • App Connection Issues⁚ If you experience difficulties connecting your lock to the Tuya Smart app, ensure your smartphone’s Bluetooth and Wi-Fi are enabled․ Check if your internet connection is stable and that you’re within range of the lock’s Bluetooth signal․ If the issue persists, try reinstalling the app or restarting your smartphone․ If these steps don’t resolve the problem, contact Tuya customer support for assistance․
  • Fingerprint Recognition Problems⁚ If your lock struggles to recognize your fingerprints, ensure your fingers are clean and dry․ Try registering your fingerprints again, ensuring you follow the instructions carefully․ If the issue persists, contact Tuya customer support for guidance․
  • Alarm Activation⁚ If your lock’s alarm activates unexpectedly, check the alarm settings in the Tuya Smart app․ Ensure the alarm is only activated when you intend it to be․ If the alarm activates frequently without reason, contact Tuya customer support for troubleshooting assistance․

For comprehensive troubleshooting guidance and support, you can refer to the Tuya Smart app’s in-app help section or visit the Tuya Smart website․ You can also reach out to Tuya customer support via email, phone, or online chat for personalized assistance․ Tuya’s dedicated support team is available to assist you in resolving any issues you encounter, ensuring a seamless and trouble-free experience with your smart lock․